Στο νέο online παιχνίδι καζίνο του Nine Casino, εμπνευσμένο από τον κόσμο της κατασκευής στένσιλ, οι παίκτες μπορούν να δημιουργήσουν τα δικά τους μοναδικά μοτίβα για να ξεκλειδώσουν ειδικά επίπεδα παιχνιδιού. Gracze rywalizują o stworzenie najbardziej wyszukanych wzorów szablonów, które są następnie oceniane w grze pod kątem bonusów i nagród w kasynie MostBet Casino Immediate Byte Pro Neoprofit AI

This post is coming to you from Tami M., contributing blogger, mom to a second grader, and all around great gal!

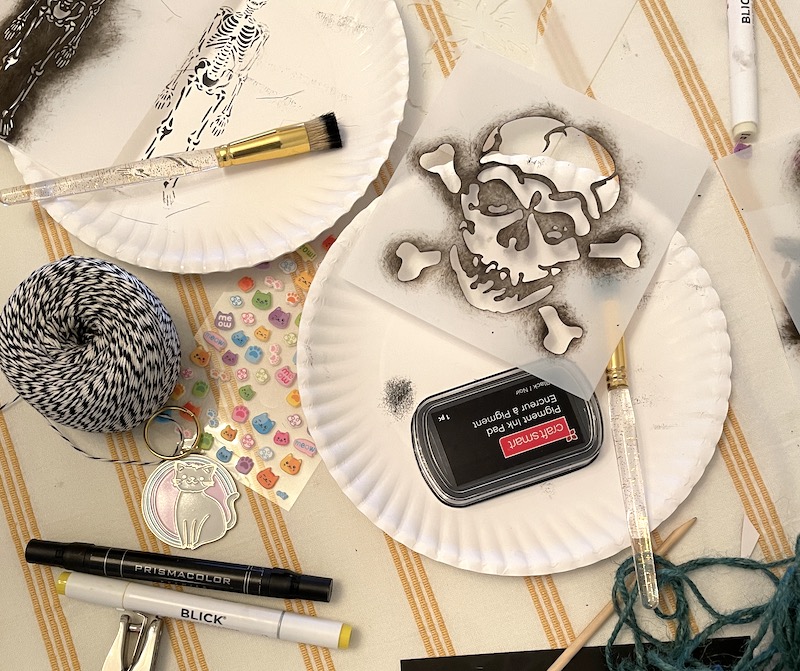
If you’ve been shopping lately, you’ve learned that Halloween is NOW. In our home this holiday of ghouls, ghosts and monsters is bigger than Christmas. Our late-summer days have been filled with crafting decorations for what my seven-year-old daughter describes as “the greatest night of the year.” As we transition into the school season, a stenciled Monster Garland is an easy, mess-free after-school activity that uses tools and supplies you’ll probably have on hand. We’re using this garland as the centerpiece of our Halloween fireplace-scape but it can easily be used just about anywhere in the home. This is a work in progress—pumpkins and other fall festiveness to come.
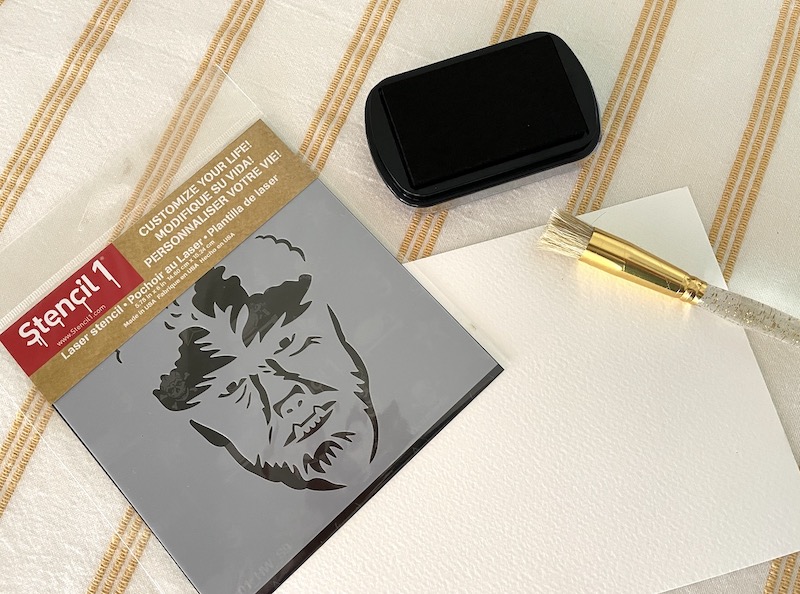
For your Halloween Monster garland, you will need:

-Multiple 5.75″ x6″ monster stencils. We chose an owl, a skull and crossbones, an evil jack-o’-lantern, Frankenstein, a raven, a skeleton and Dracula.

-Paper (we used sheets from an Artist’s Loft Watercolor Pad)

-An ink pad

-Round paintbrush

-Painter’s tape

-Hole puncher

-Baker’s twine
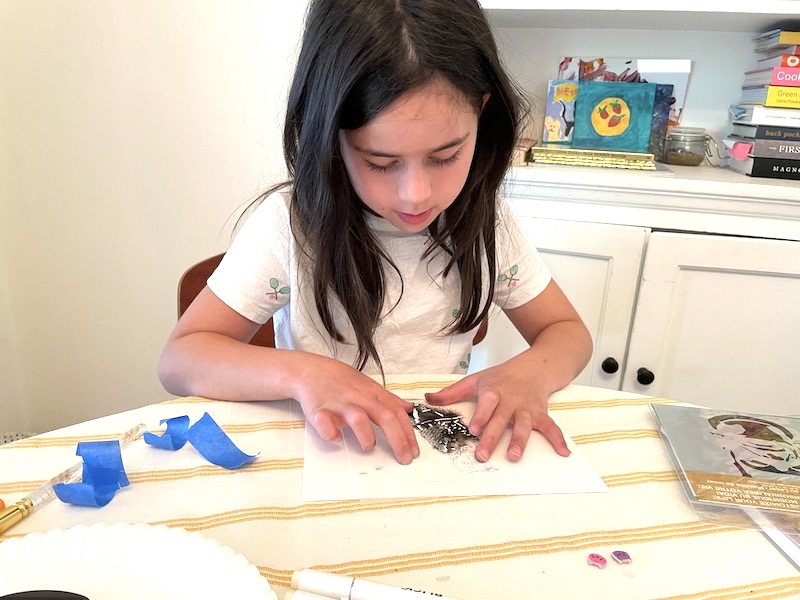
Step 1: Start by selecting your stencil design and figure out placement on the paper. Be sure to tape the stencil to the paper so that it doesn’t move while painting. Painter’s tape is a must so that it doesn’t damage the paper when peeling off.
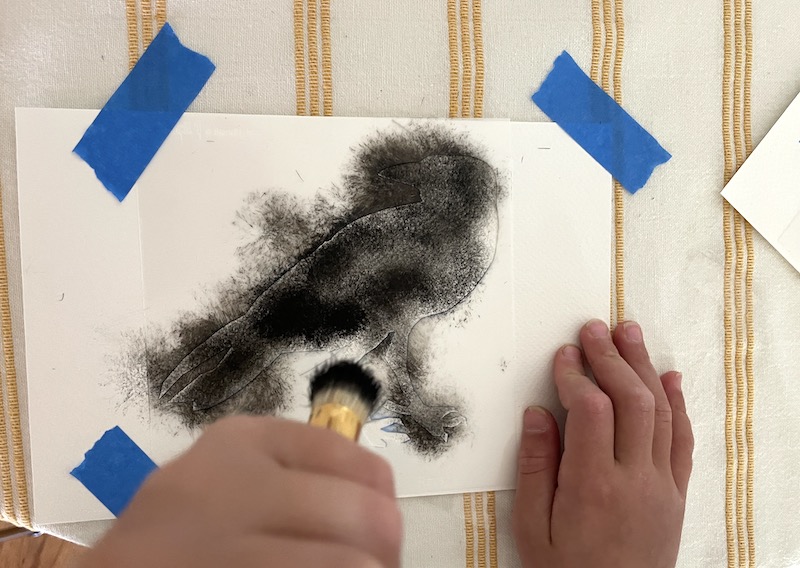
Step 2: Once you are ready to paint, dab the ink onto the brush and then dab dab dab onto your stencil. The ink pad is very forgiving and won’t bleed under the stencil but never say never so do a few test runs to find out the ideal amount of ink that you’ll want for your design.
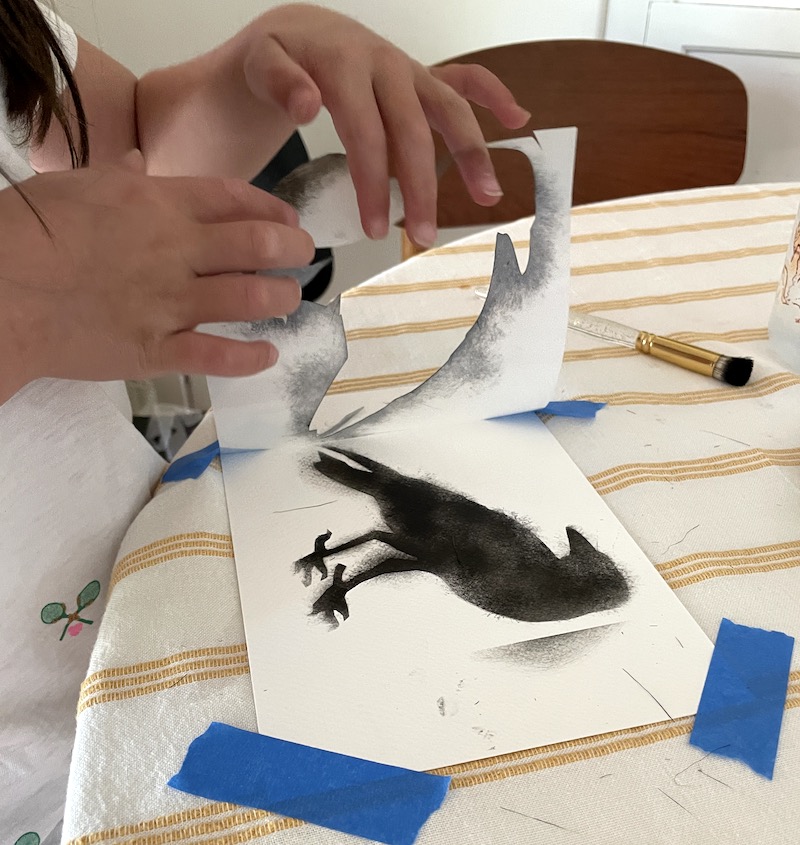
Step 3: When finished, remove stencil and let dry. *Remember, this craft is not about perfection. It’s an activity that is both structured and open-ended so let the kids explore with designs and color. We stuck with a black and white theme because those are the supplies we had in the craft cupboard.
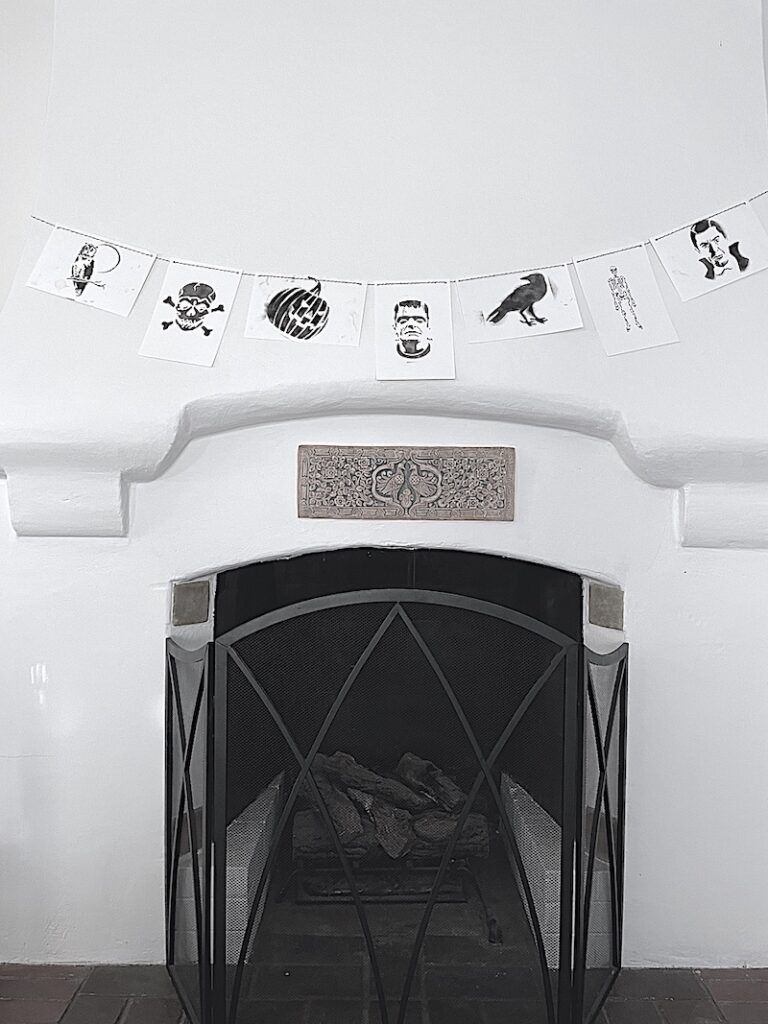
Step 4: String your monsters together to assemble the garland. Add pumpkins and pots of mums to embellish.

Please share what you made by using #stencil1 and tagging @stencil1 on social media.


stenciled backpack

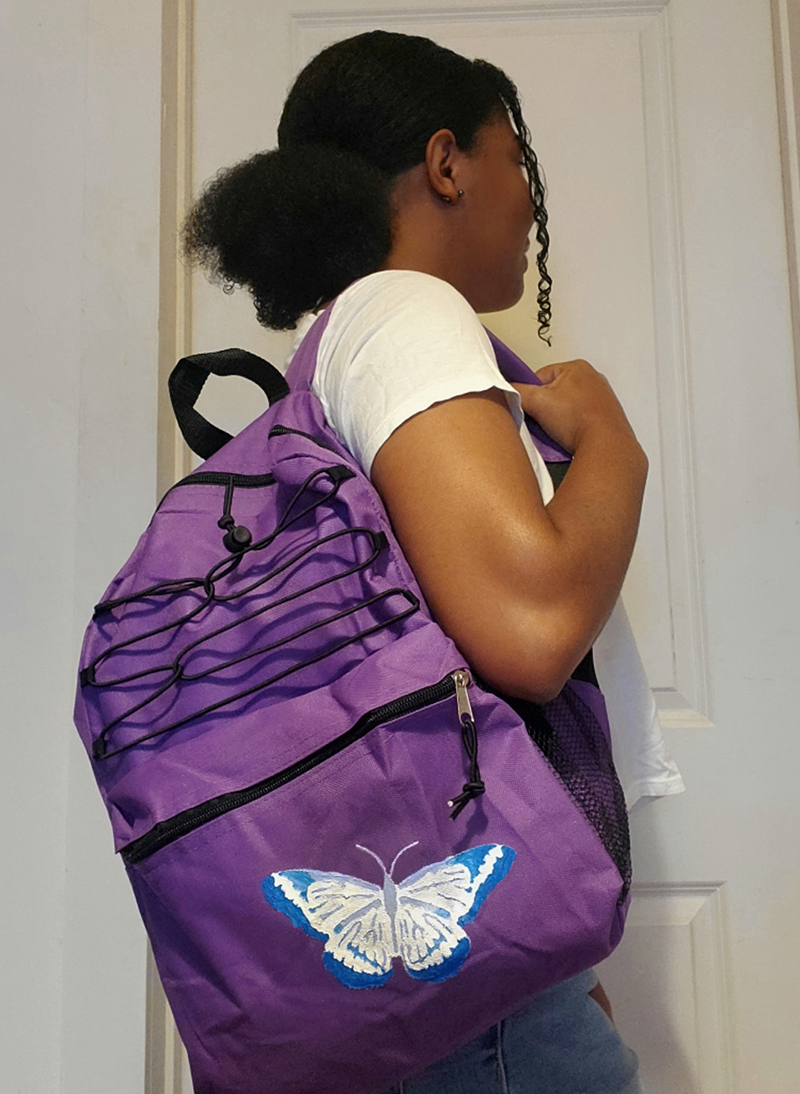
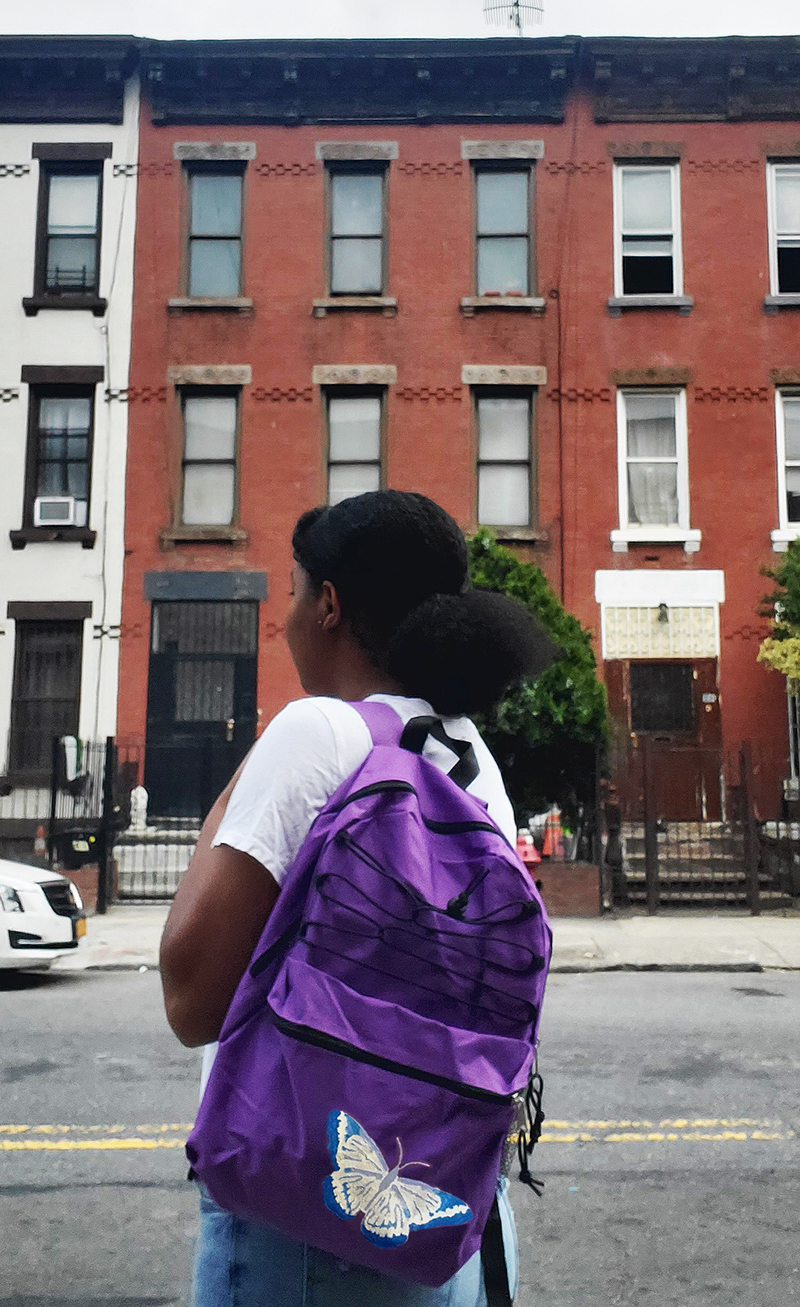
Looking for activities to get the kids excited for the school year? This ombre butterfly backpack is a fun craft for kids of all ages! Having a customized backpack will distinguish your backpack from the rest of the kids in school, you will always know it’s yours! Guest Blogger Jaylin created this project for us and she’s 16 and getting ready for school herself!

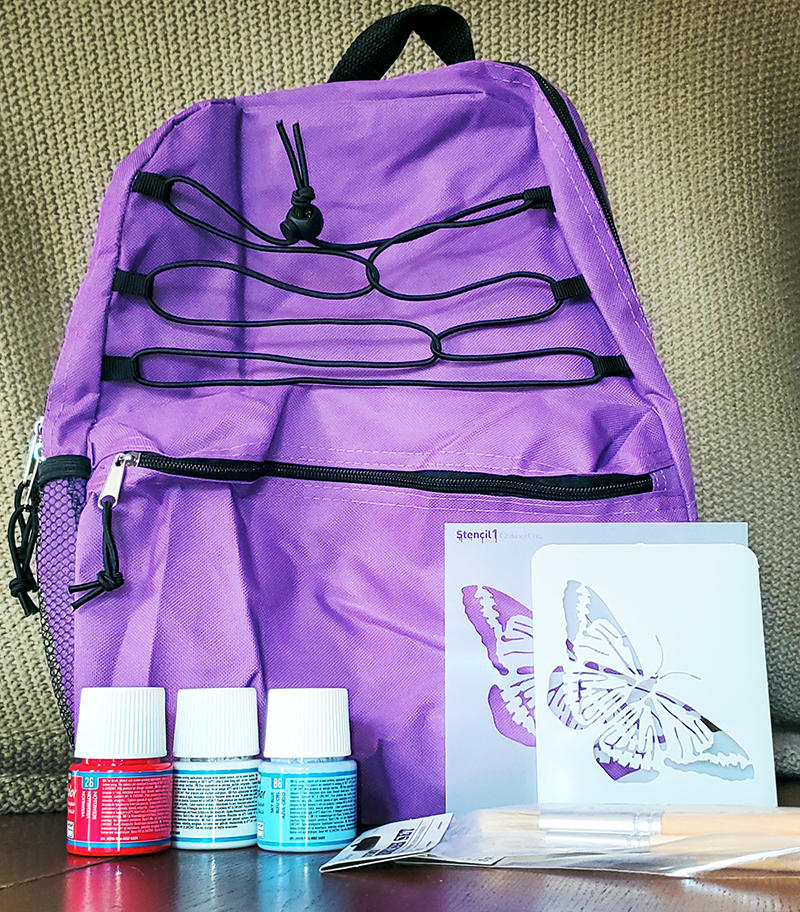
For this project you will need:

-Stencil1’s 5.75×6 butterfly stencil (This can also be done with Stencil1’s butterfly two-layer stencil)

Fabric paint (we used 3 colors, but you can use up to 4)

-Paint brushes 

-Spray adhesive 

-A backpack

stenciled backpack

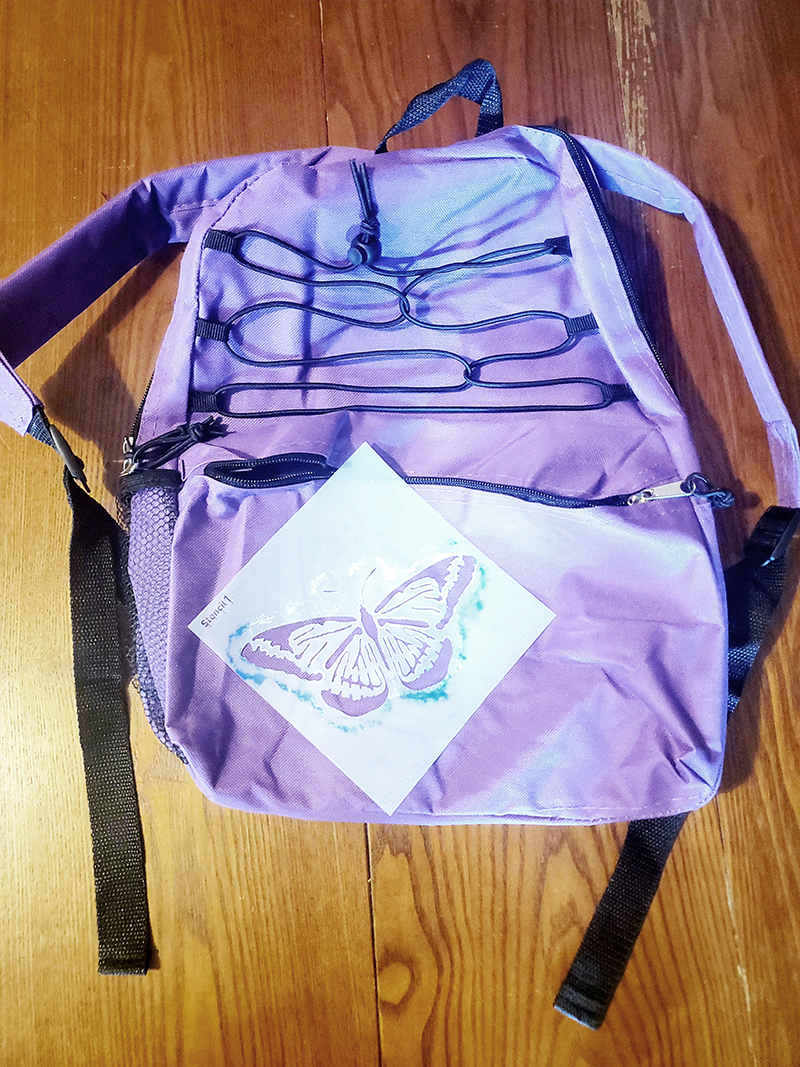
Step 1: Start with a clean Backpack. Planning placement is a great way to start your stenciling project. Place some firm cardboard in the backpack to give your stencil support. Apply spray adhesive to the back of the stencil, the carefully place stencil on the backpack. Be sure that the stencil is secure to the backpack and is not lifting in any areas, this will keep the paint from getting under the stencil.
stenciled backpack

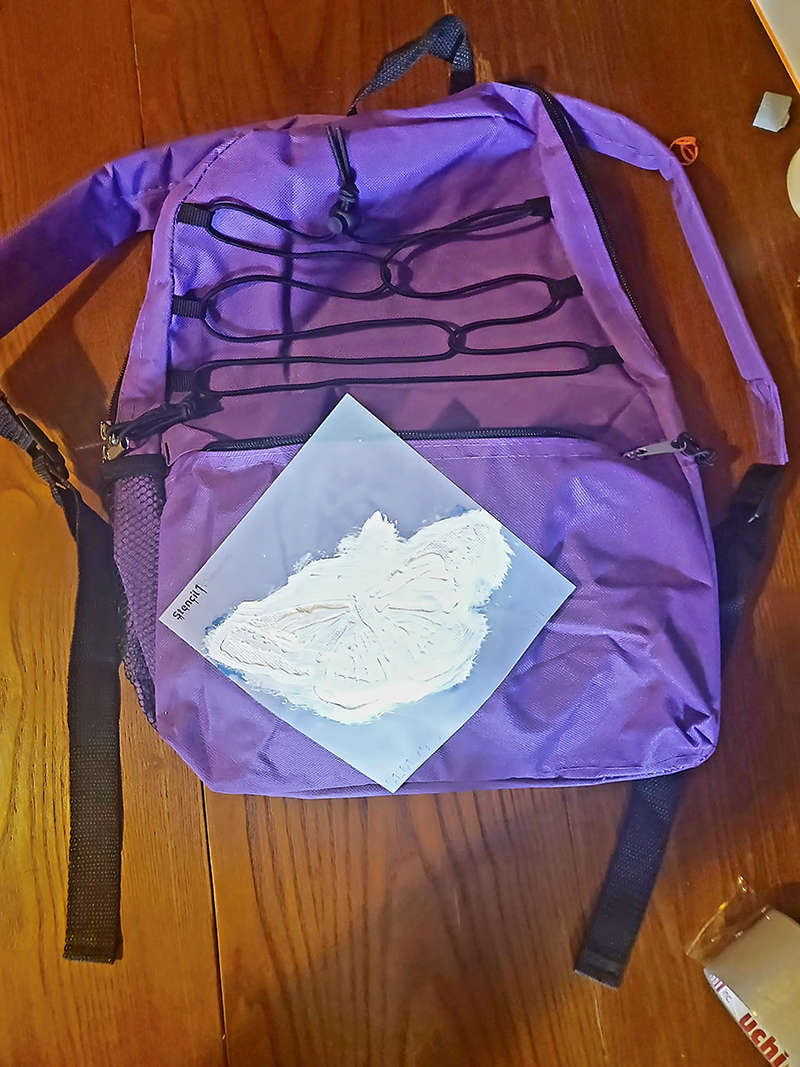
Step 2: Apply a coat of your base color, we used white. It’s ok if some of the paint gets under the stencil. This happened so we decided to fill in the entire butterfly shape with white paint, a silhouette shape. Lift the stencil while the paint is still wet and fill in the butterfly’s silhouette. Let dry or dry with hair drier.

stenciled backpack

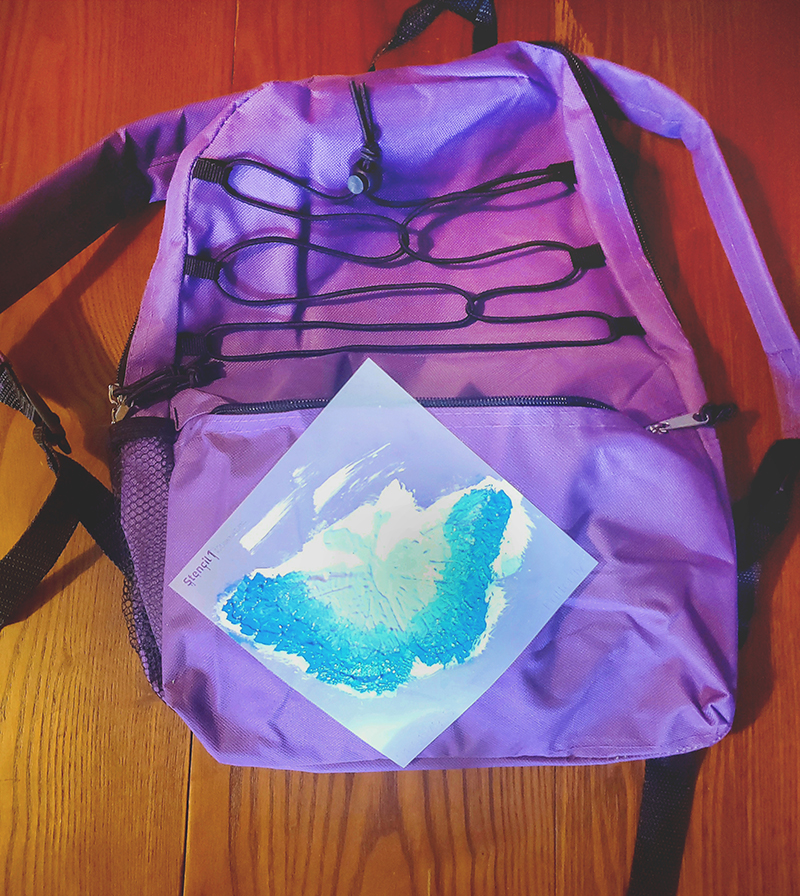
Step 2: Begin painting your second coat of paint, we used light blue – It took one coat of paint to achieve full coverage.

Step 3: Before the second coat of paint is completely dry, use your third paint color to paint the edges of the butterflies wings, we used a darker blue. Don’t be scared to blend some of the third color into the previous coat of paint. This will create a softer transition between the colors.

stenciled backpack

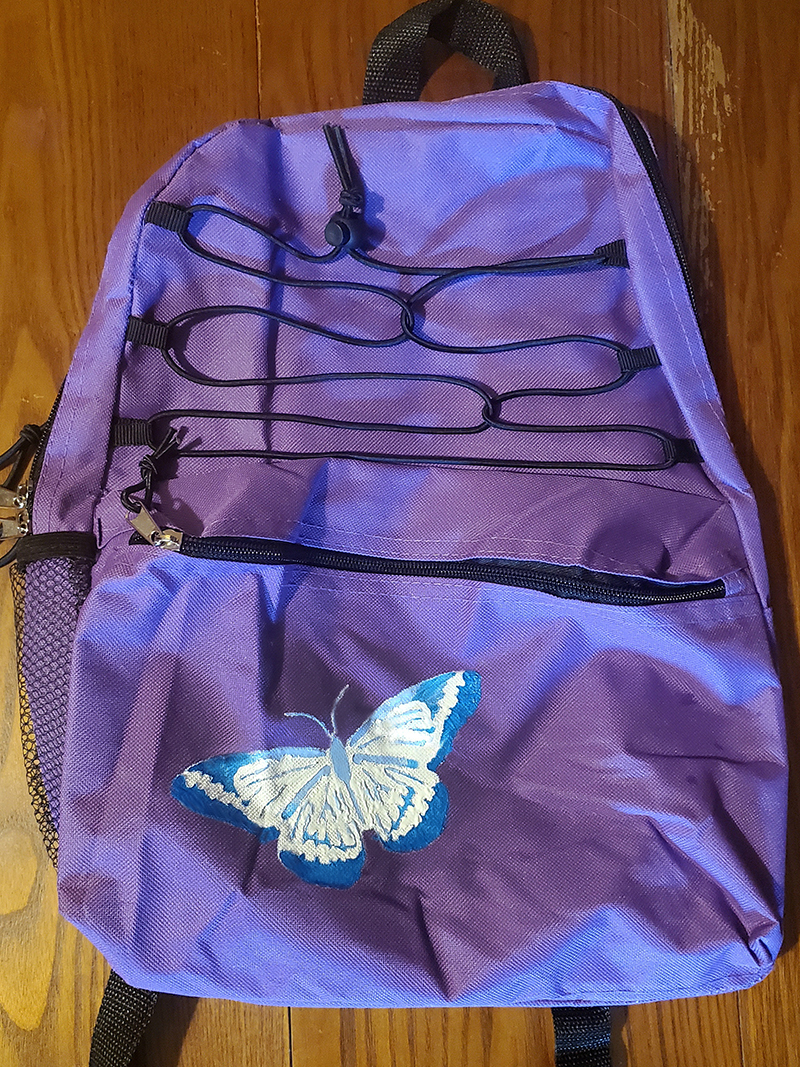
Step 4: When the paint is completely dry you can carefully remove the stencil to reveal the image.

stenciled backpack

If you are headed back to school, make your old backpack new again with Stencil1 stencils or make your new backpack one-of-a-kind and all yours with your favorite stencil designs! Show us your stenciled creations by using #stencil1 and @stencil1 !


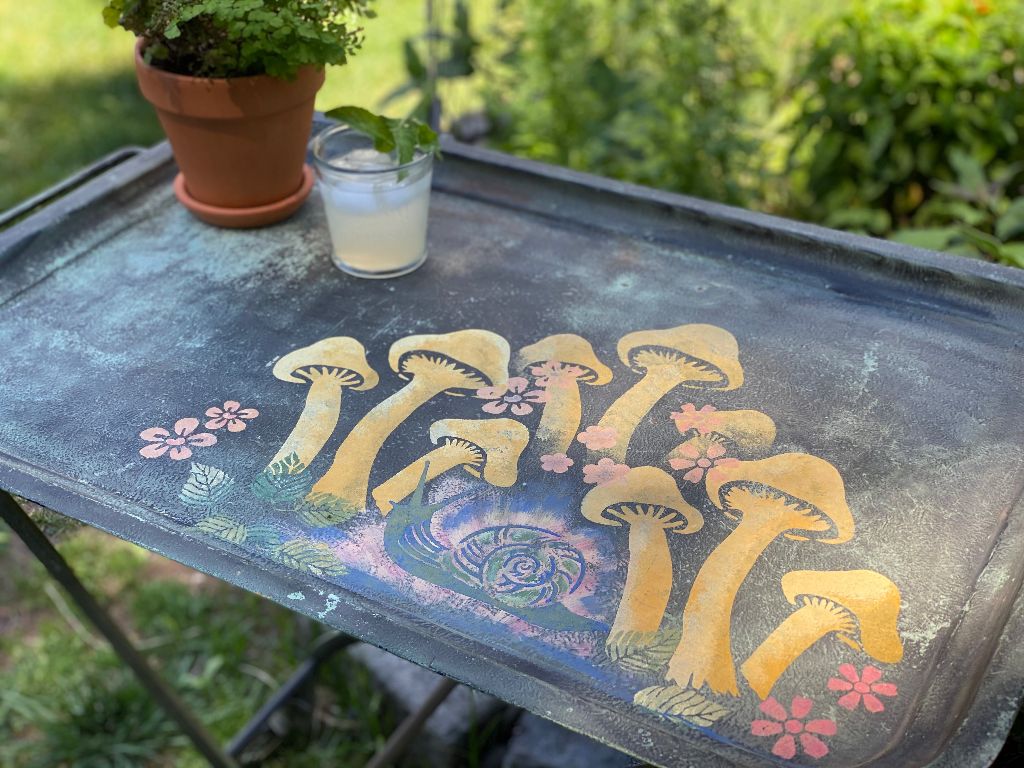
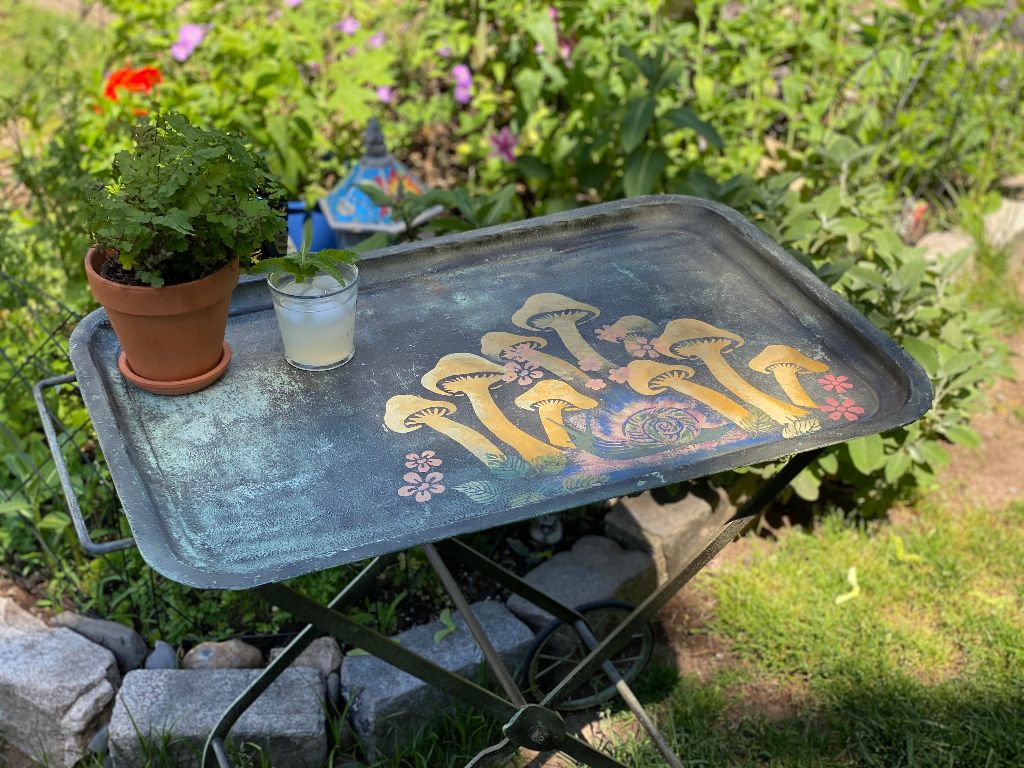
Here’s a DIY post that’s perfect for upcycling an old piece of furniture and giving it new life!This metal garden cart was actually someone’s trash and I decided to make it my treasure!Here’s how I stenciled the cart.

Materials you will need:

Metal cart
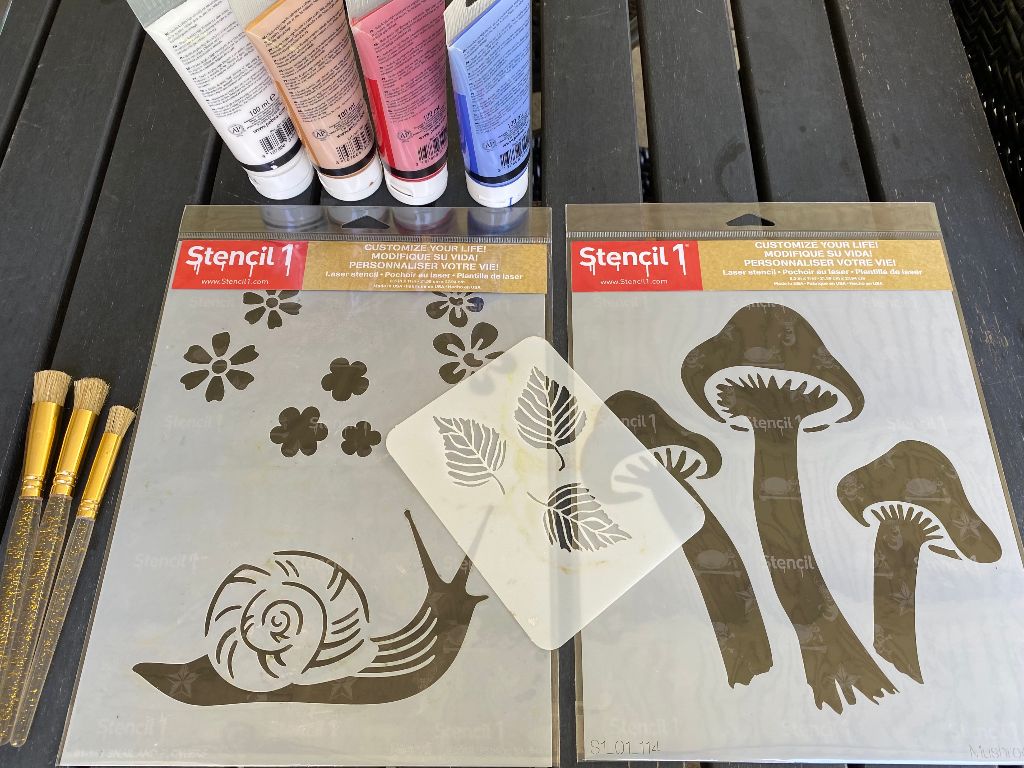
Assorted acrylic paints
Assorted stencil brushes
Mushroom stencil (8.5×11)
Spring stencil 4 pack
Snail and flowers stencil (8.5×11)
Matte clear coat spray

A group of garden themed stencils

Color mixing and process

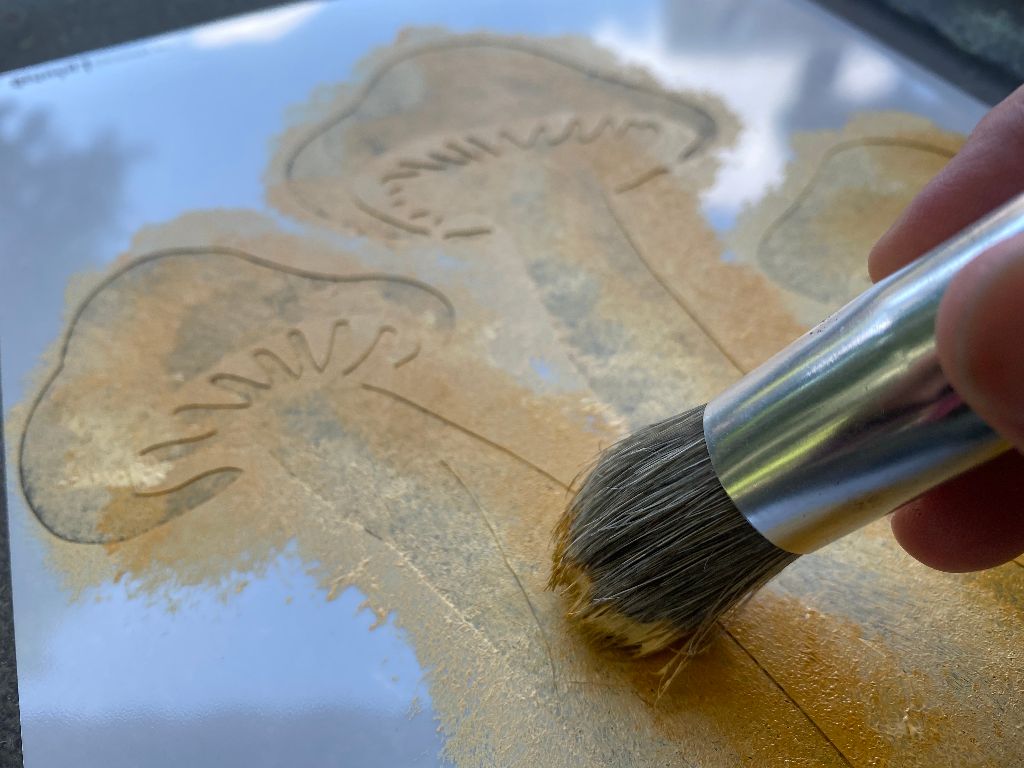
The process was really fun and easy. I wanted to keep the colors somewhat consistent with what you might find in nature. I mixed a golden yellow for the mushrooms and a lighter, brighter yellow to highlight them.

Painting a mushroom stencil

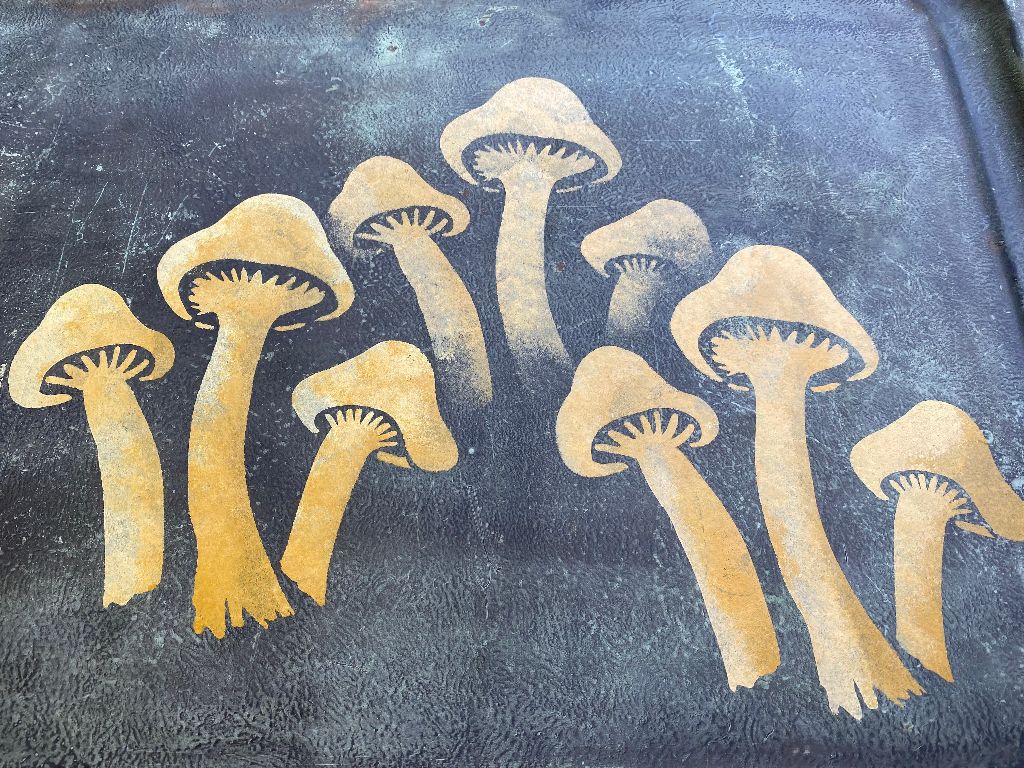
I chose to use the stencil three times at varying heights to create depth.

Mushrooms stenciled on a garden cart

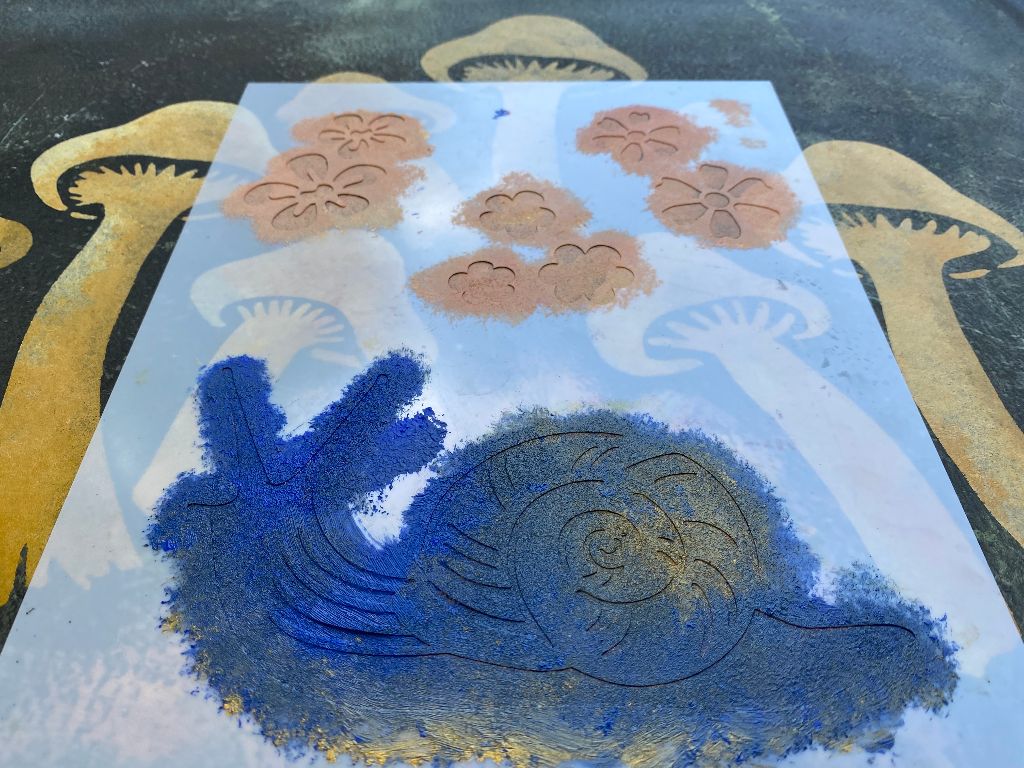
Then I mixed a bright blue for the snails first coat because the green I wanted to use would get lost against the green background without it. Then I went over that with the green, leaving some blue peeking through in spots to lift the snail off the background. I decided on a soft pink, with hints on orange and red for the flowers and used the green from the snail and a lighter yellow for highlights on the leaves.

Painting a snail stencil

I added metallic gold to everything I mixed up. After everything dried, I did two quick coats using a rust-proof, matte clear coat spray.

A garden cartwith stenciled designs

I loved doing this project, not only were the stencils adorable and fun but they also were easy to use on this surface. I love making something beautiful for my garden that I can use while spending time outside with friends.

Happy Crafting!
~ Teri @tjaneiro2 on Instagram


Do you create Home Decor Updates with Stencil1?
Please share with us on social @Stencil1 and #stencil1 


We feel so proud, here at Stencil1 every time someone shows us what they made!
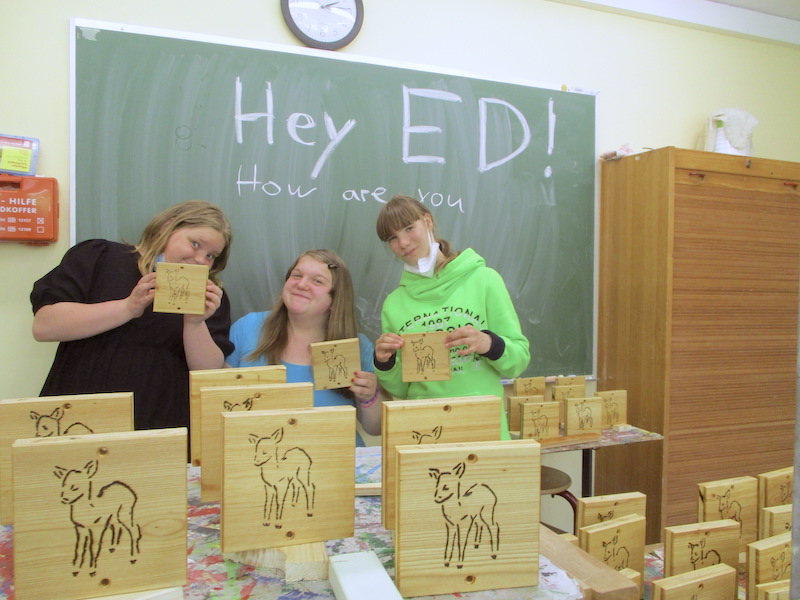
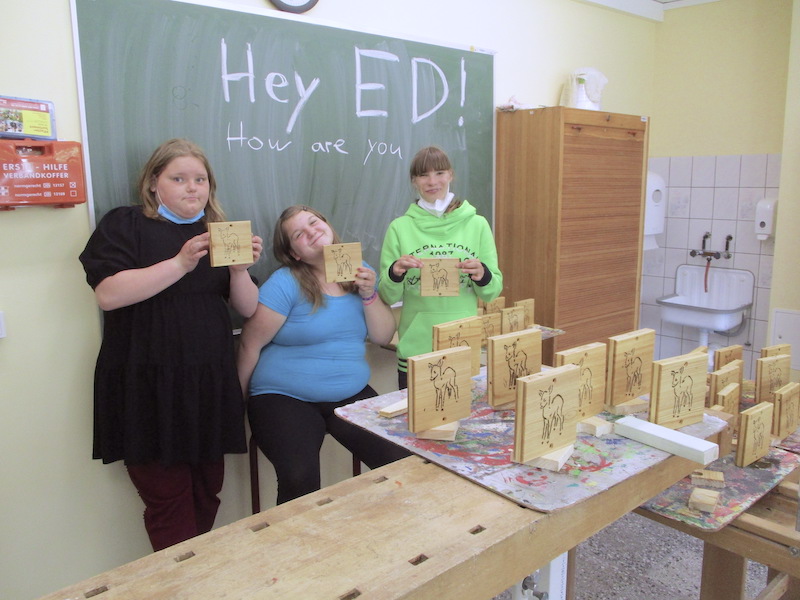
Check out this exciting project – Our customers created wood burning stenciled signs for a forest path in Eberswalde, Germany only 65 km south of Berlin! A small school with 90 pupils wanted to help out the local park ranger create signs for the various paths within the woods. They used our Baby Deer Stencil to create wood burning signs! They will keep us updated a long this project.

Check Them Out! These Students Smiles’ Say Everything!

Do you have some Stencil1 creations you’d like to share with us?
Please share with us on social @Stencil1 and #stencil1 


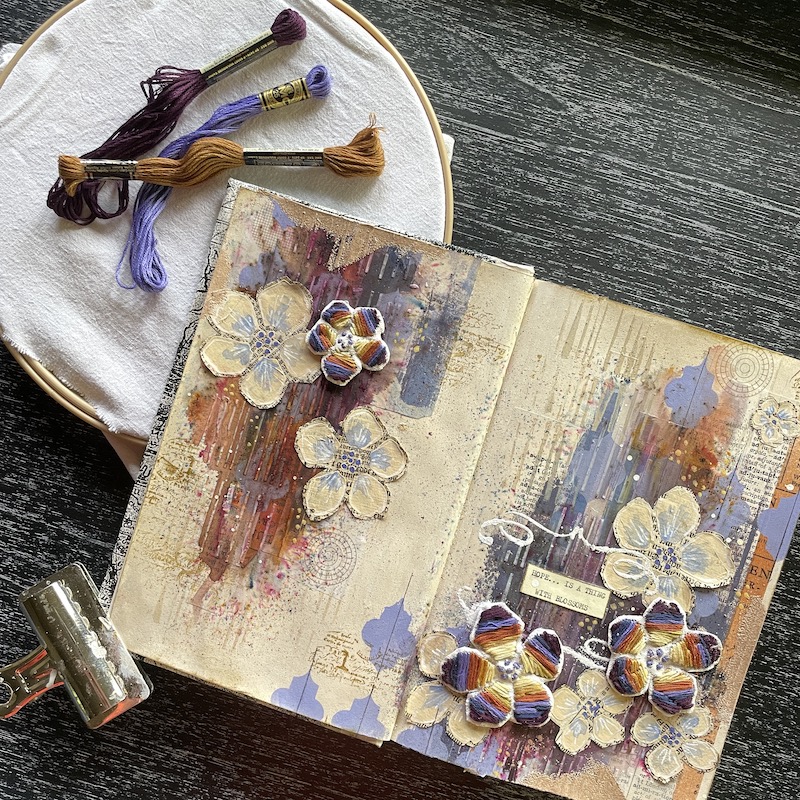
Beginner Art Journaling in an altered book using Stencils two different ways.

Materials Needed:

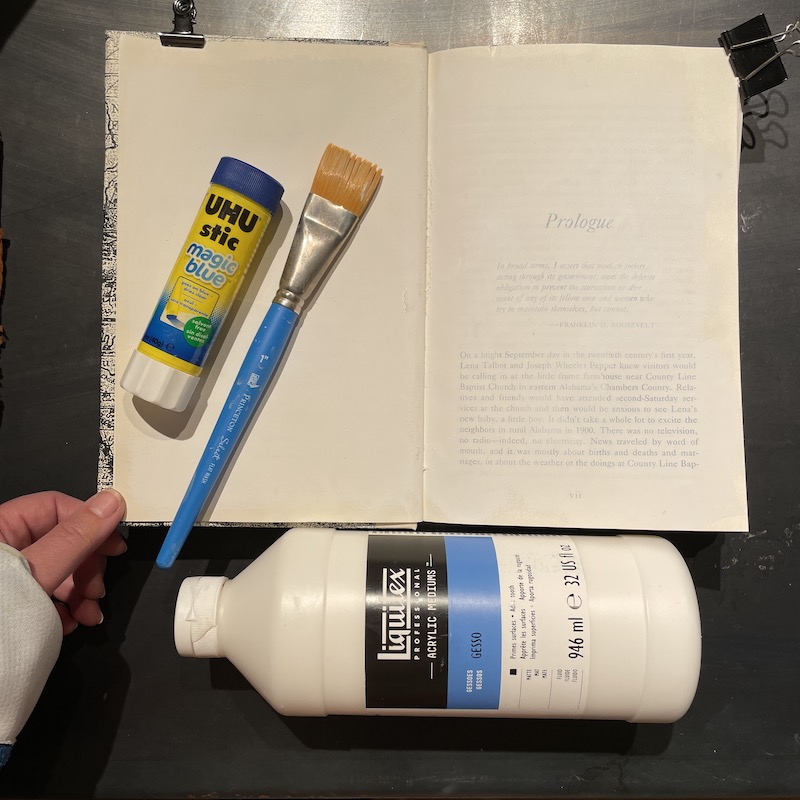
Any hardback book or novel
Glue stick
Clear and White Gesso
Flourish Borders Stencil 8-pack
Thatched Texture Stencil
2 Quatrefoil Stencil Small
Blossoms Stencil
Color Infusions or Magicals 
 (You could substitute watercolors)
Painted Papers or Collage Paper
Acrylic Paint in San, Chalk, Periwinkle 
Washi Tape
Molding Paste
Water in a Spray Bottle
Chalk Paste in Sand
Watercolors
White Cotton fabric 
Embroidery Floss
Embossing Powder

Step 1: Prepare your Book
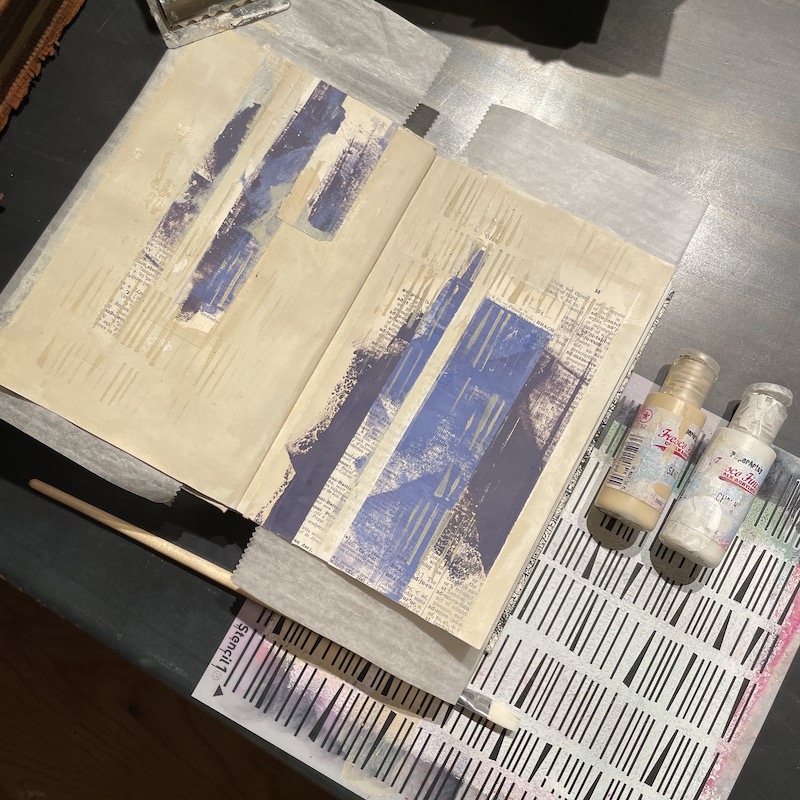
You can work in an art journal but recycling an old hardback book or novel laying around is a fun way to start journaling with little investment. I usually glue the left page to the page behind with a glue stick and do the same thing to the right page to reinforce the pages depending on the paper thickness. Next coat both pages in a layer of white gesso, A lighter coat see your text shows through, or do a couple of coats to cover completely. (It’s a good idea to tear out three or four pages between every journal entry to allow for thick layers that get built and then discarded pages can be used as collage elements

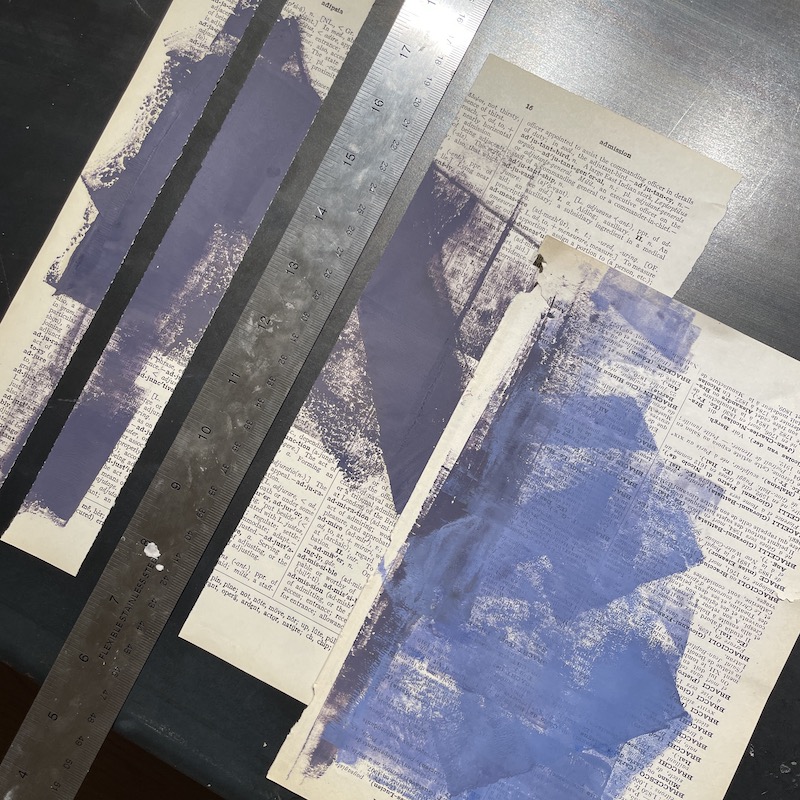
Use a couple painted papers, magazine pages or collage papers that you have laying around and tear into different width strips.

Step 2: Develop a Background
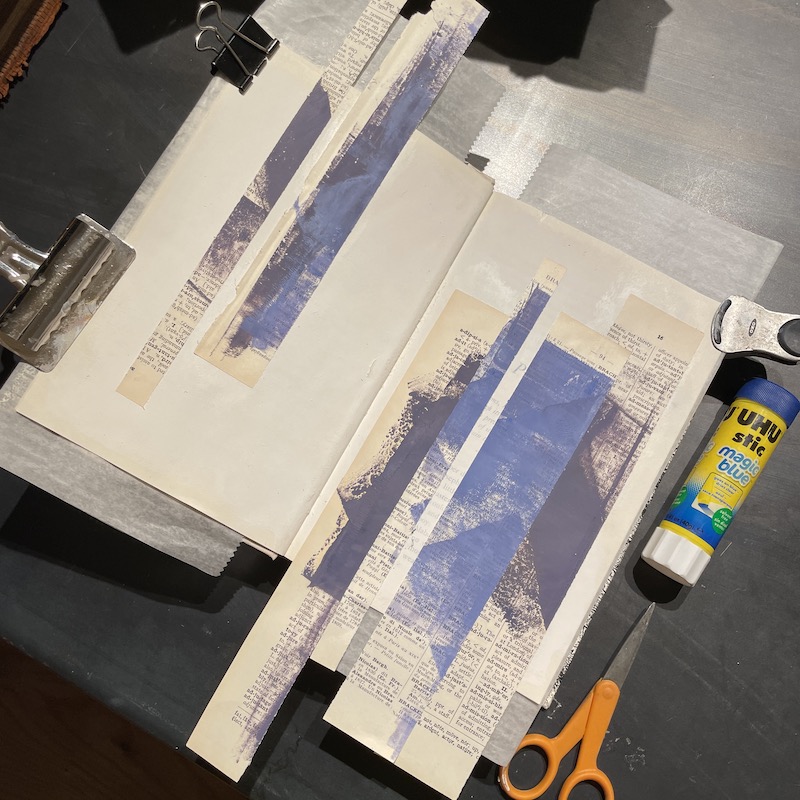
Using the glue stick, adhere your paper strips in a pleasing pattern onto your pages.
Choose one or two acrylic paints, (I chose a sand color lightened with white that blended in with the back of my dictionary page strips) Paint over the white gessoed blank background and blend in scrap paper strips.

Place the Thatched Texture Stencil over your painted papers and sponge sand-colored acrylic paint pounced through the pattern. (I love this stencil as it can be used vertically, horizontally, or on an angle for completely different effects and also stacked over top of itself to make a hatched pattern ;). This technique helps harmonize your collage paper strips with the background.

Step 3: Add Washi Tape and more Stenciling
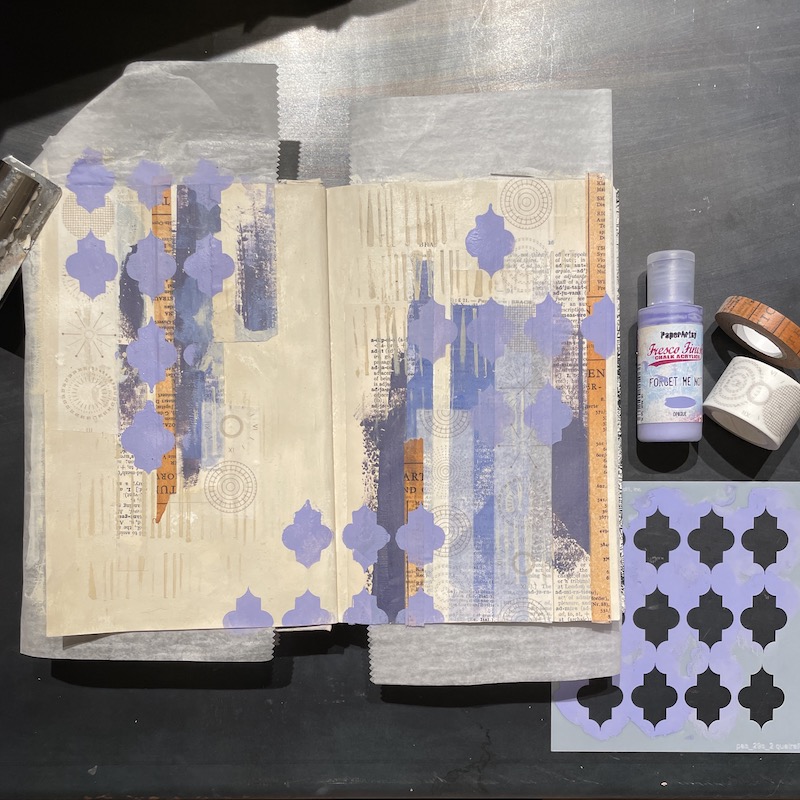
Choose a few different Washi Tapes, masking tape can be substituted here. I always use a coat of clear gesso over the washi tape to let future mediums adhere better. Place the Quatrefoil 2 Stencil over the washi and pounce periwinkle paint through the stencil onto both pages.

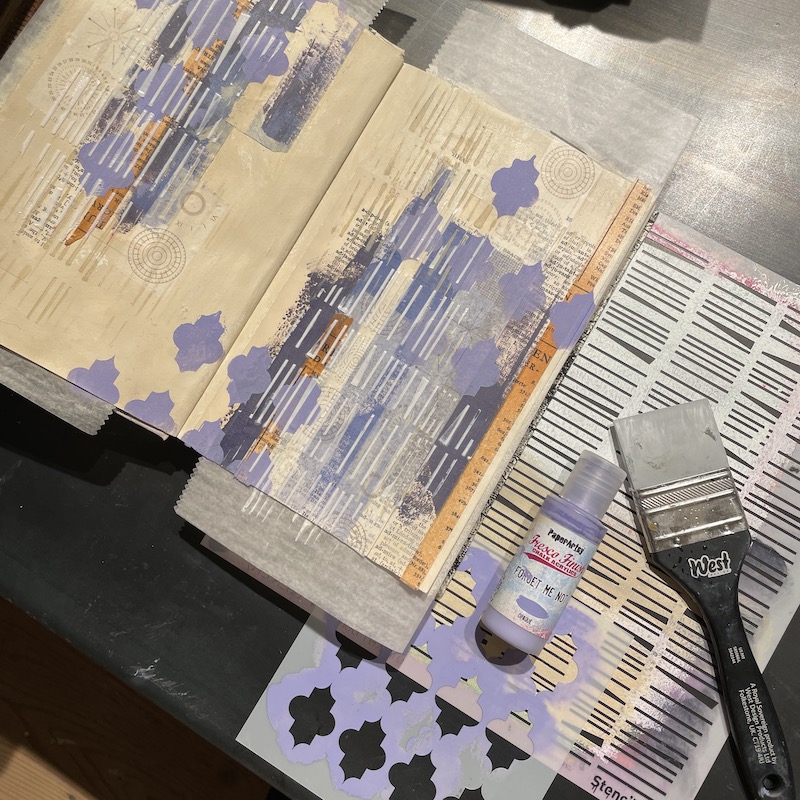
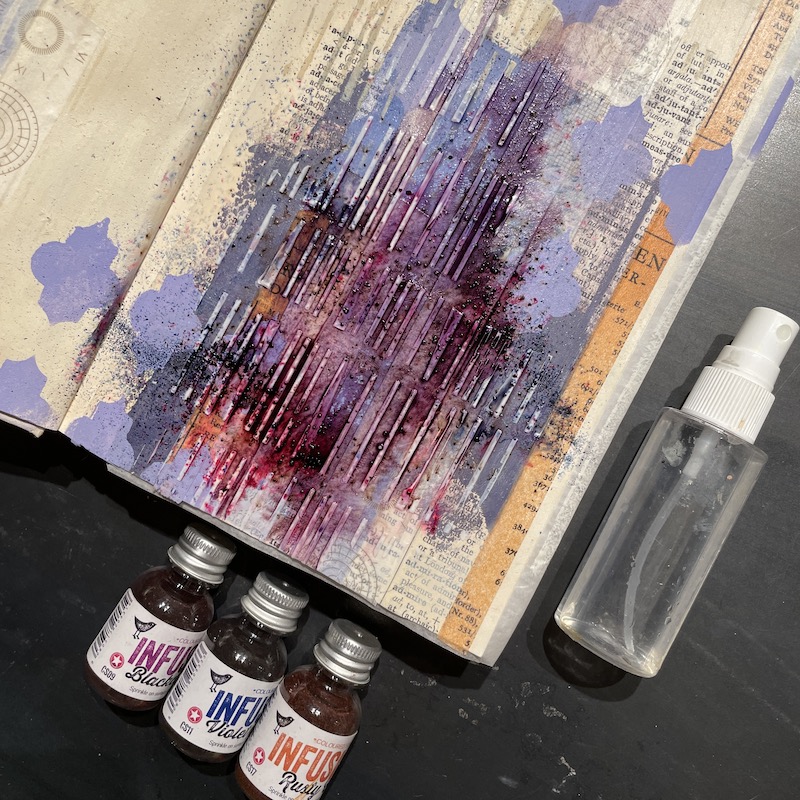
Using the Thatched Texture Stencil a second time, spread molding paste through the pattern with a silicone brush, gift card, or palette knife, and let dry. 

Step 4: Final Layers with Stenciling Two Ways
Infusions or Magicals are small jars of pigments that can be sprinkled onto the page then spritzed with water so the colors magically appear. This technique was used over the dried molding paste Thatched Pattern. (It can be fun to tilt the pages this way or that for the colors to move around and you can also blot back the color if you don’t want it so vibrant)

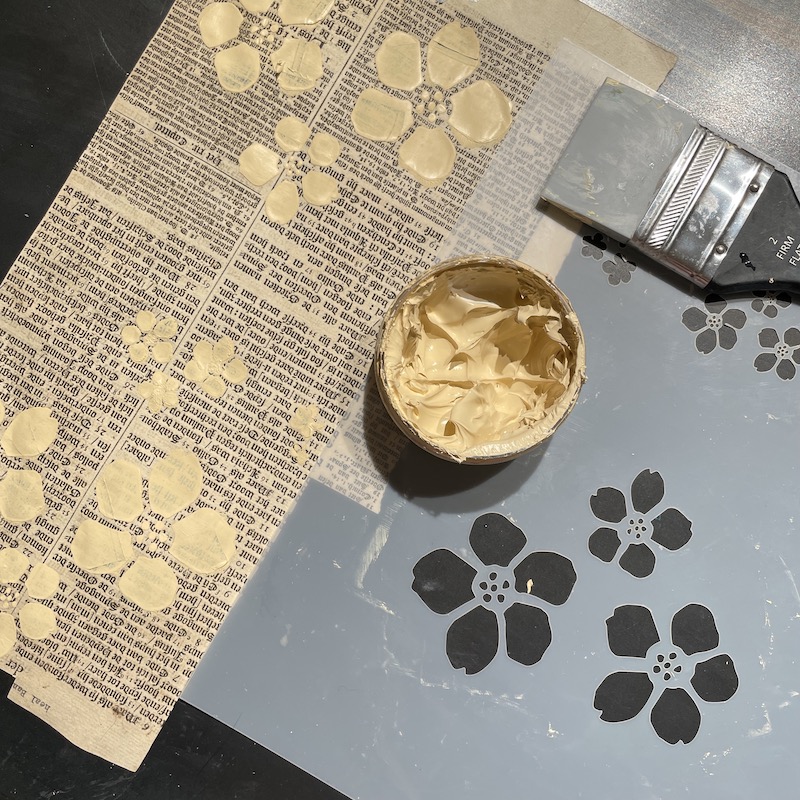
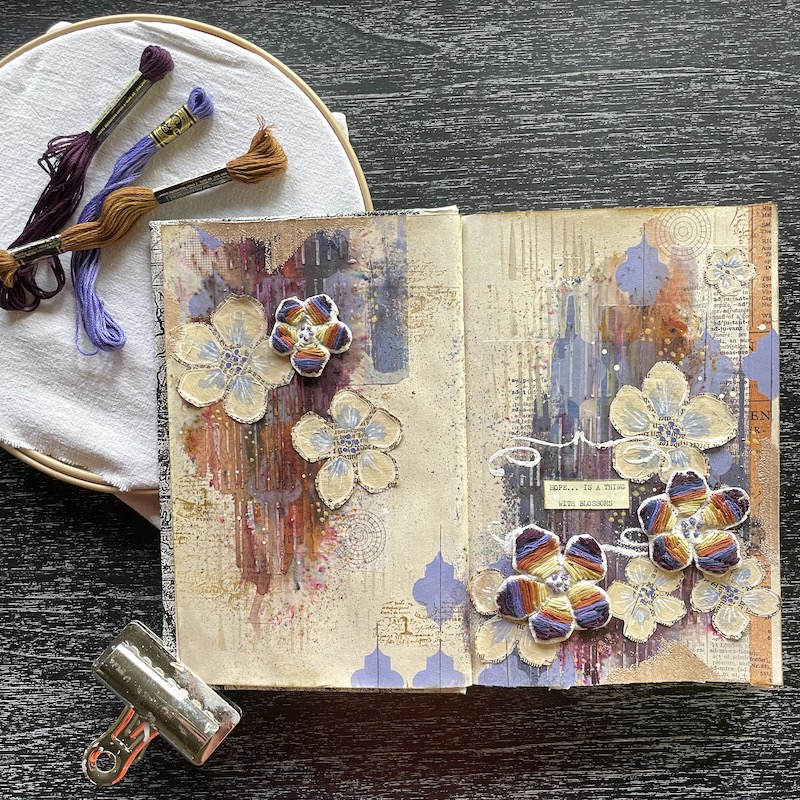
Next, spread Sand Chalk Paste (or Molding Paste tinted Sand) through the Blossoms Stencil onto the discarded book pages and cut out when dried.

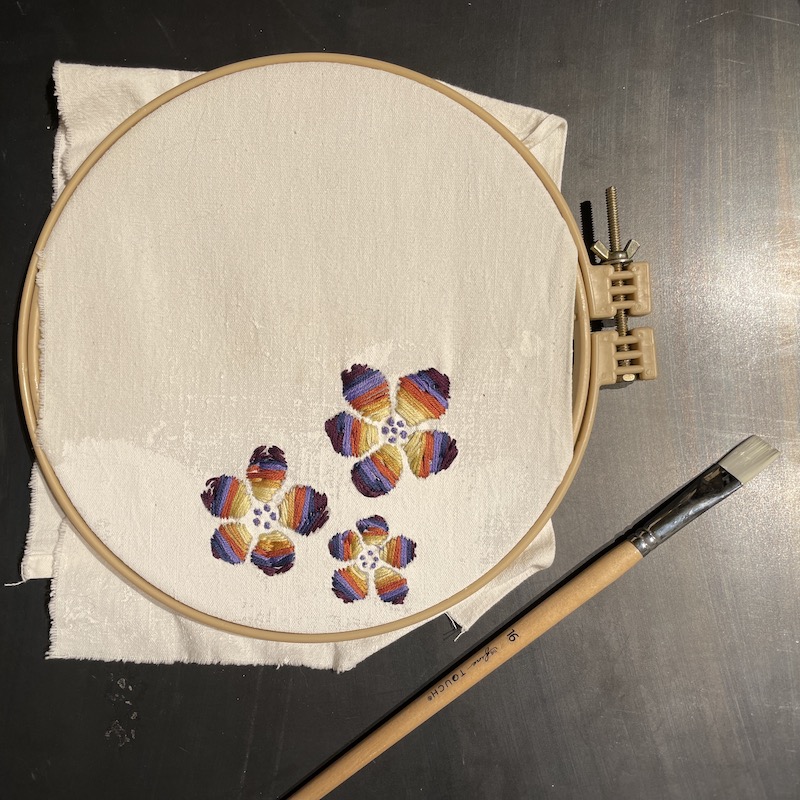
Using the same Blossoms Stencil, trace the pattern onto some plain fabric and use embroidery floss to stitch over the design. Glue the threads on the backside and when dry cut out your Blossoms. (This pattern embroidered on a pair of jeans would be fun!)

Step 5: Apply Blossoms and Final details

Glue your paper Blossoms down with a glue stick and glue your embroidered blossoms down with a thicker glue-like gel paste or fabric glue. Hand paint some details on your blossoms with watercolors and a white gel pen. I next cut out and adhered my quote, “Hope is a thing with Blossoms” and framed it with the Flourish Border Stencil by sponging clear embossing powder through the stencil and heat setting white embossing powder. Add some stamping with brown ink in a few spots and use the same brown ink around the edges of both journal pages. Finish by heat setting some Baked Texture Powder smudged onto a few areas over clear embossing ink and you’ve completed the first entry in your altered book! 

Happy Journaling!

Tracy Hickman
@anonymous.palette 

Do you create Mixed Media and papercrafts with Stencil1?
Please share with us on social @Stencil1 and #stencil1 


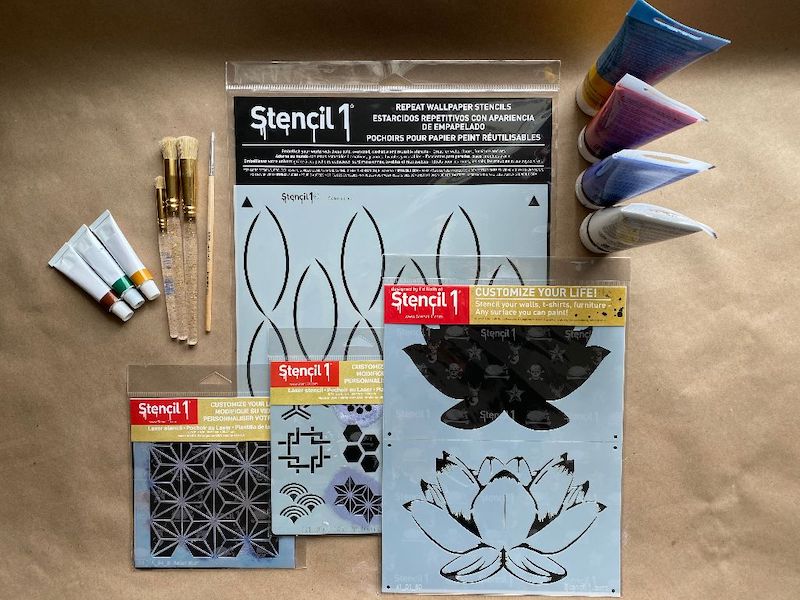
Materials Needed:

Color Mixing

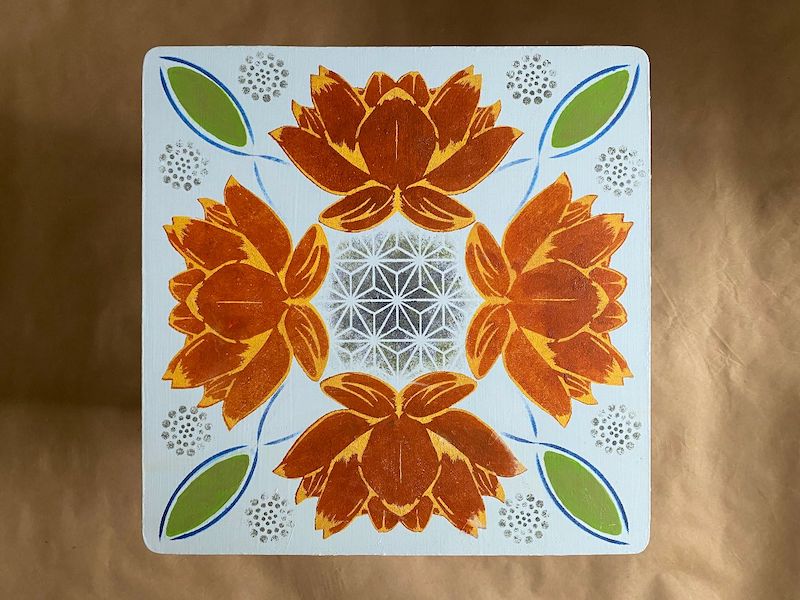
For this project, I used a pallet of muted spring colors. A mix of red and orange with a splash of green to dull it down for the lotuses with a mustard yellow made by mixing the deep yellow with what I used for the first layer of the lotuses. The blues I used for the Soft Chain Stencil were a mix of ultramarine and cobalt. The green I used for the leaves and in the radial pattern and Asian star pattern was a combination of deep yellow, cobalt blue, titanium white, and scarlet red. For the very muted purple, I added more cobalt blue and scarlet red to the green I had mixed. 

Process

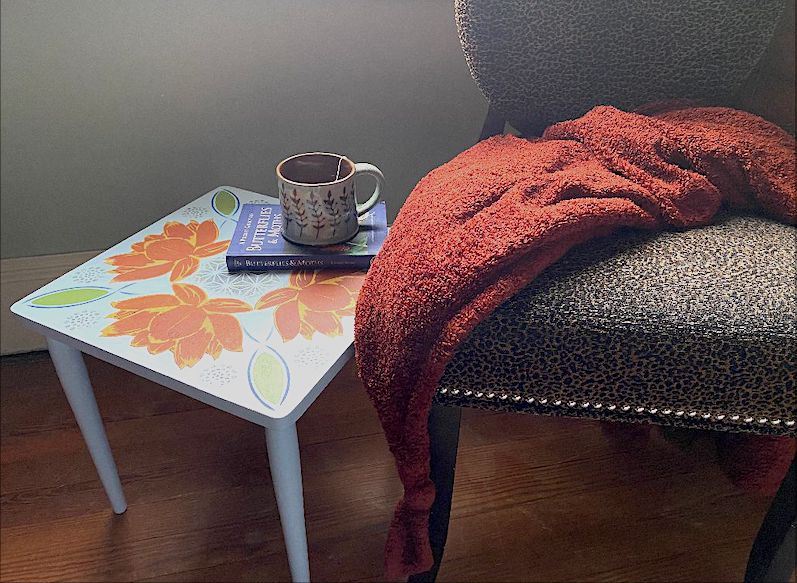
I refinished my table first, but if you already have the surface you are happy with, you can skip this step. First, I lightly sanded and primed my table with a high quality water based furniture primer. I chose a pale blue latex paint for the table so my stencil patterns would stand out.

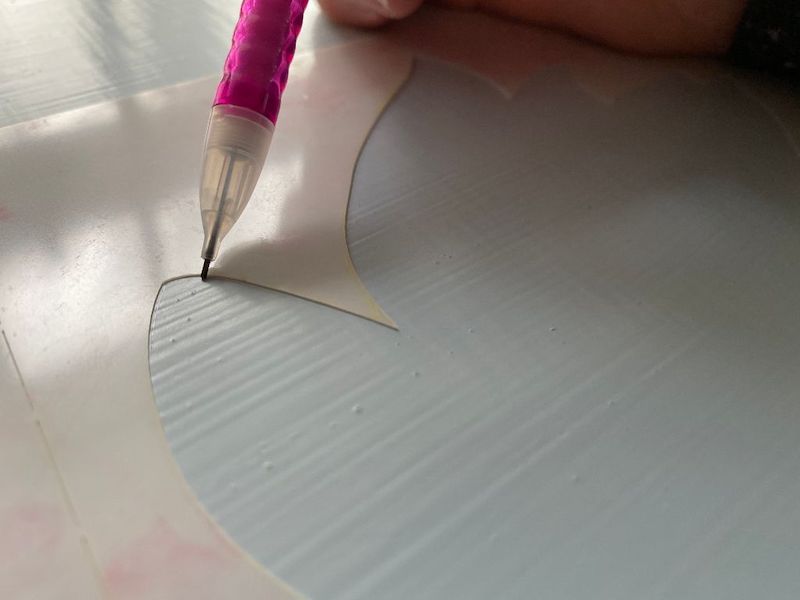
When dry, I used a yardstick to draw an X from corner to corner to ensure my pattern would be evenly distributed. I used two simple lines and based the placement of my stencils on that. No measuring or math was used in this project but if you are a stickler for symmetry, you may want to incorporate some of that.

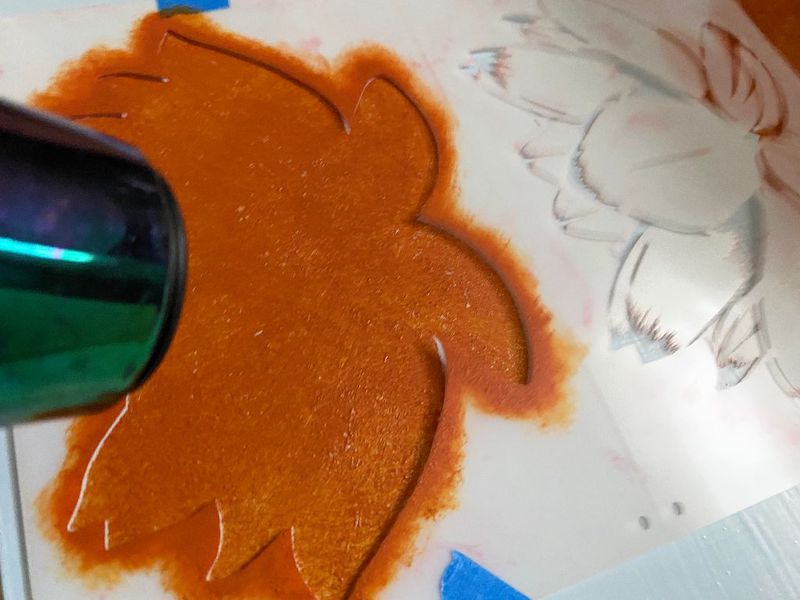
I started painting with a burnt orange that I had mixed up and used a lightly loaded dry brush first and then did a second coat, using the stippling technique, building up two layers of paint. After painting in each coat, I used a blow dryer to keep the process moving along while avoiding smearing the paint already applied. Once all four lotuses were painted in, I painted in the second layer of the lotus stencil highlighting the flower with a mustard yellow, again using the dry brush, tapping technique.

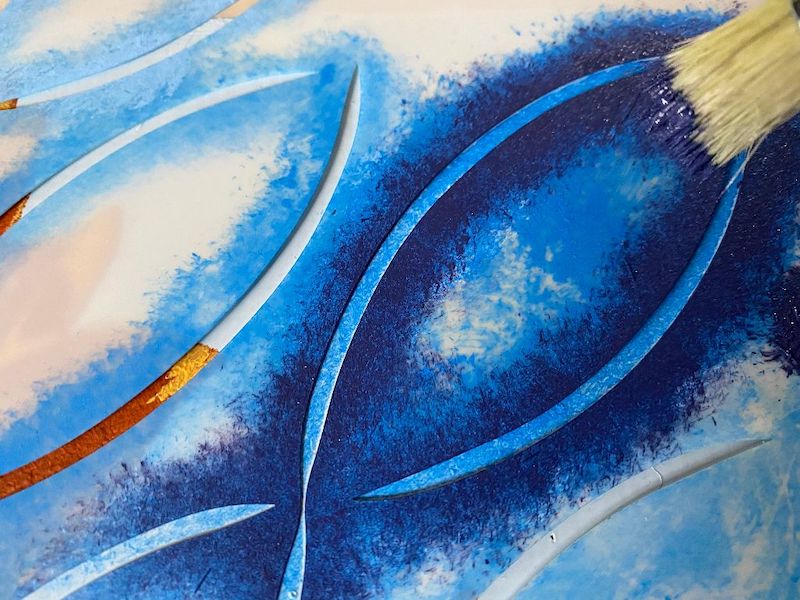
For the Soft Chains Stencil on the corners, I used a teal in a dry first layer, then went back over with a deeper blue. Each time using very little paint and tapping with the brush to build layers and texture. Once that was dry, I added a free hand-painted leaf shape within each of the Soft Chain shapes in pale green. I felt it added balance to the design and fit in with the flower design.

Lastly, I used a very muted purple to paint in the center for the Asian Star stencil. My original pencil guidelines were still visible and I used that again as a guide to line up my stencils. After the light coat of purple, I went back in with the green I had used for the leaves on the corners and lightly peppered in some highlights. As a final touch, I used the same purple and green combo of colors to paint in the small radial design stencil in the corners.

This project was challenging and fun for me and it was really enjoyed the process as well as the finished product. I hope you do as well!

This project was made by our lovely friend, Teri @tjaneiro2 on Instagram
Please share your creations with us @stencil1.com