Στο νέο online παιχνίδι καζίνο του Nine Casino, εμπνευσμένο από τον κόσμο της κατασκευής στένσιλ, οι παίκτες μπορούν να δημιουργήσουν τα δικά τους μοναδικά μοτίβα για να ξεκλειδώσουν ειδικά επίπεδα παιχνιδιού. Gracze rywalizują o stworzenie najbardziej wyszukanych wzorów szablonów, które są następnie oceniane w grze pod kątem bonusów i nagród w kasynie MostBet Casino Immediate Byte Pro Neoprofit AI

Stencils and Glass? Yes it’s a thing, a good thing!

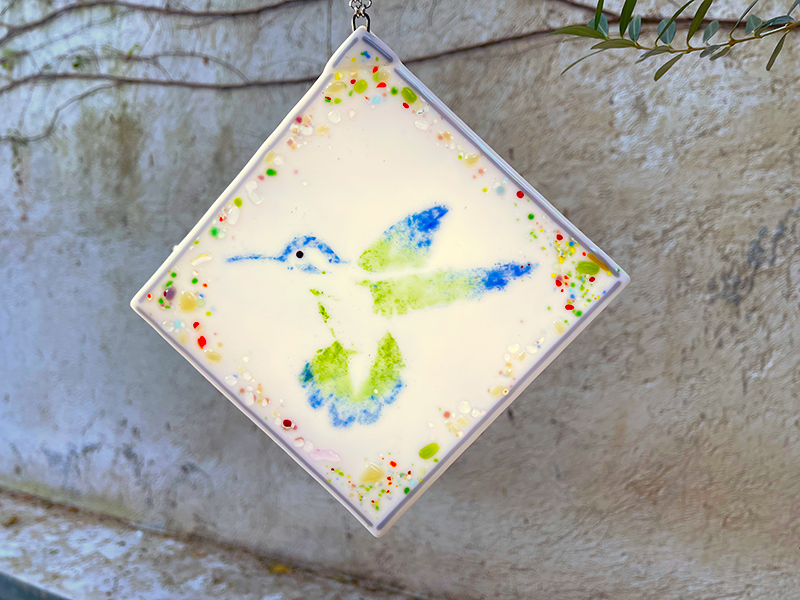
BYOS – Bring Your Own Stencils, that’s what I did…to a glass making studio! Stencils can be used in so many mediums and my experimentation with glass produced some beautiful results if I do say so myself :). Here is how I used Stencil1 stencils with glass to make a hummingbird glass window ornament:

Materials You Will Need:

  • Detailed Birds Stencil 4 Pack
  • Tape
  • Glass Dust
  • Detail Brushes
  • Solvent
  • A Sturdy Flat Surface
  • A Small Spoon
  • Elmers glue
  • A Stove or Kiln or all this in a glass studio

I wanted to work on an optimistic, Spring themed image and the hummingbird was a perfect choice. It’s also great because it is a stencil design with a lot of bold open shapes, perfect for filling with glass powder!
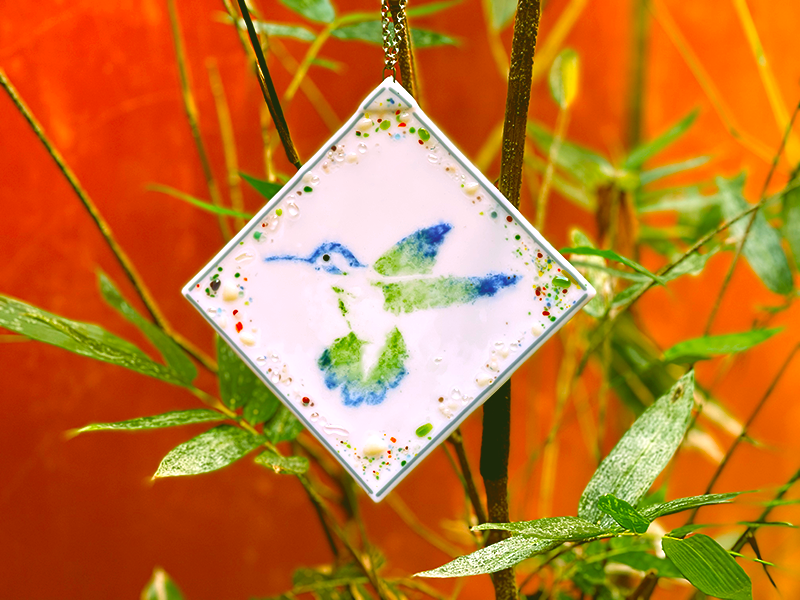
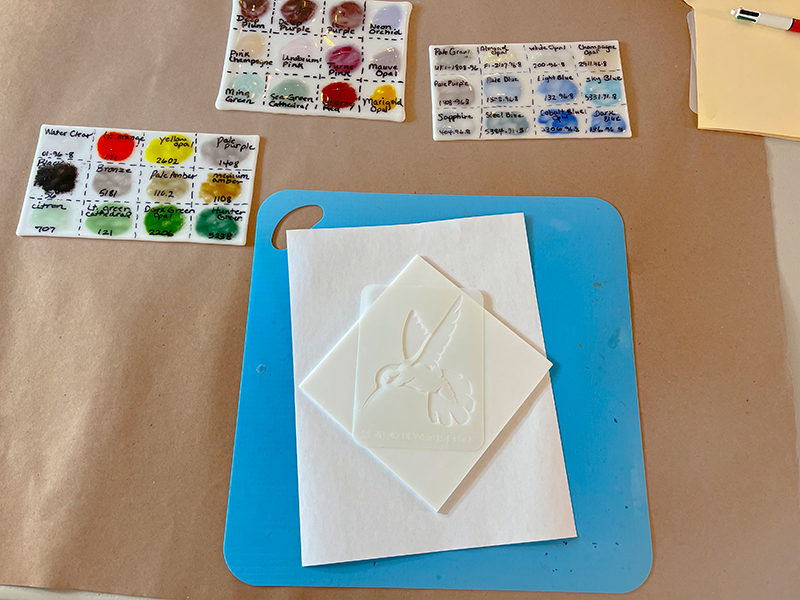
I was provided a 7″ x 7″ white sheet of glass, that’s my surface for today! You have to wipe it clean with alcohol, no oil should be on the surface. I then planned the layout of the design and thought it might look best to turn my square glass shape to a diamond-like position and attach a chain to the top point for hanging.
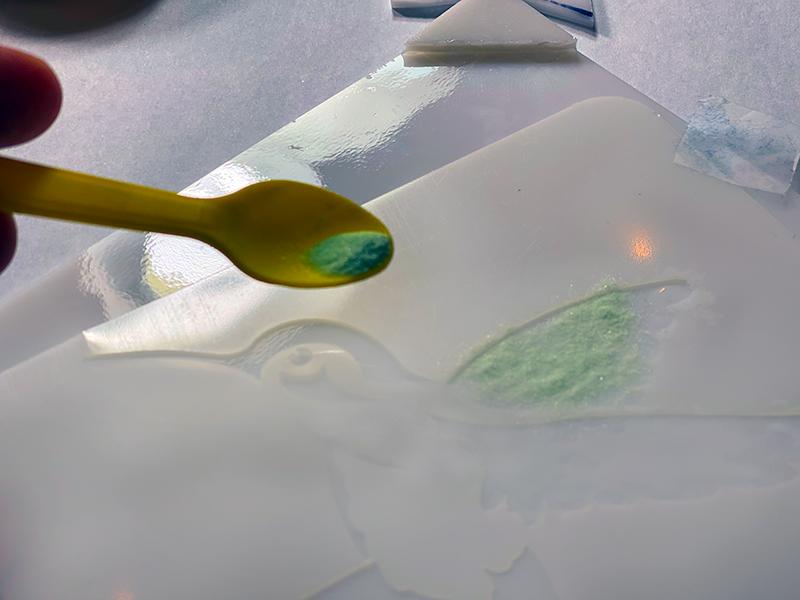
I brushed in a little bit of watered down glue into the wing area and then sprinkled in glass powder.

I continued the process with a few colors of powdered glass. you can see here that I am creating ombre blended effects by the way I sprinkle the dust. I also always use my darker colors on face details, it helps to really see the detail of those features!
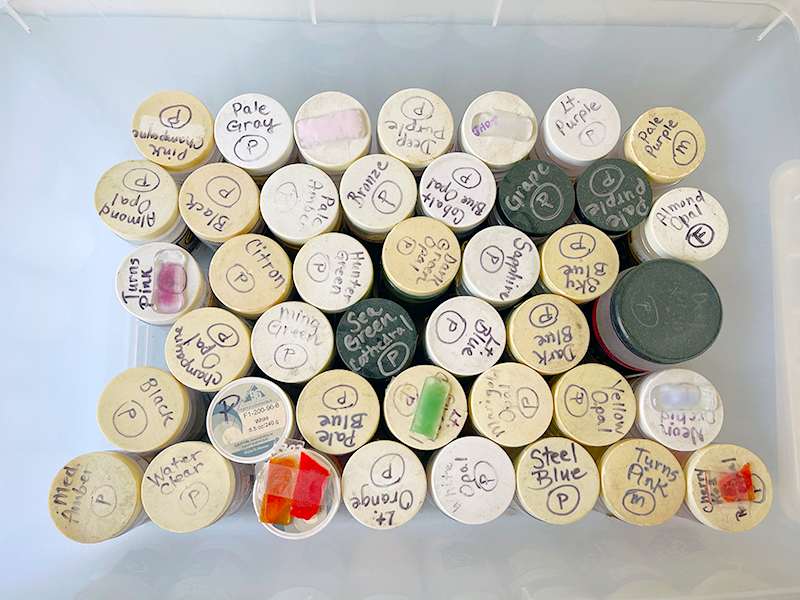
Here’s a shot of the different glass dust colors the studio offered. I love supporting small, local businesses like this. You don’t have to buy all the supplies, just visit, create, and everyone is happy! But yea, I also was like so how much is a kiln, haha! The art is addictive!
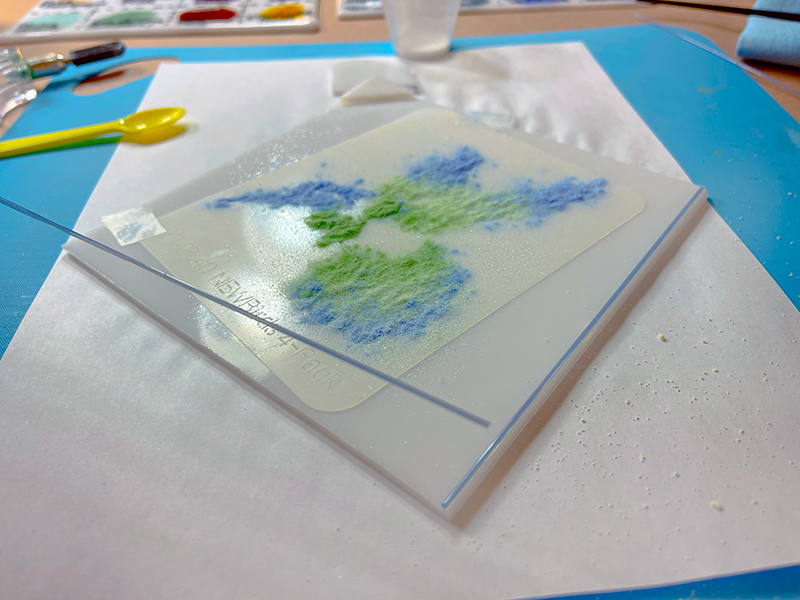
I also created a frame around the piece using these long sticks of glass, similar to hard pasta. It looked a little too structured for my taste so see what I did next…

I added these chunkier glass pieces around the edges to add some “atmosphere” to my little birds world. It adds some whimsy and texture. I then used a tweezer to adjust them to the composition I wanted.
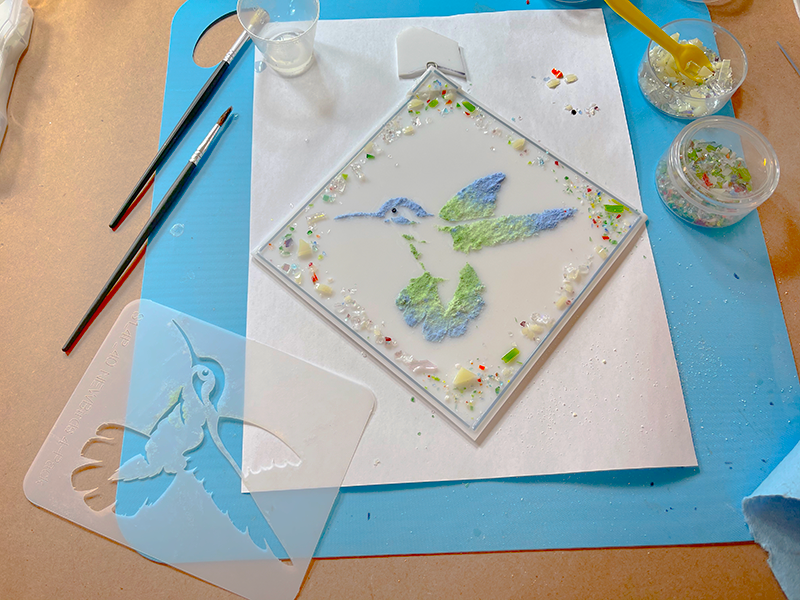
Notice how I cut a small triangle shape up top and layered my hook in the layers of glass, a hook sandwiched between two pieces of white glass. The piece of white glass you see above the art piece is being used to simply prop up my hook so it doesn’t flop down while the glue is drying it inside the “sandwich”.
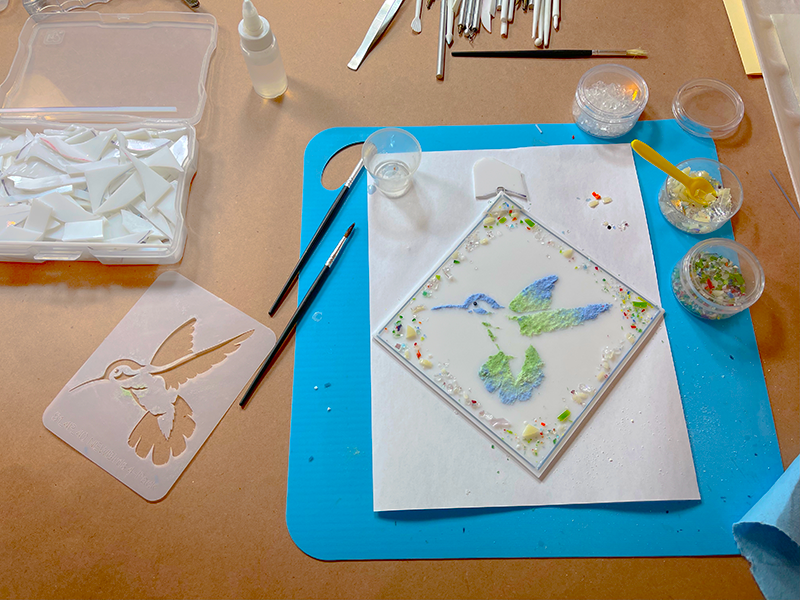
Once you remove the stencil, add your other elements of glass, you can use small tools to clean up your design. You can push some sand around, move shards around, and get it all to it’s final position before it get’s fired.
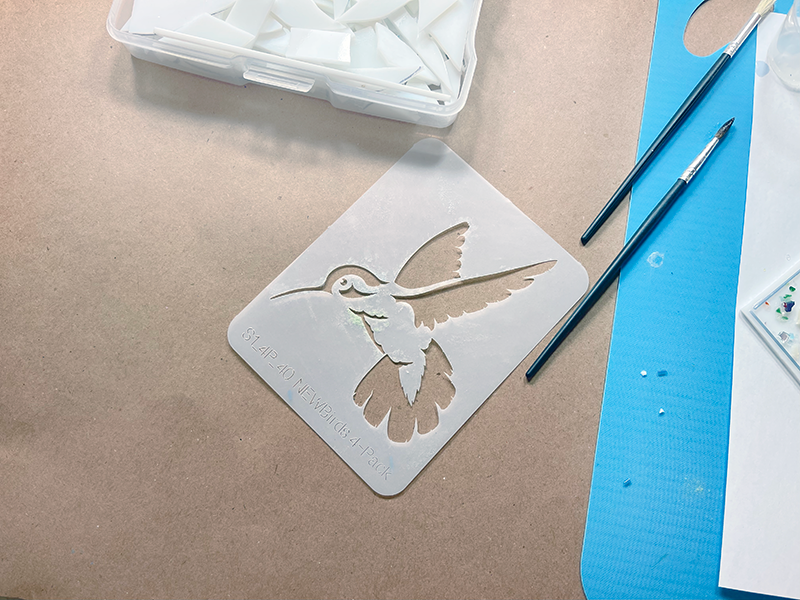
Your stencil has done it’s purpose and can be washed with warm soapy water. It’s ready for storage and to be used many more times!
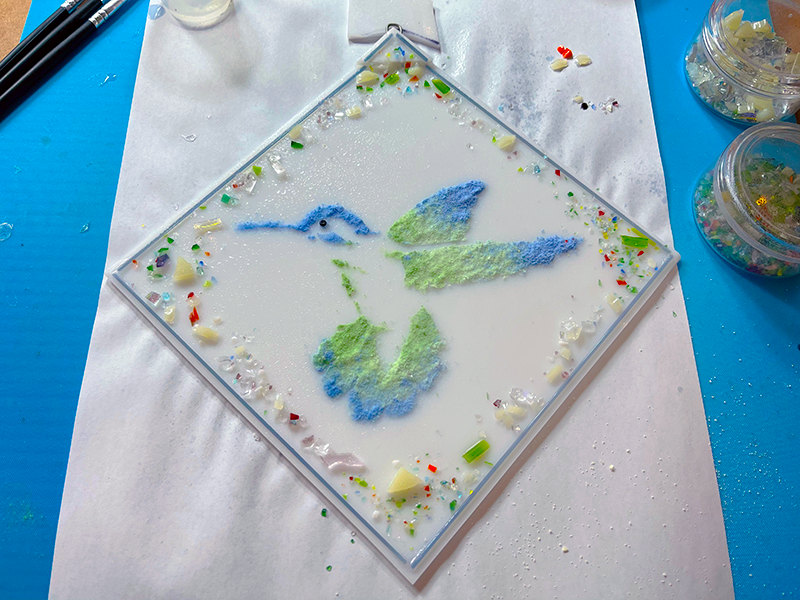
The design was then spritzed with a very thin glue spray, almost like hairspray.
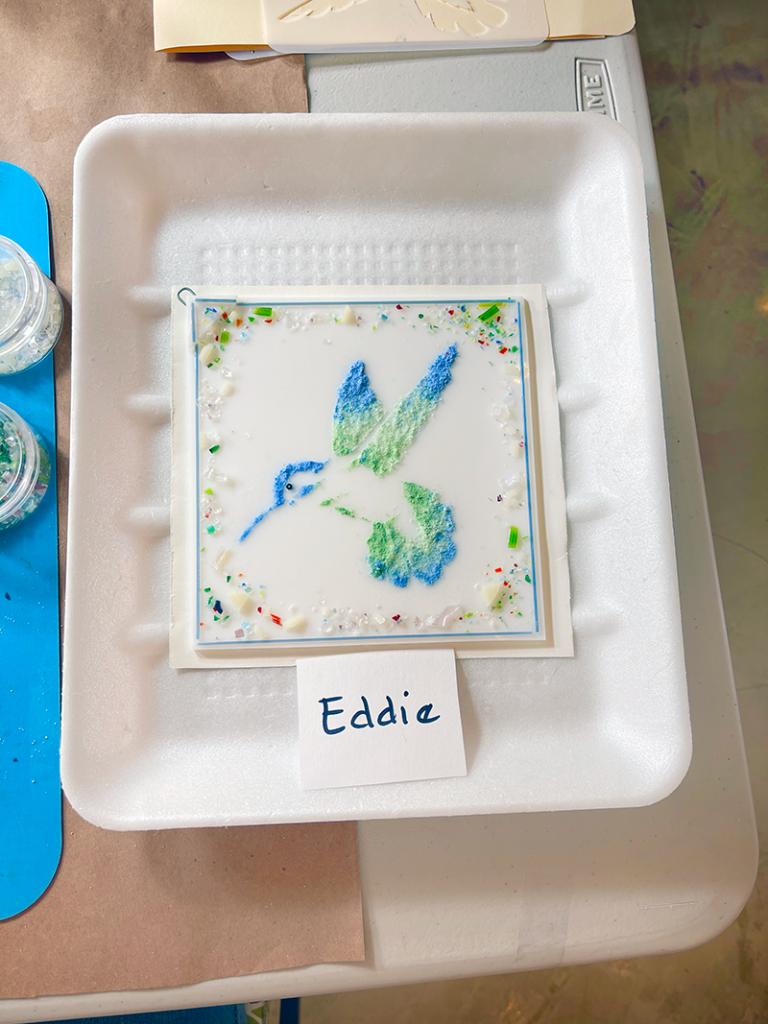
The piece was then placed on special paper that it sits on in the kiln. That’s me Eddie 🙂
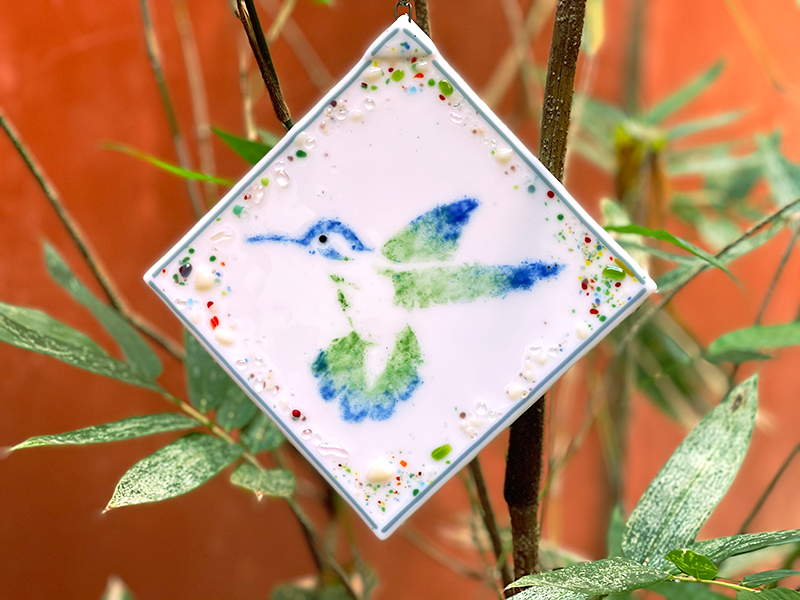
Here’s a shot of the piece all finished, I am so happy with how the dust gets darker. Oh, forgot to mention I placed a small black glass bead for the eye. I think the eyes should pop in an image so this little bird got a nice dark eye.

Once completed, hang your piece proud! As shops reopen, please search for your local glass studios and bring Stencil1 stencils with you to try this technique. We would love to see what you make!

Please share your creations with us @stencil1.com


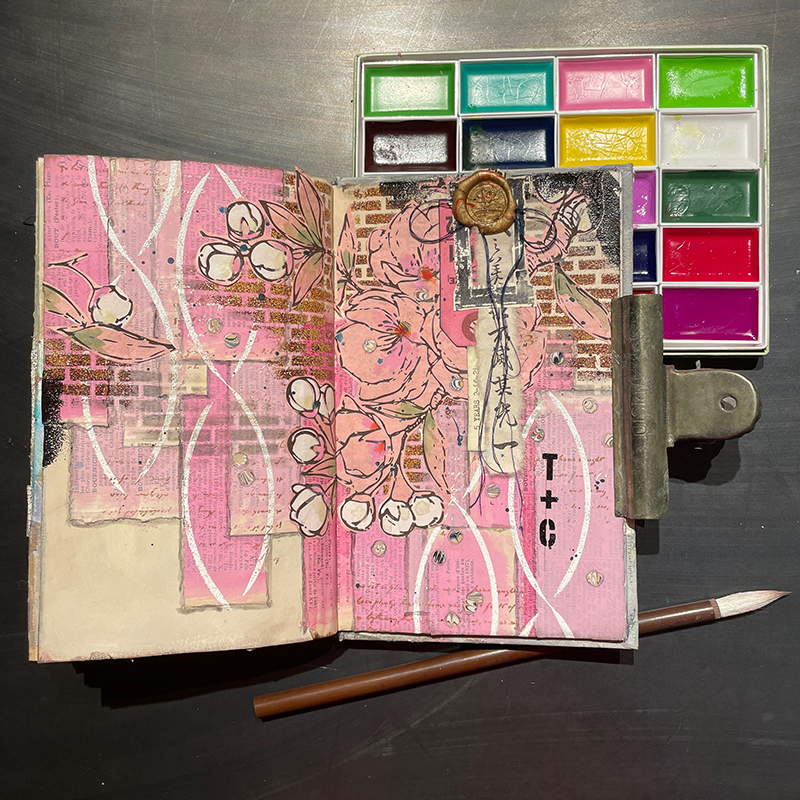
We hope you are all having a pleasant weekend. Whether it’s self-love, Valentine’s, or just a beautiful day we offer all of our love to you. Take some time to look at this beautiful anniversary mixed media journal entry.

What You Will Need:

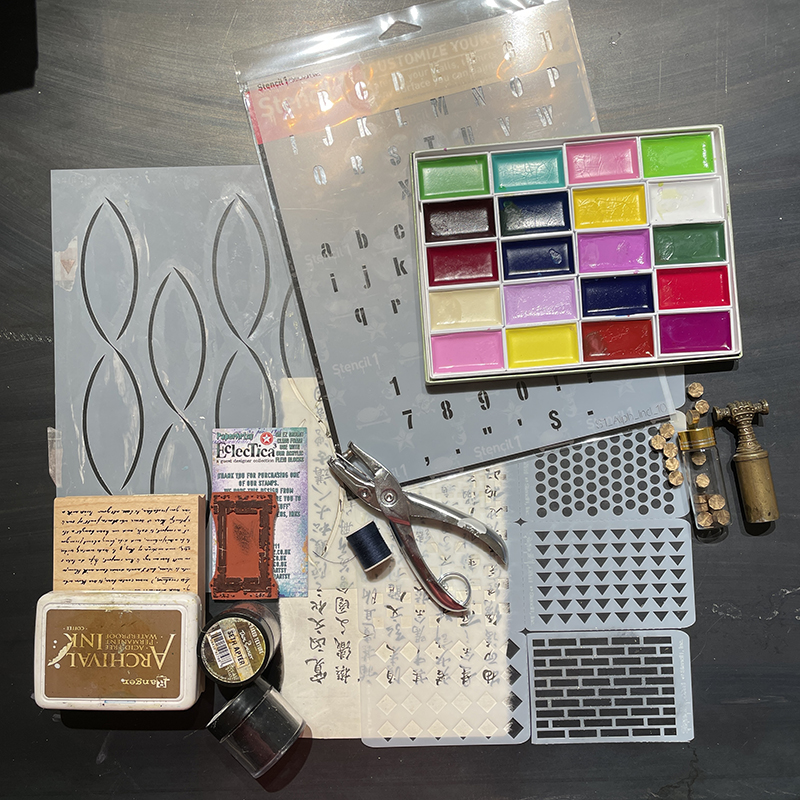
  • Stencil1 Soft Chains Stencil
  • Stencil1 Industrial Font Stencil
  • Stencil1 PATTERNS #2 Stencil 8 Pack
  • Baked Texture Powder from Seth Apter, White Cloud, Eclipse, and Taos Sunset (or other embossing powders)
  • Paper Artsy Fresco Finish Paints, Sand, Blah Mange, Bubble Gum, Cerise, and Inky Pool. (Or like acrylics)
  • Golden Shading Gray Fluid Acrylic
  • Small Paint Brush
  • Dictionary Pages
  • UHU Glue Stick
  • Paper Artsy EM53 Stamp
  • Script Stamp from Dawn Houser
  • Archival Ink Pad in Black and Coffee
  • Clear Embossing Pad
  • Navy Blue Or Black Thread
  • Collage or Marbled Papers
  • A standard Hole Punch
  • A Waxed Seal Stamp
  • Watercolors or Gouache Paint
  • Vintage Collage Elements

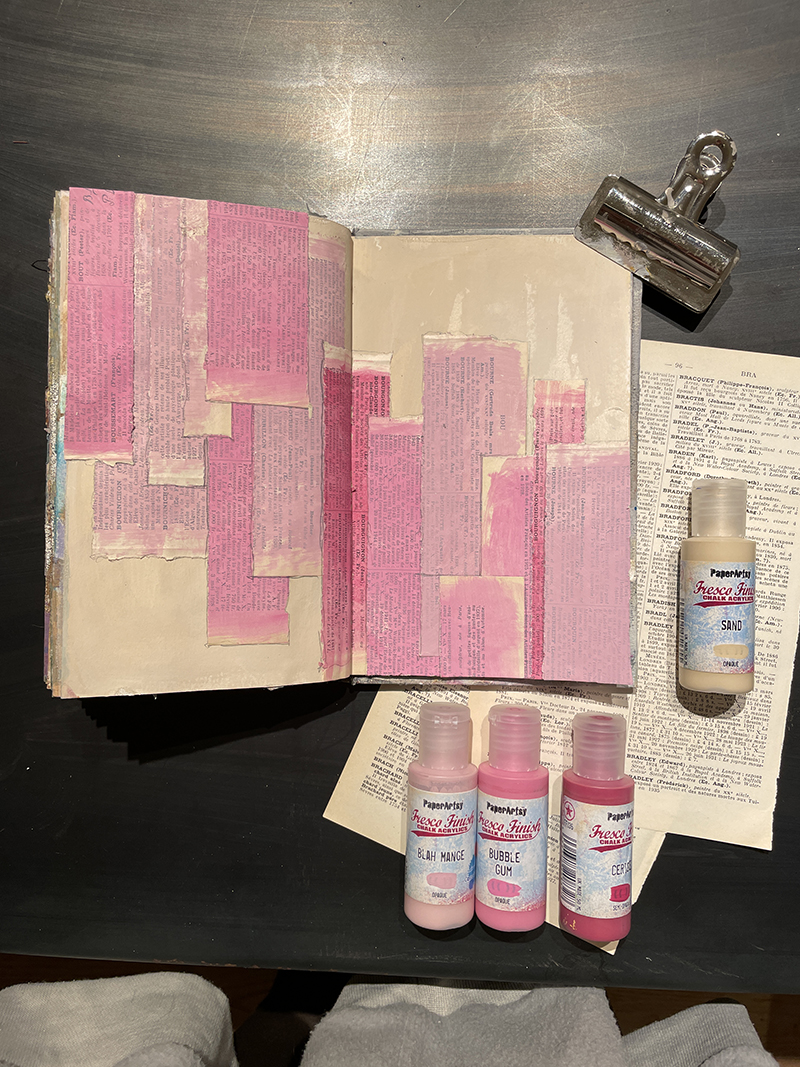
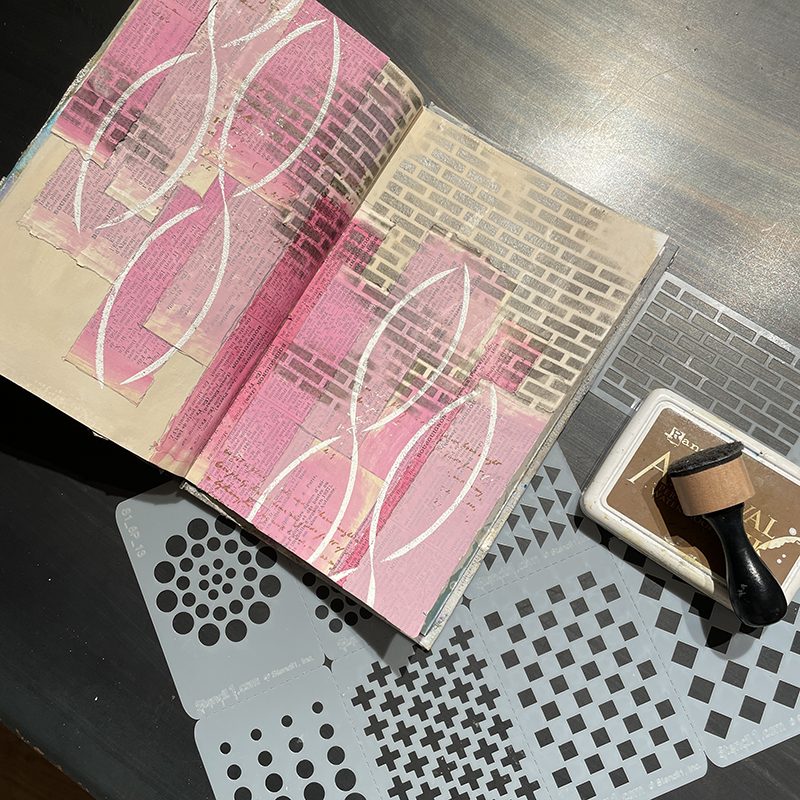
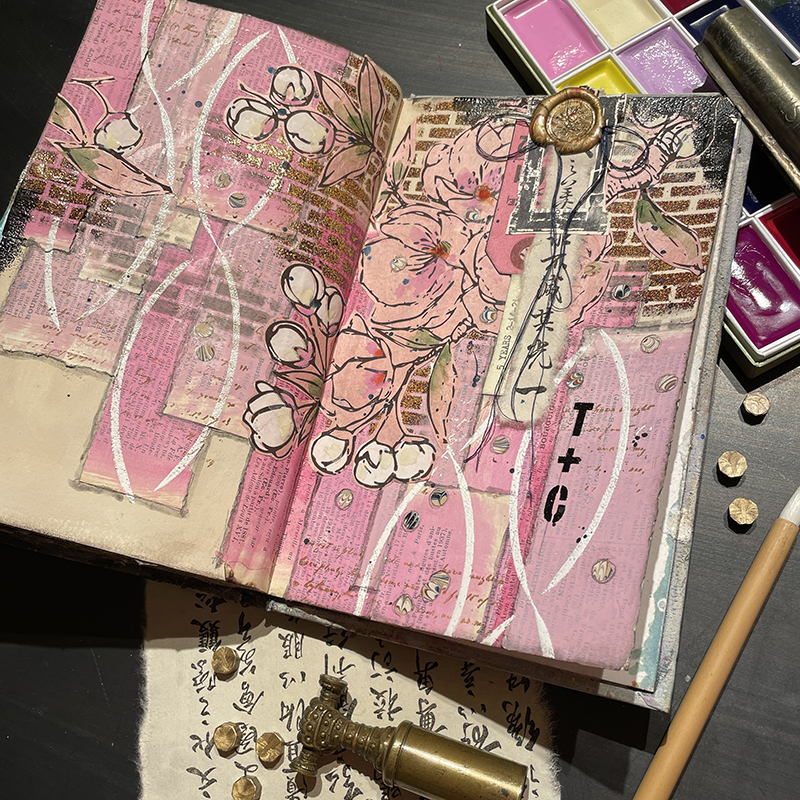
“Hitched” is a journal entry inspired by a prompt “pink” in the #creative6daychallenge. I painted two adjoining pages in a Stillman and Birn journal with PaperArtsy Sand mixed with a little White Gesso. I next painted a few vintage dictionary pages in PaperArtsy Blah Mange, Bubble Gum, and Cerise. I ripped these into strips and glued them down with a UHU glue stick in a shingle-like format.

 I used some brown Archival Ink on a stamp with some French writing over the shingles in spots for some added interest.

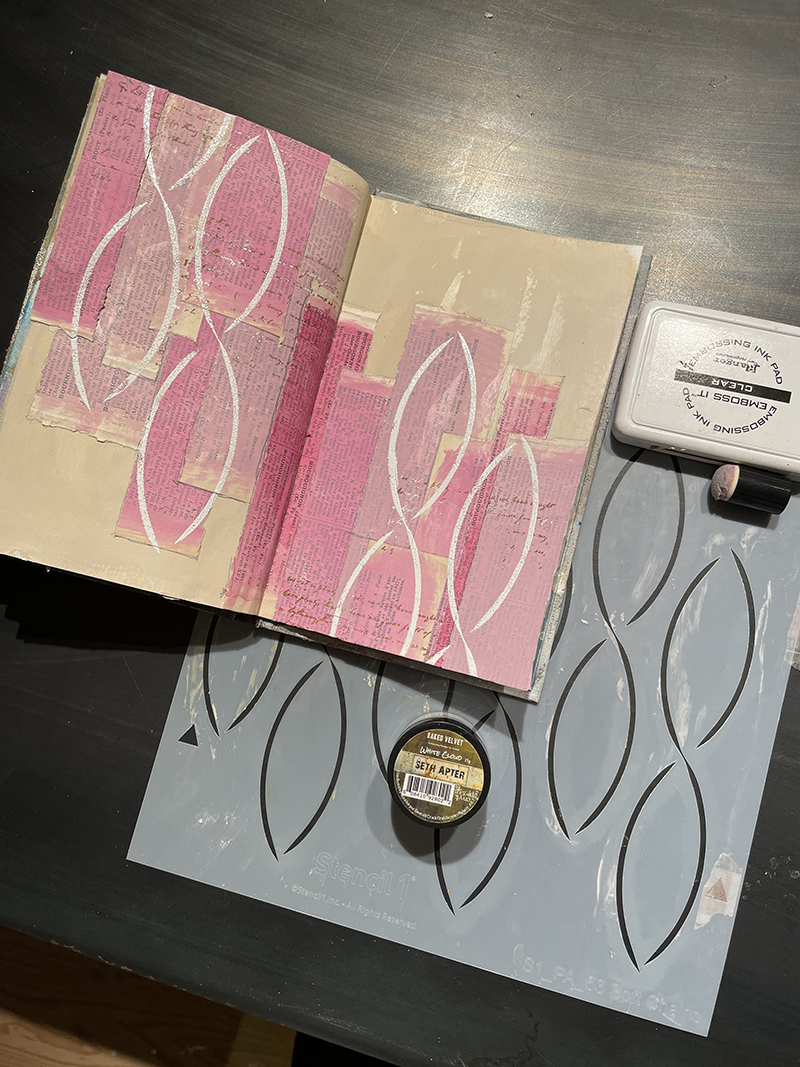
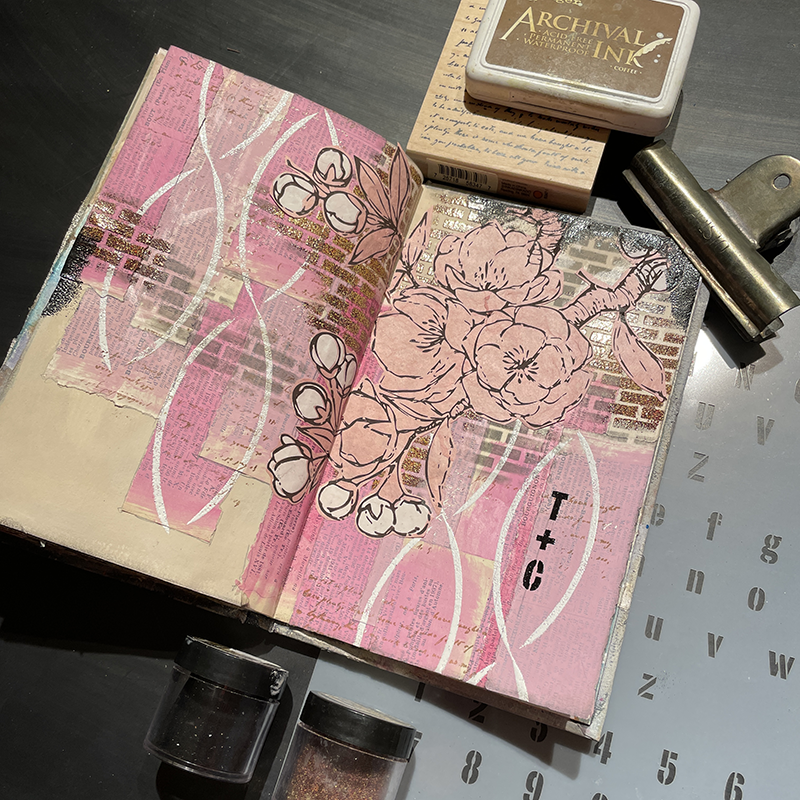
I next used the Soft Chains Stencil and sponged on clear embossing ink from a pad through the design and removed the stencil. I sprinkled White Cloud Baked Texture Powder onto the clear wet ink and shook off the extra onto a piece of paper. Heat setting the powder with an embossing or heat tool reveals the magic of the embossing powder and makes such a crisp image from the stencil.

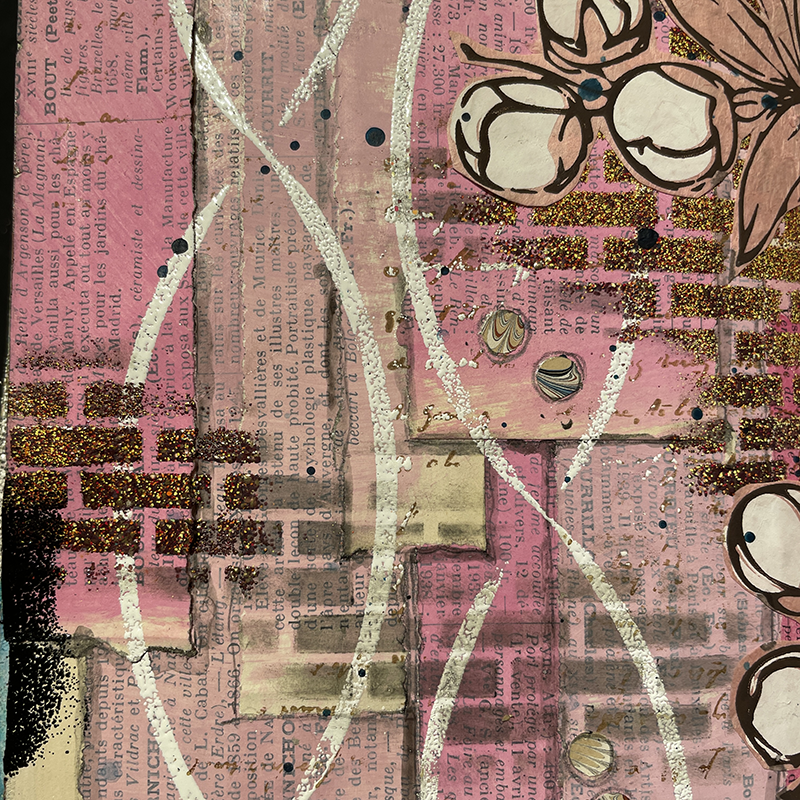
This brick pattern stencil from the Patterns #2 Stencil 8 Pack was next calling my name and used it by sponging Brown Archival ink through in random spots. I heat set and then replaced the stencil back over the pattern and sponged on clear embossing ink in spots and used Taos Sunset Baked Texture Powder to add that real brick texture.

I remembered a great wrapping paper with cherry blossoms from The Paper Source that I used and cut out the image, gluing down with a glue stick in the upper right over my “brick wall”. I then pulled out The Industrial Font Stencil to graffiti my wall with my and my husband’s initials also using clear embossing ink with Eclipse Baked Texture Powder (I created the plus sign with the lower case L.). I also added a bit of Eclipse Texture Powder at the right top and left pages to tie in the initials.

 I added some punched circles in marbled paper and glued down pencil lining after placement so they were a bit more dimensional.

I also outlined the individual pink shingles with Shading Gray Fluid acrylic ink from Golden to shadow. I next watered down some Inky Pool PaperArtsy paint and splattered over the bricks and cherry blossoms (covering the collage elements to protect). Using custom gold marbled wax, and the stamper, I took the Japanese calligraphy and stamped it with the string right below it. The string was tied into a neat little bow.

I colored the collage element with some Japanese watercolors and edged the outside of both pages with brown and black ink to the border and typed “5 Years 2-14-21” which is my 5 year anniversary and slipped it on the side of the calligraphy. Best Valentine’s Day Ever ;).

Happy Valentine’s Day! ❤️❤️❤️

This is another beautiful post from Tracy Hickman (@anonymous.palette on Instagram).

Please share your creations with us @Stencil1


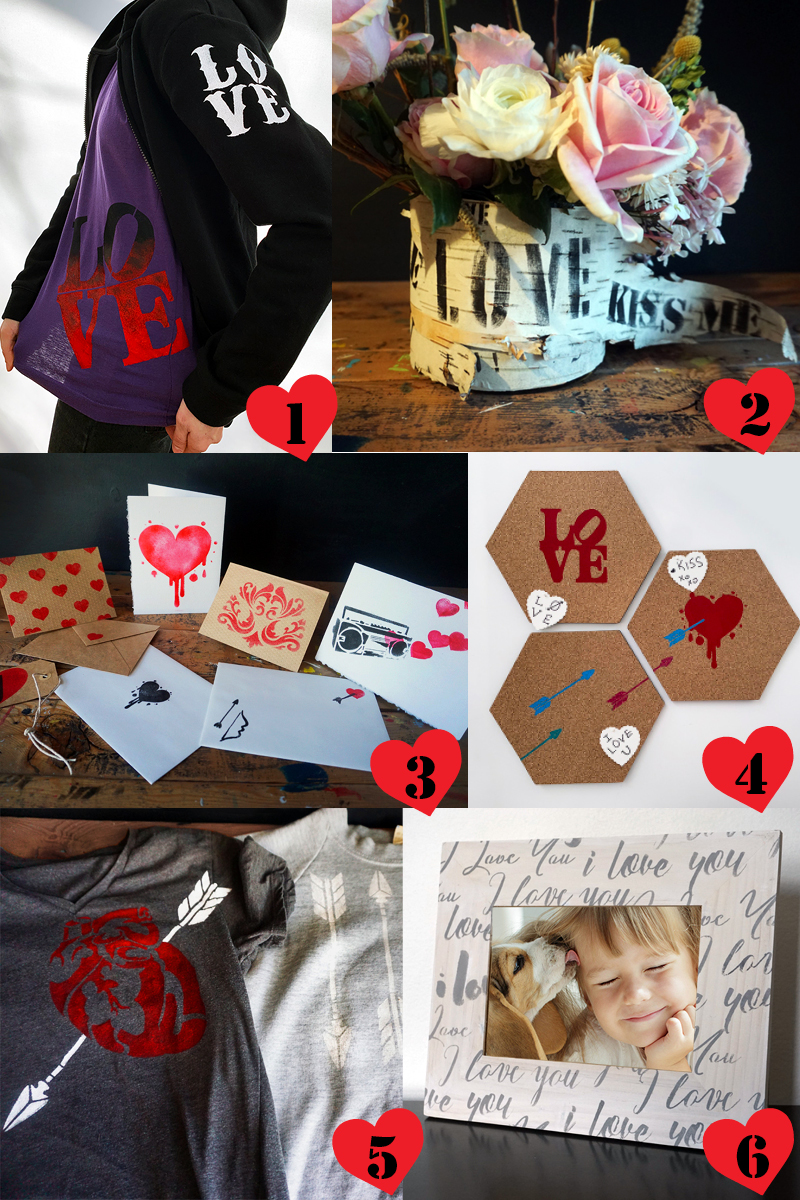
For 2020 Valentine’s day you can create unexpected and very creative DIYs. Check out our project list to get inspired, and start making your art with our best stencils. Spread the LOVE this holiday season with Stencil1!

  1. LOVE Stenciled Sweatshirt & T-shirt using Love Stencil.
  2. Valentine’s “Carved” Birch Bark DIY using Letter stencils.
  3. Valentine’s Day Cards – from your heart, not the store, using Stencil1 Valentine’s Day themed stencils and stamps.
  4. Stenciled Valentine’s Hexagon Corkboards using LOVE Stacked StencilHeart Dripping StencilArrows Stencil.
  5. Cupids Arrow Sweater and Heart Shirt using Arrows stencilHeart stencil.
  6. I Love You Stenciled Picture Frame using Valentine’s 3 pack stencil set.


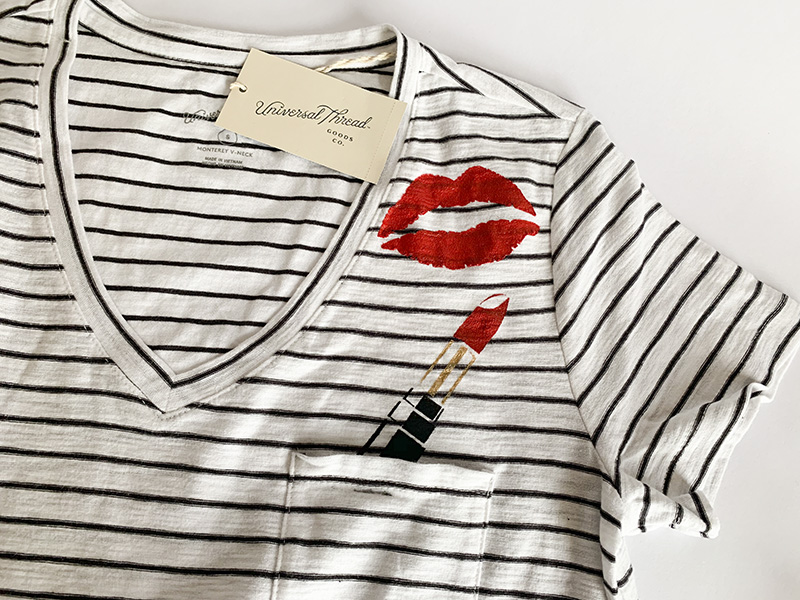
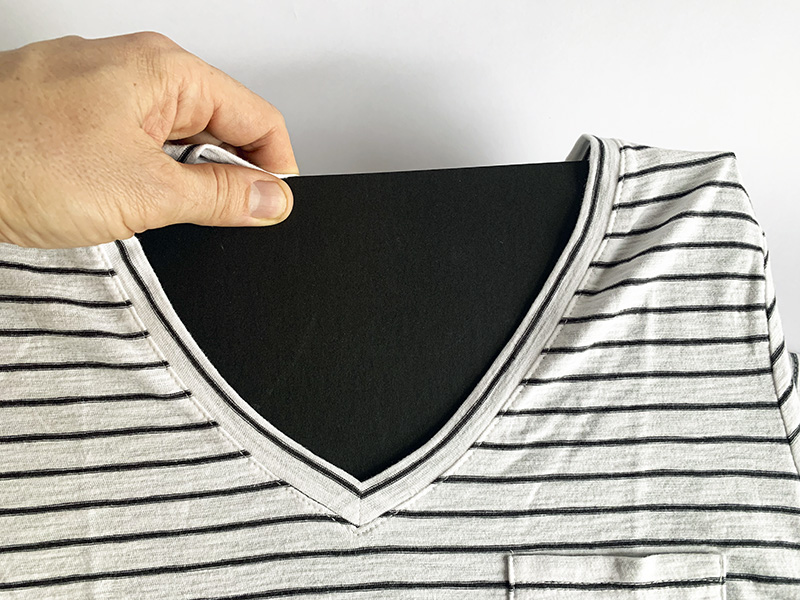
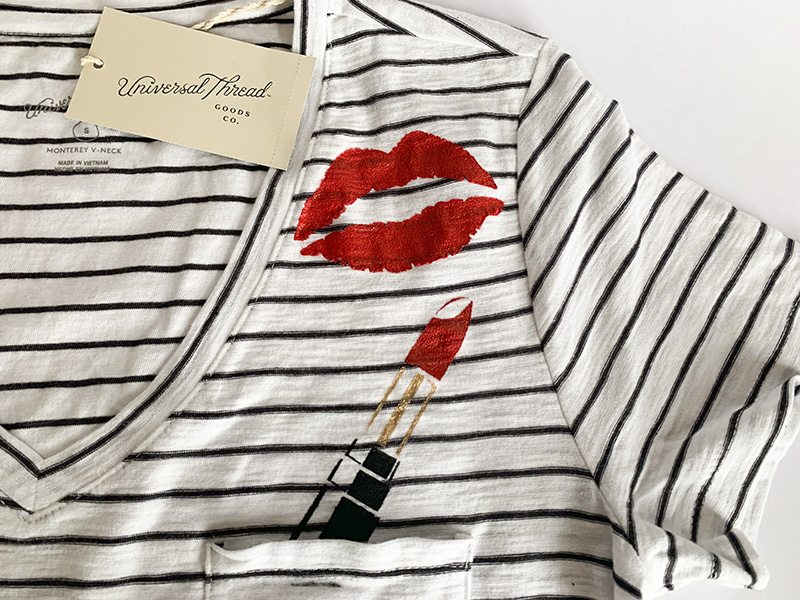
A classic striped shirt from Universal Thread at Target just got even cooler with this lipstick and kiss stenciled embellishment.

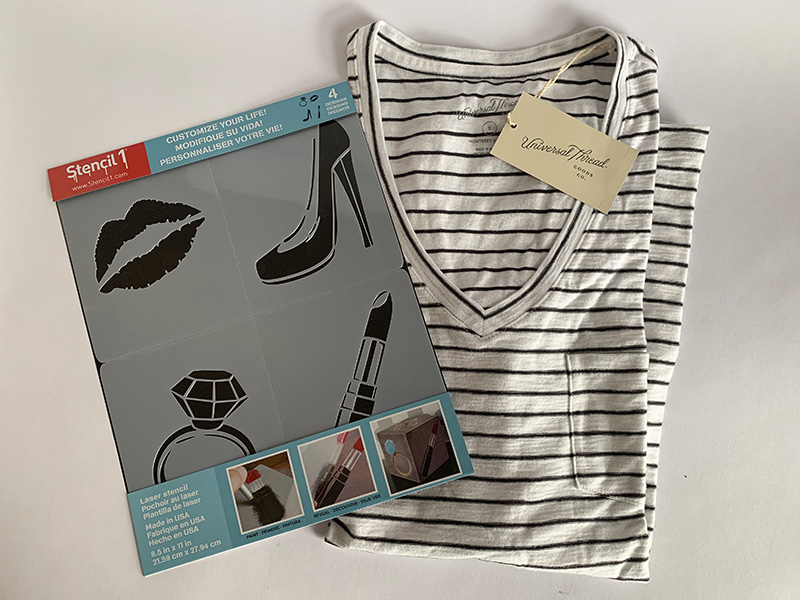
We used the Diva 4-pack set, available at Target for this stenciled top DIY.

Start by inserting cardboard inside the shirt. Make sure it fits just right, don’t stretch the shirt too much or you will warp your design.

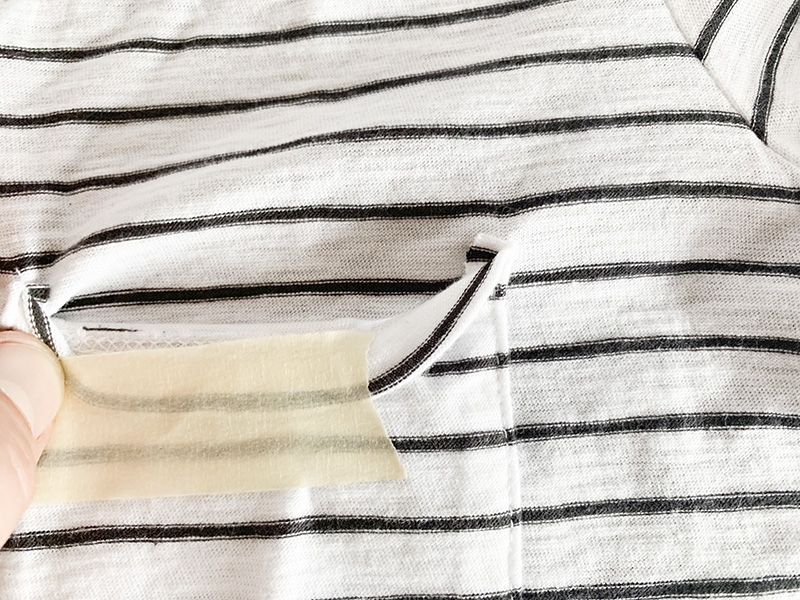
We wanted the lipstick to appear as if it’s in the pocket so we taped down the pocket to paint inside it a bit…

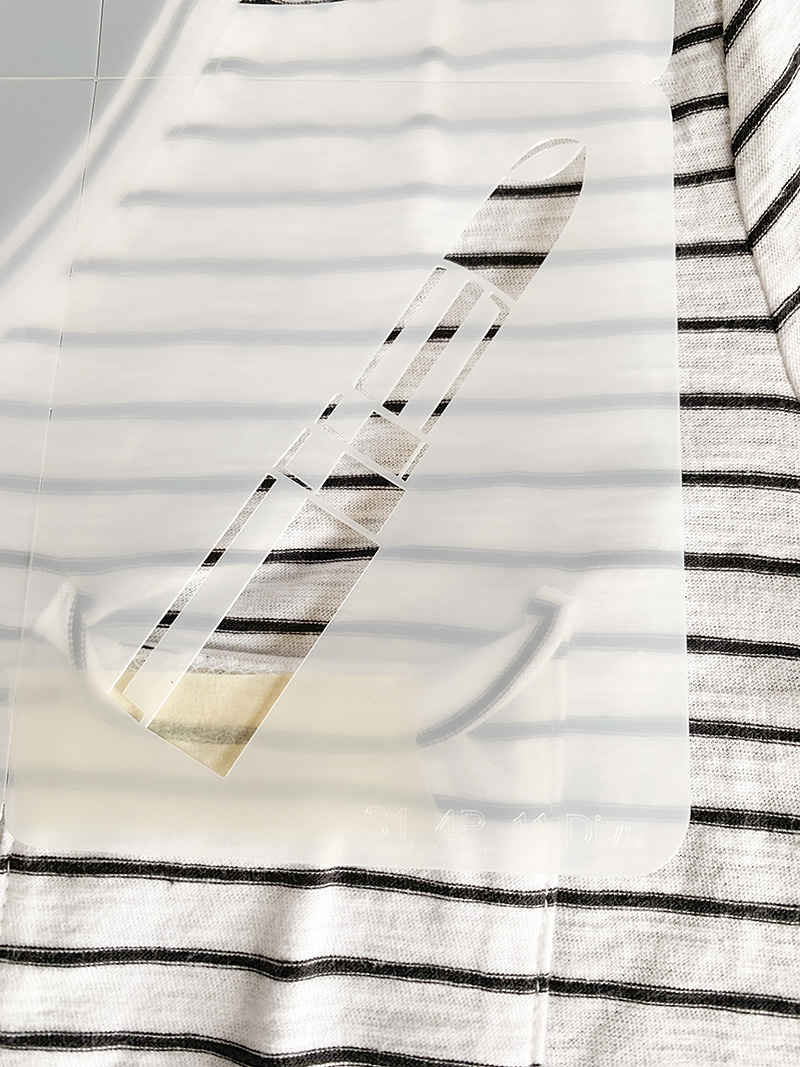
Next, place the lipstick stencil where you want the design to appear.

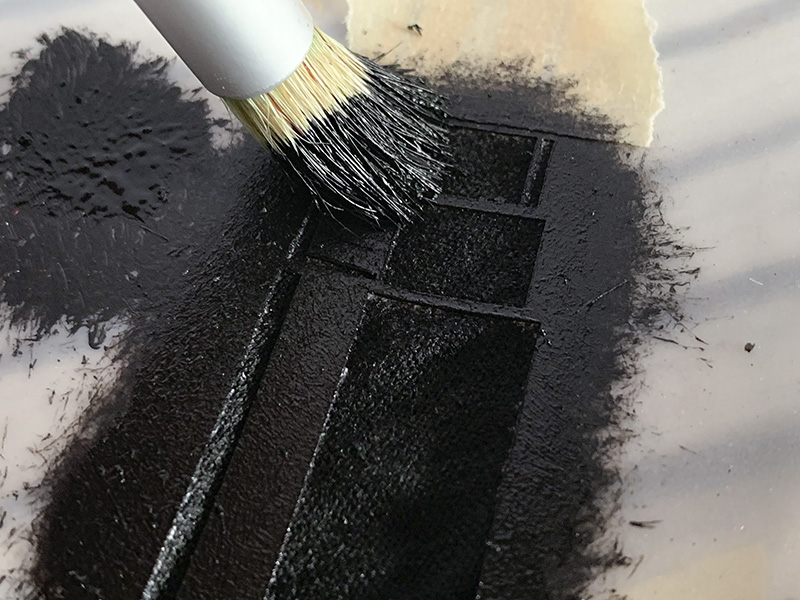
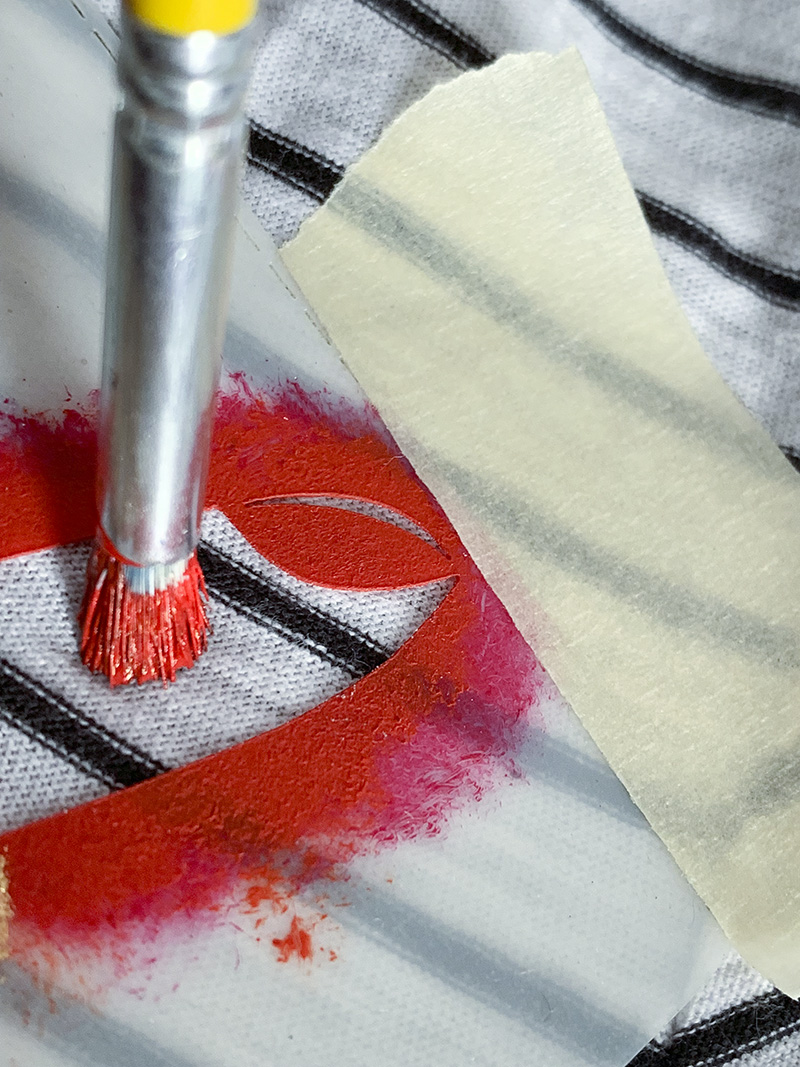
A few pro tips: Use small stencil brushes for designs such as the lipstick stencil as it will allow you to change colors for different areas and not color outside those areas. And pro tip #2, always use very little paint, it’s better to build up a few layers until the stencil design is filled in nicely rather than use too much paint and get blurry results with paint seeping under your stencil.

Oh yea, if the design is close to the edge f the stencil, place a piece of tape as a block so you don’t paint outside the stencil area!

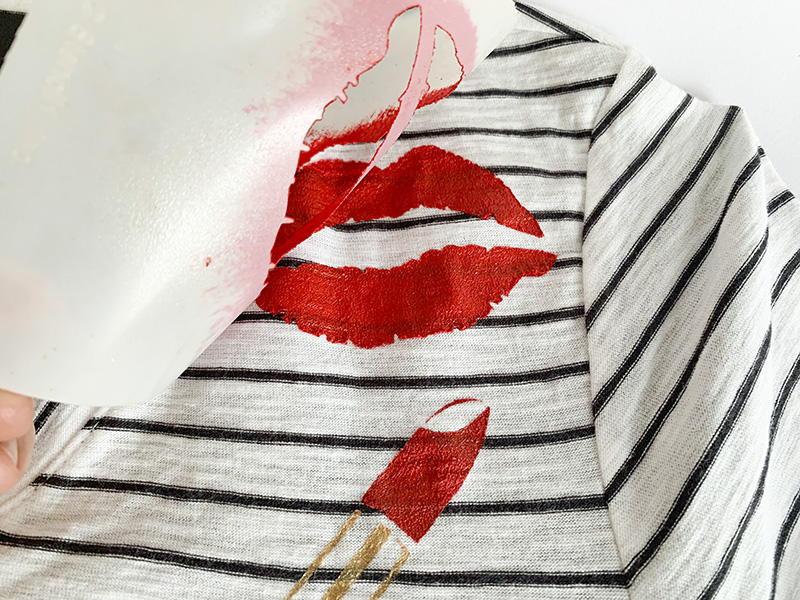
Dry the lipstick design and place and paint the lips next. No need to wait for it to dry, lift up your stencil and see your work!

How hot is this top?! Wear it proud and send us your stenciled t-shirt images to @stencil1 so we can share them on the blog!


We love to customize and denim is probably our favorite canvas! A customized denim jacket is just what you need to be a one of a kind fashionista.

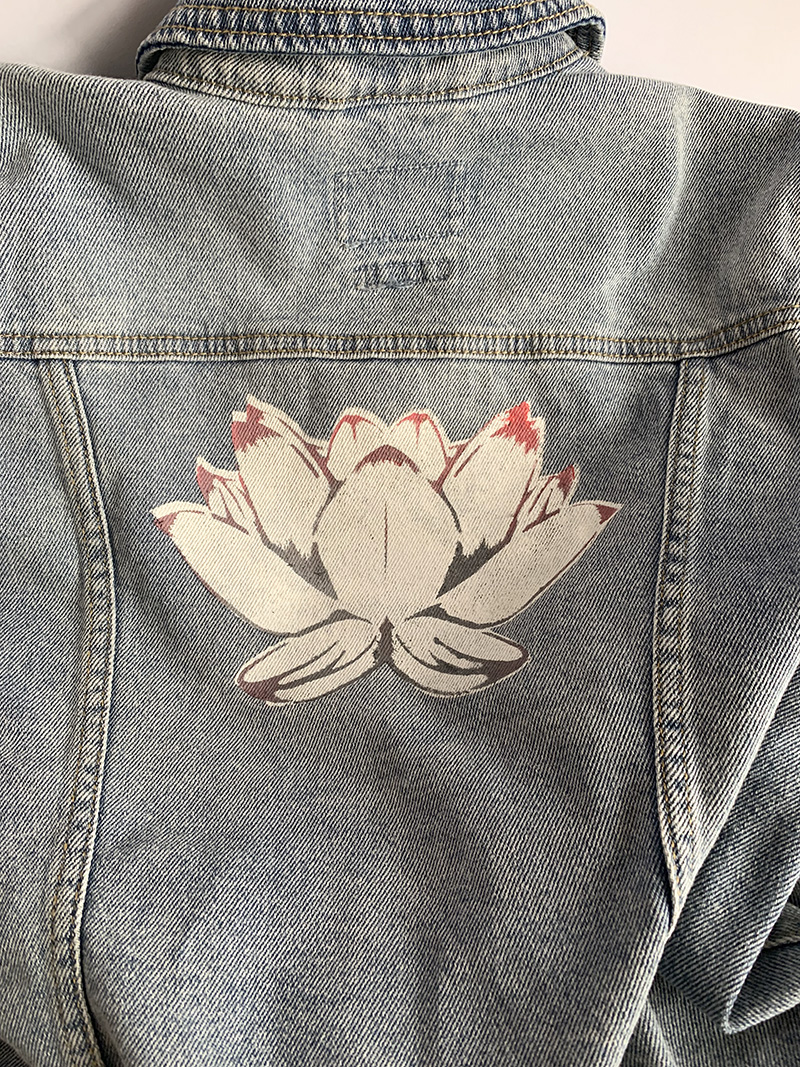
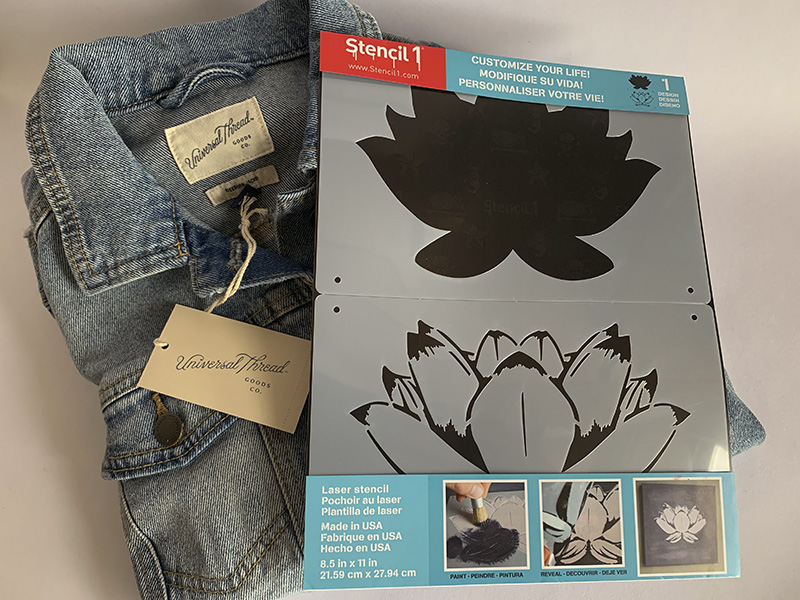
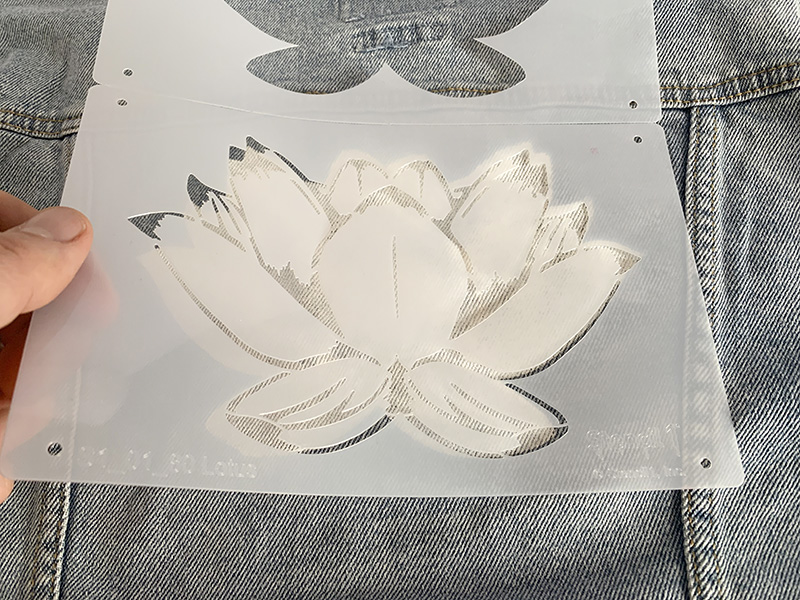
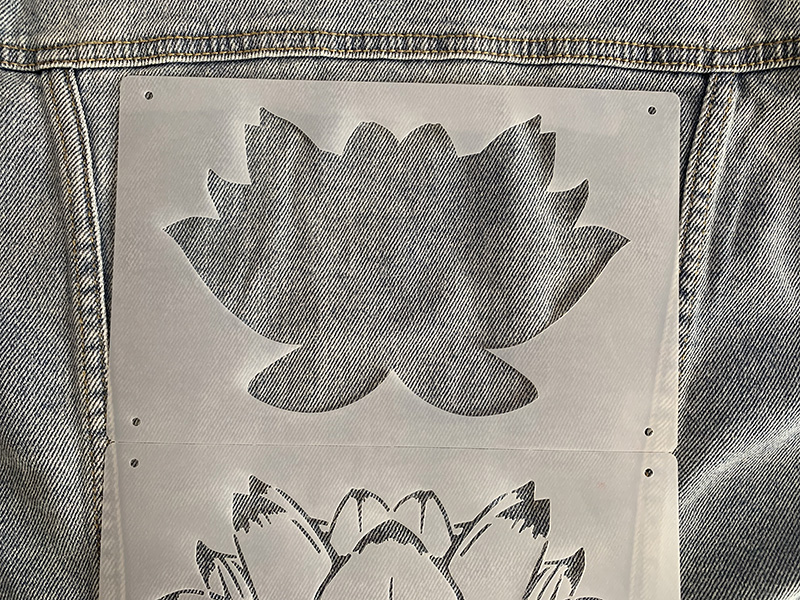
We grabbed a Universal Thread denim jacket from Target and used our two-layer lotus stencil, also available at Target.

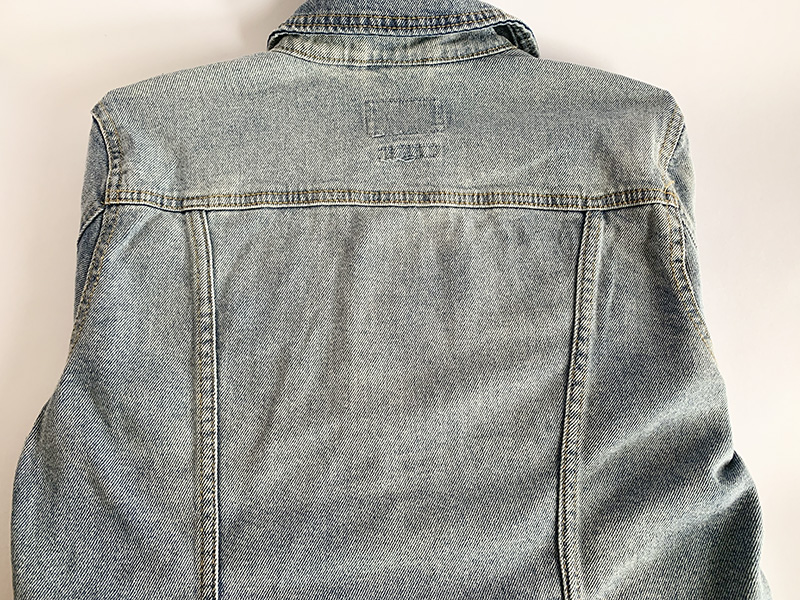
Start by putting a sheet of cardboard inside the jacket. This creates a firm surface to stencil on and keeps paint from seeping through the jacket.

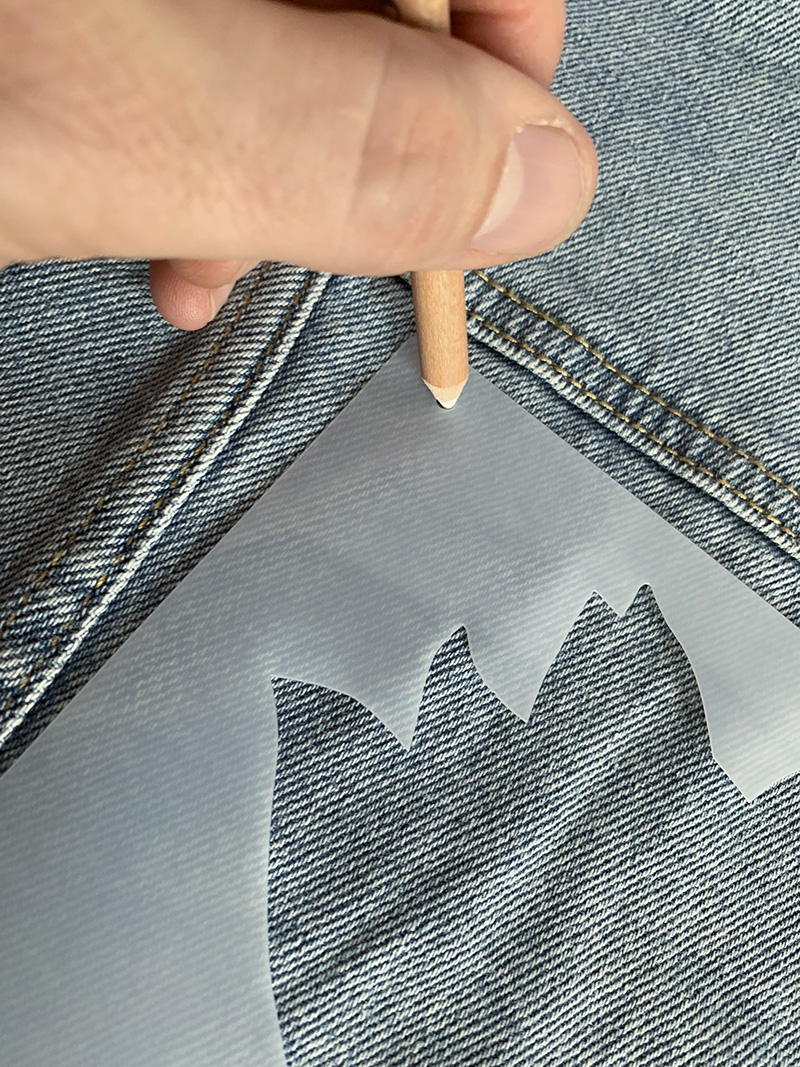
Place the silhouette or outline stencil where you want your lotus to appear. You can separate these stencils or leave them together as seen here.

The four cutout circles in each corner are registration marks, they help you line up the second stencil right over the work you will do with the first stencils. You can make small pencil or chalk pencil marks in the registration marks or you can just eyeball layer two’s placement.

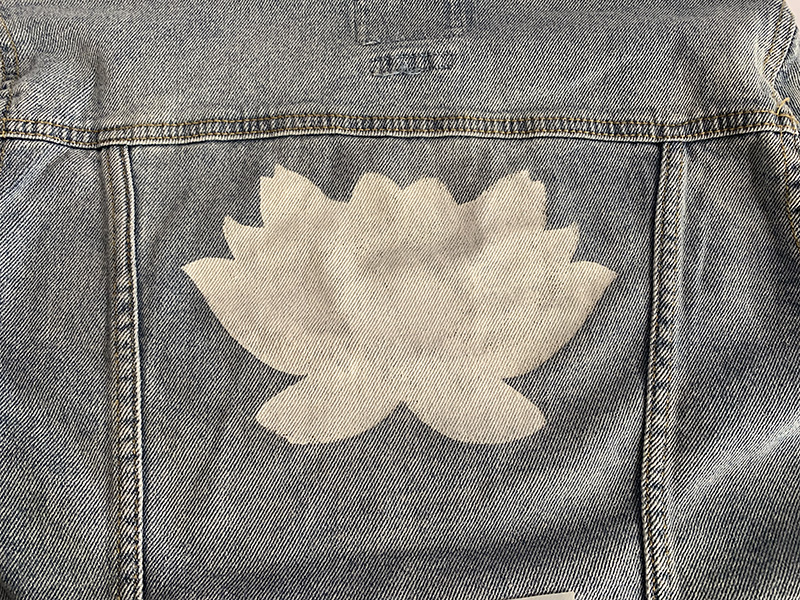
Paint in a few coats for the silhouette, we used white.

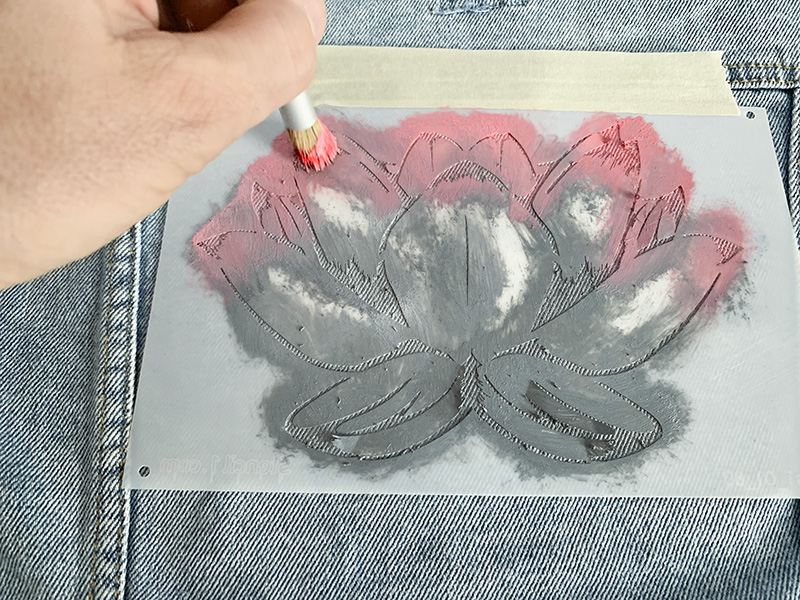
Once that silhouette painting is dry, you can place the second detailed stencil on top of the silhouette.

Here’s where you can get creative, we used two colors for an ombre effect. You could of course do this with the silhouette as well. We painted pink at the tips of the petals, gray on the rest and then once the pink brush had very little paint on it, swirled the pink paint down into the gray area a bit where the colors met.

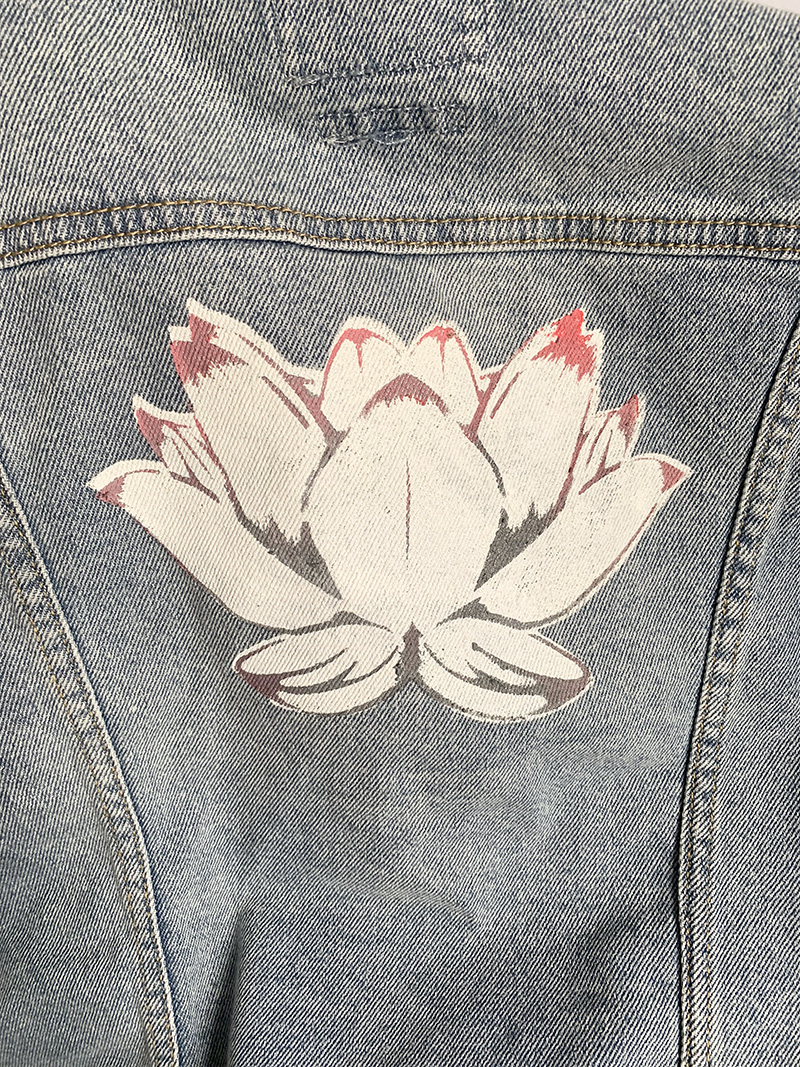
Here’s the result! An ombre white lotus stenciled denim jacket! Please share all your stenciled denim creations with us at @stencil1 THANKS!


FOR IMMEDIATE RELEASE

BROOKLYN, New York—March 17, 2019 — Stencil1® launches a design-focused capsule collection at Target stores nationwide. Offering stencils for every season, designer Ed Roth takes you through a year of fun, DIY projects. For spring, start with the glam Diva 4-pack, featuring a stiletto heel, diamond ring, lipstick and a lipstick kiss. Summer offers a carnival of cool treats with ice cream cones and popsicles. Fall spotlights a birch tree and antlered deer. Lastly, winter serves up the eternal symbol of rebirth, a lotus blossom.  You will notice a new look to the packaging as well, with inspiring how to project photos and instructions in English, Spanish, and French. These designs are available in Target stores starting March 17, 2019.

“Having Stencil1 in Target is exactly where I’ve wanted to be,” says Ed Roth. “We’ve evolved and our retail locations should reflect that. We maintain a global perspective, though are still exclusively made in the USA. I find inspiration everywhere from the street art I see during my neighborhood walks to my recent trip to Morocco. At Target, we are excited to start connecting to a new audience.”

For this collection, Stencil1 will be publishing numerous DIY projects on its blog and social media, using additional supplies from sister Target lines Hand Made Modern and Hearth and Home with Magnolia. The aim for these activities is accessibility, perfect for anyone, even kids. Stencil1 projects are the ultimate after-school invitation to create.

“When I shop in Target, I see so many families,” Ed says. “I hope to reach kids and their families and let them know that it’s easy to create side by side. They can be creative together and work on everything from embellishing and personalizing clothing to simple construction paper crafts with washable markers or paints. Projects are easy, don’t require complicated supplies and are, most importantly, easy to clean up!”

Kids aside, these projects are for everyone. “I kept almost all the projects at the easy level,” Ed says, “using markers on fabric or just two colors for paintings. I want using these stencils to be a good experience for the first-timer. But there are how-tos for the advanced crafter as well.”

Ed stresses that he’s here to support these creative endeavors. “I am making several videos and blog posts with detailed tips and tricks so that once someone has the stencils in hand, they know what to do and where to go with their project if they need it. But most importantly,” he stresses “I am all for letting kids or anyone have a go at it and see what they come up with!”

Stencil1 is a certified LGBT business enterprise about which Ed says, “I am grateful for Target’s Supplier Diversity program. I met with their team and feel very appreciative of this program.”

About Stencil1®: Stencil1® is a Brooklyn-based modern design and décor company founded by Ed Roth in 2004. The brand’s focus is on revitalizing the craft and décor market with innovative tools of the trade and beautiful trend-forward product. Providing customers customization tools to enhance their lives and create beautiful one of a kind art, design and decor items is our mission. Stencil1® has collaborated with a diverse list of companies, including Levi’s, Anthropologie, Converse, Sharpie, Etsy, and the Ace Hotel. In addition, Ed is the author of six stencil design books with Chronicle Books.

For more information – sales, samples or product information – please contact the following:

Ed Roth / Stencil1.com

info@stencil1.com
###