Στο νέο online παιχνίδι καζίνο του Nine Casino, εμπνευσμένο από τον κόσμο της κατασκευής στένσιλ, οι παίκτες μπορούν να δημιουργήσουν τα δικά τους μοναδικά μοτίβα για να ξεκλειδώσουν ειδικά επίπεδα παιχνιδιού. Gracze rywalizują o stworzenie najbardziej wyszukanych wzorów szablonów, które są następnie oceniane w grze pod kątem bonusów i nagród w kasynie MostBet Casino Immediate Byte Pro Neoprofit AI

Beginner Art Journaling in 5 Easy Steps…
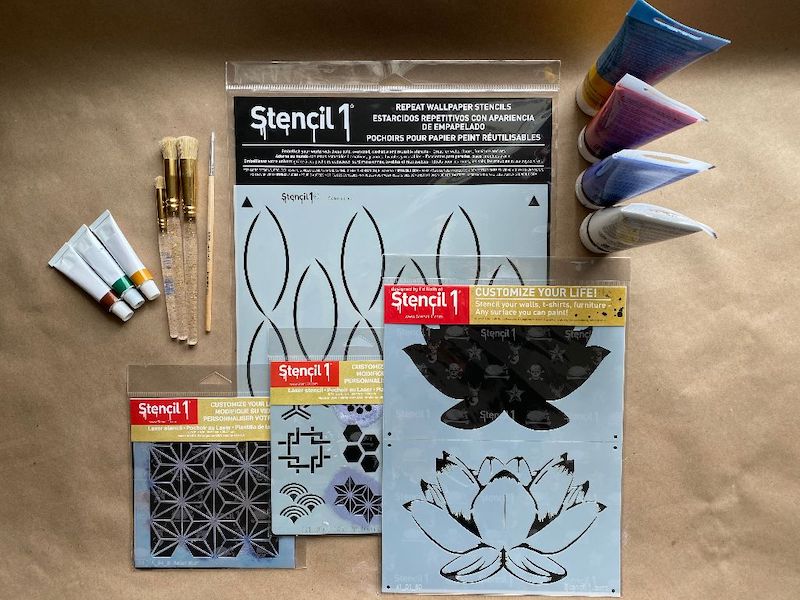
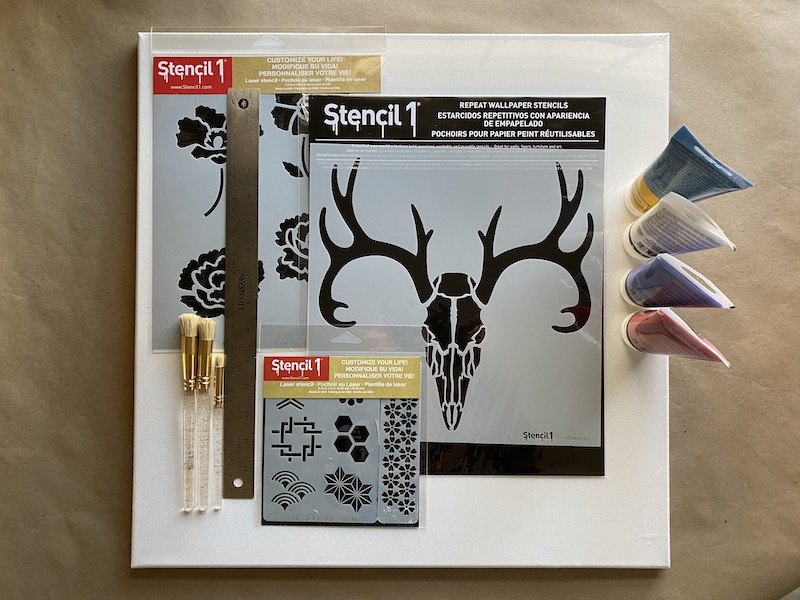
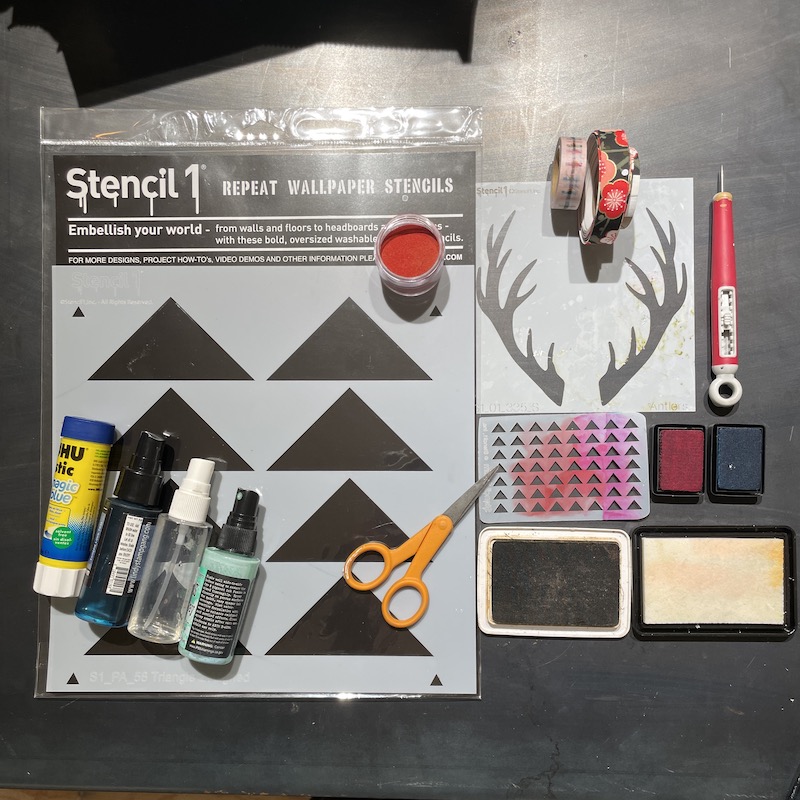
Materials Needed:

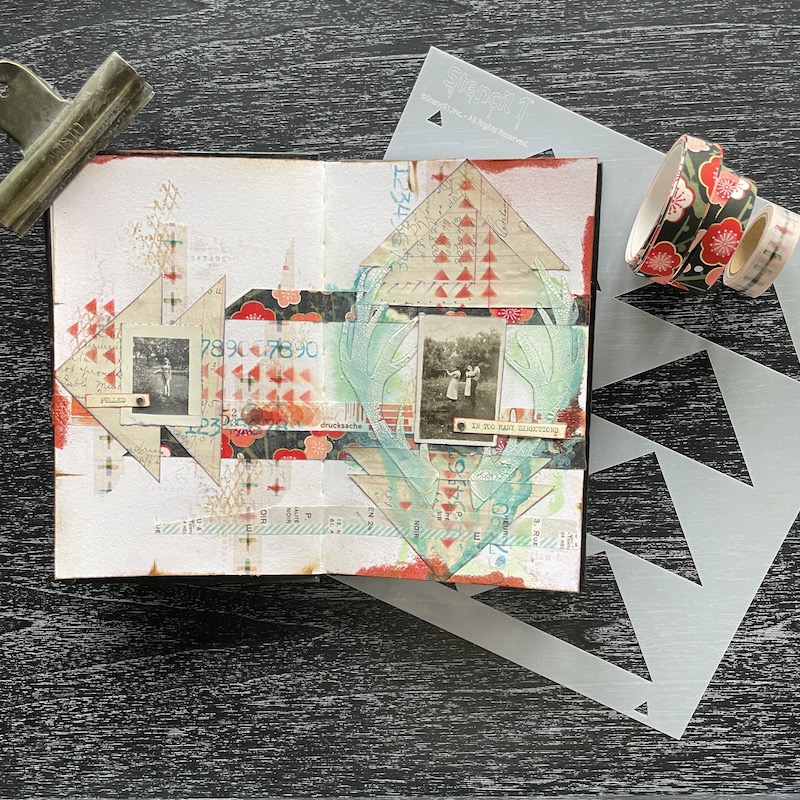
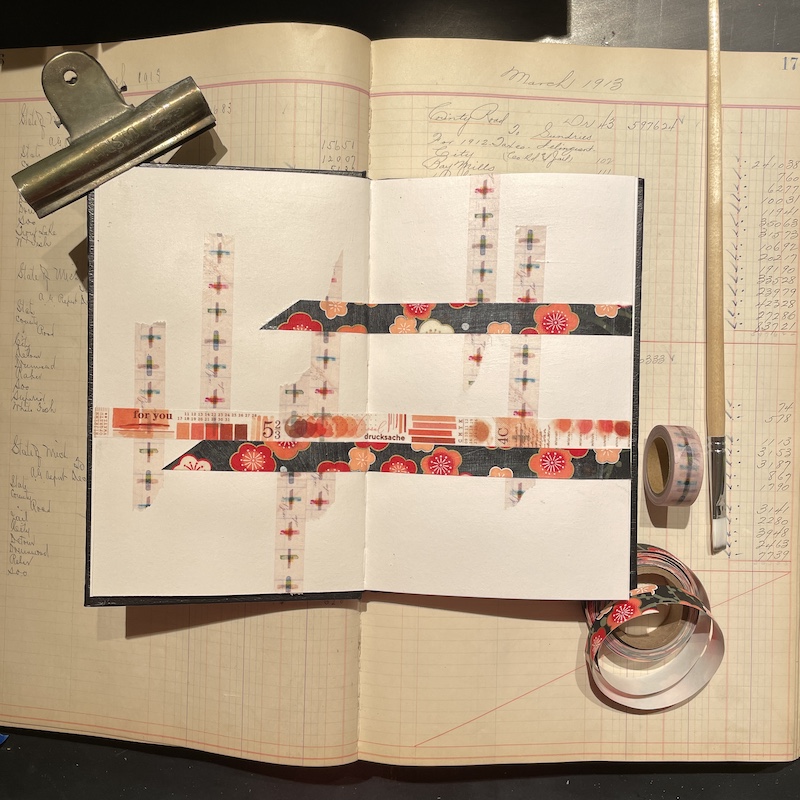
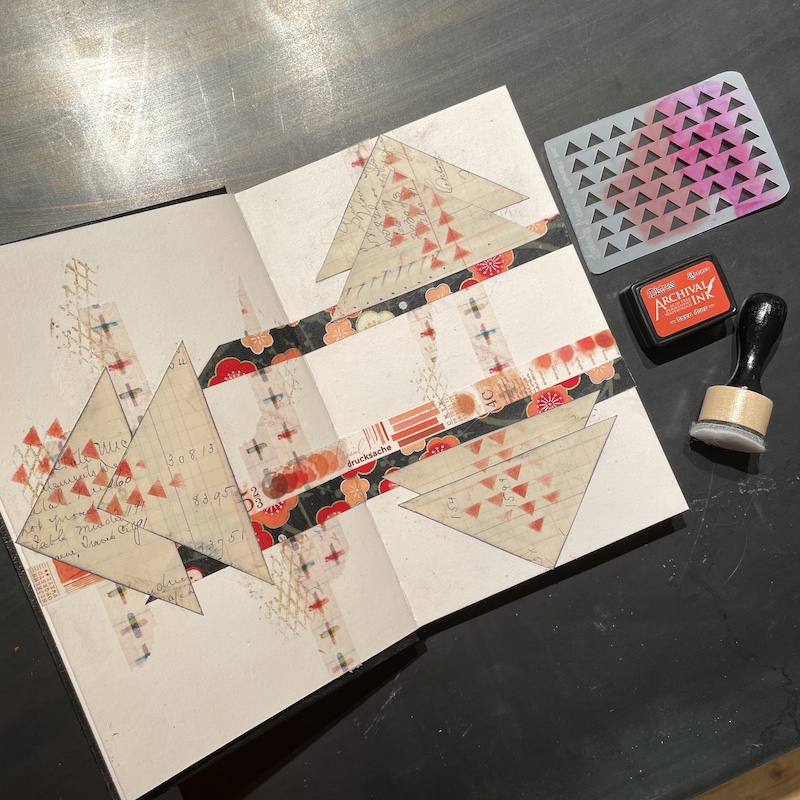
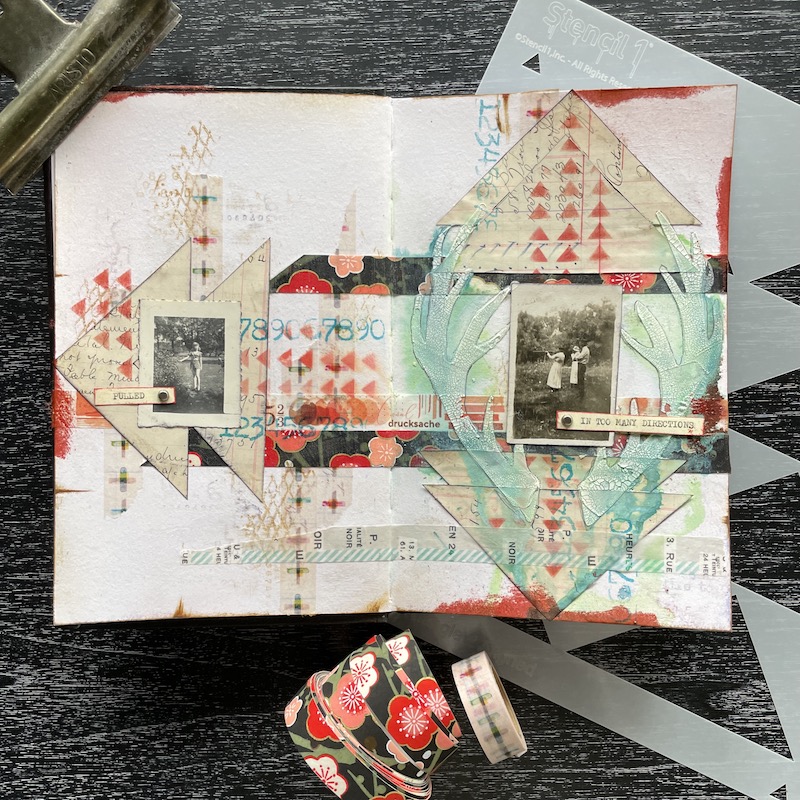
Step #1 Washi Layer: Place several washi tapes down in a pleasing pattern across your pages. Add glue stick under the tape for permanence and a layer of clear gesso over top.

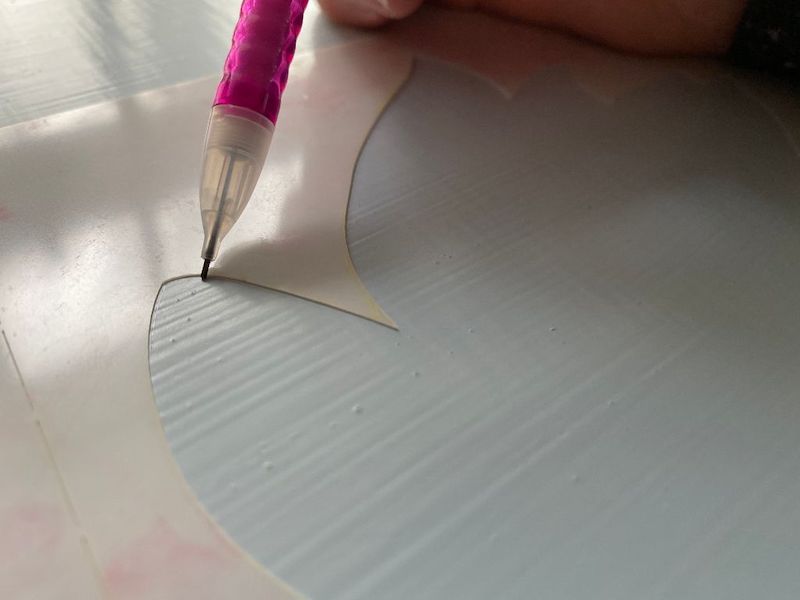
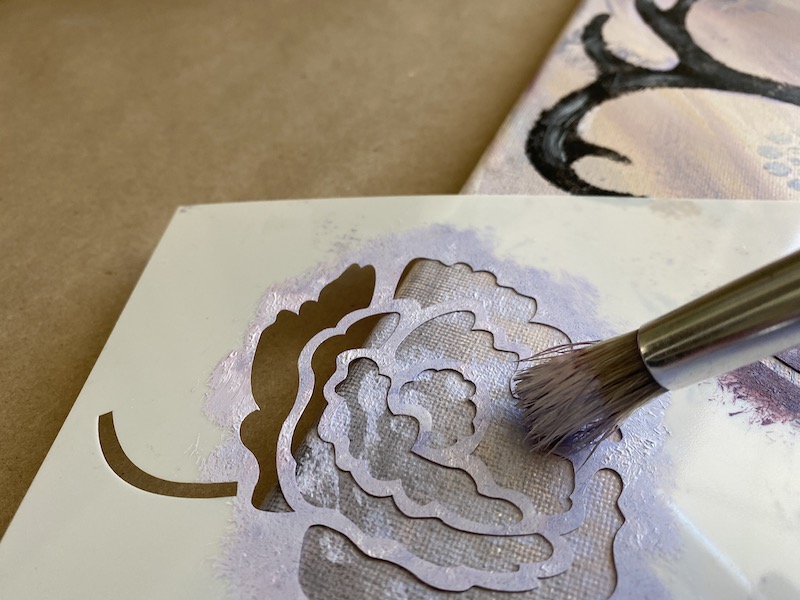
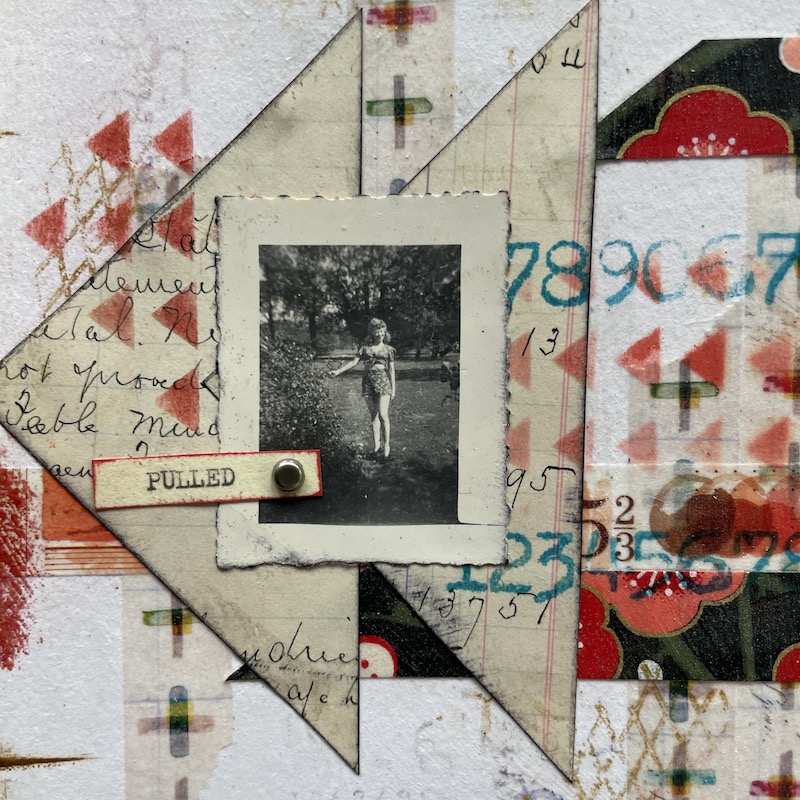
Step #2 Collage and Stamping: Using an old ledger page (or any collage paper you may have on hand) trace the Triangles 2 Aligned Stencil with a pencil and cut out triangles.

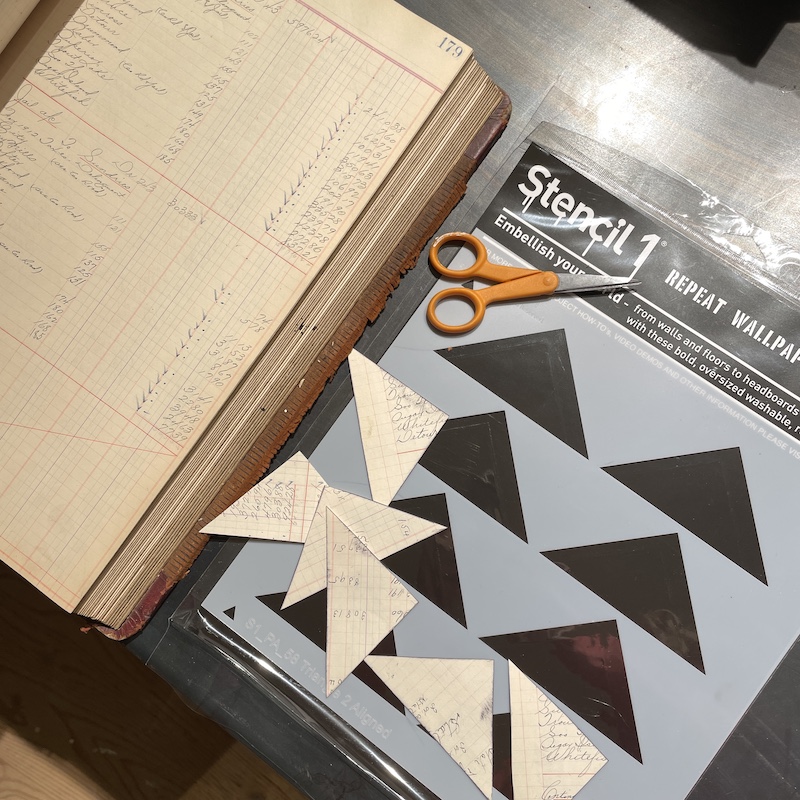
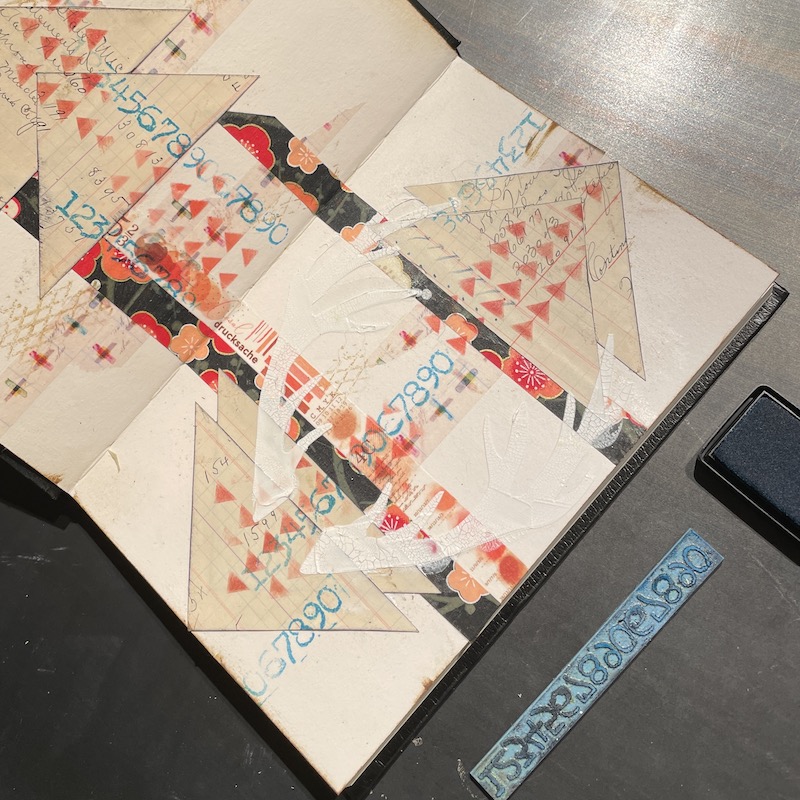
Step #2 Continued: Place triangles down in a pattern of your choosing, I overlapped mine. Glue down with a glue stick and cover in clear gesso. Add some stamping in red ink through the small triangle stencil in the Patterns 8 Pack Stencil to marry all the elements. I also added brown ink to a chain-link rubber stamp in a few areas and teal ink with a numbers stamp.

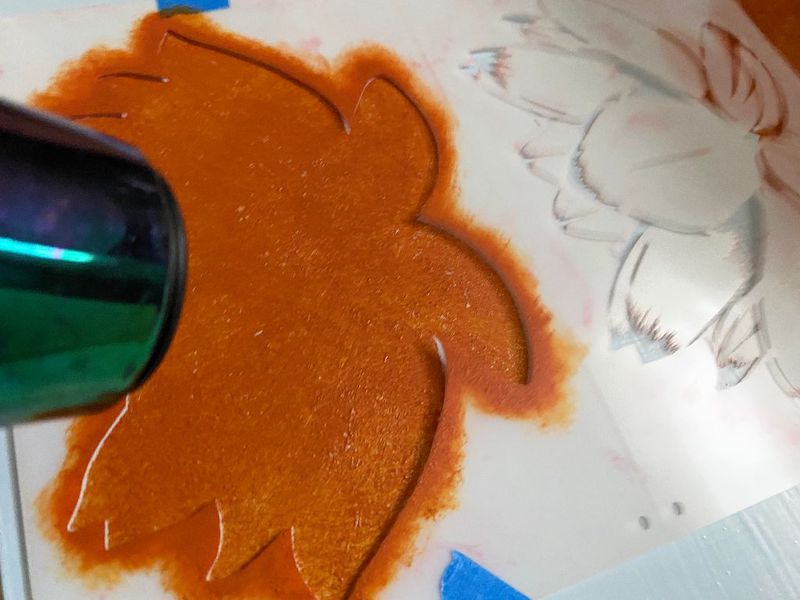
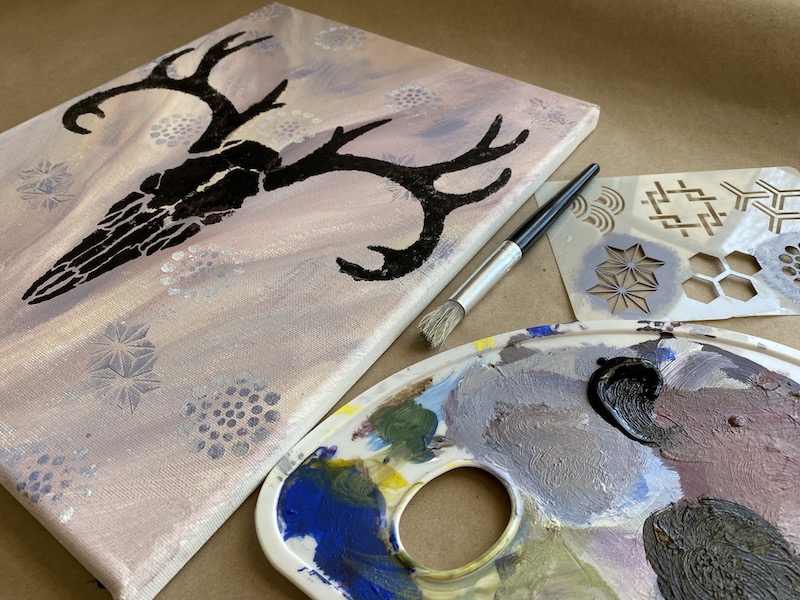
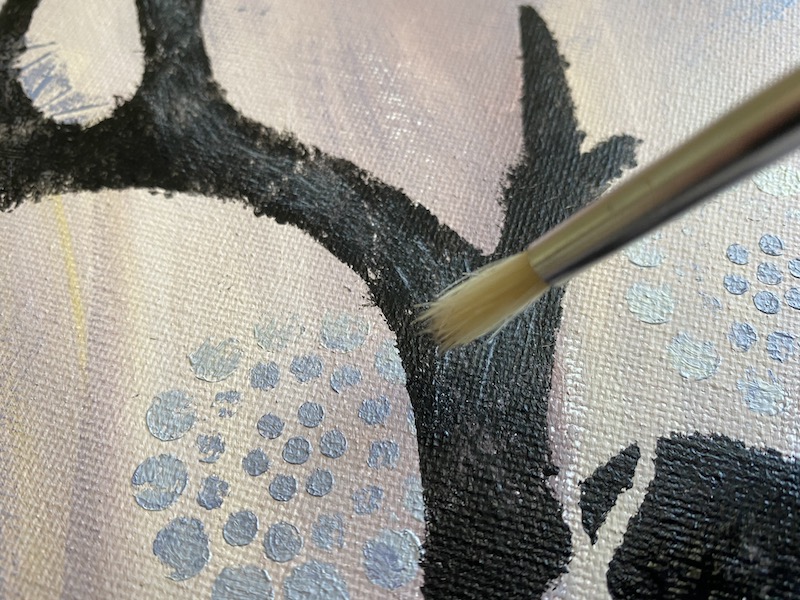
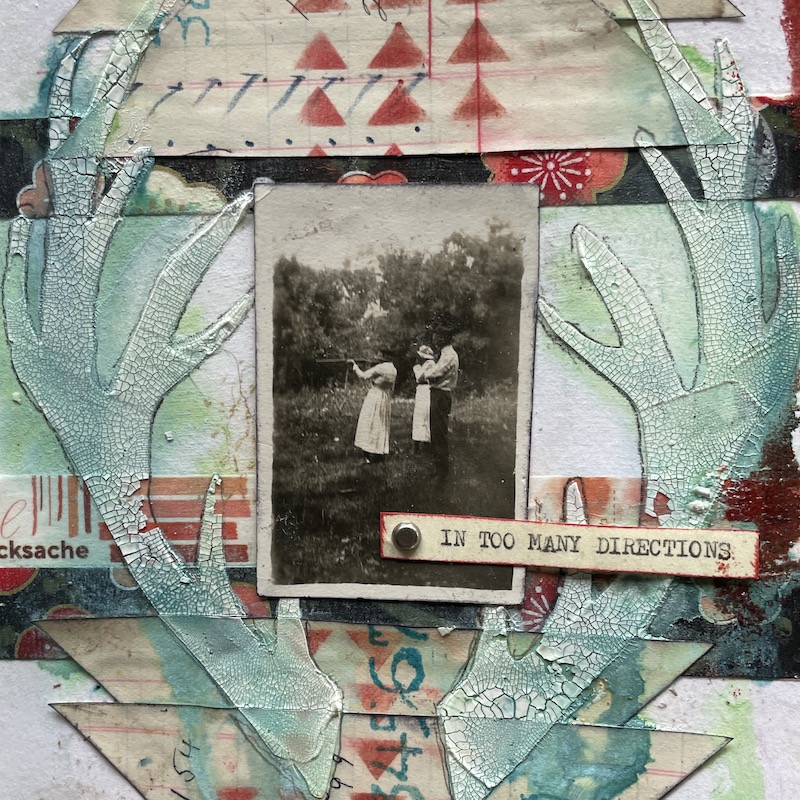
Step #3 Stencils: Place the Antlers Small Stencil down over the collage elements and hold in place with washi tape. Using a palette knife or gift card, spread crackle paste through one antler at a time when dry. Let crackles appear without heat setting for the best effect. 😉

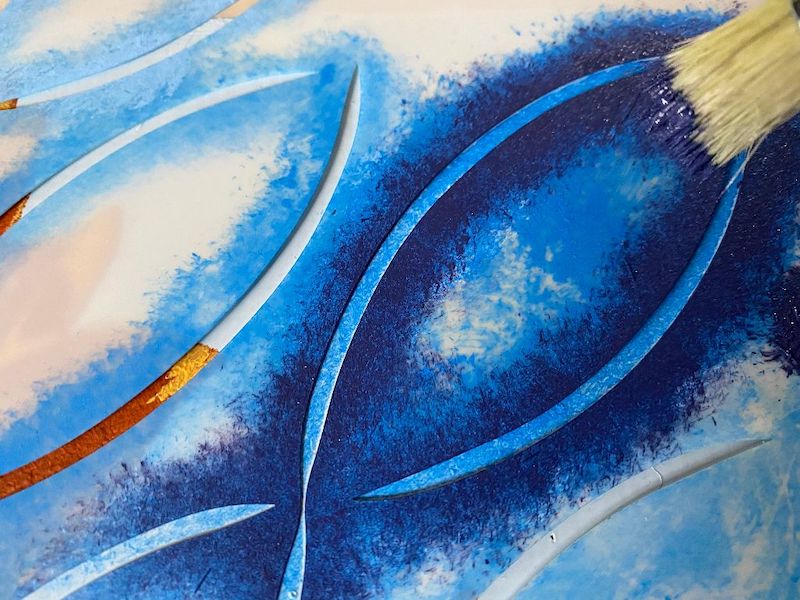
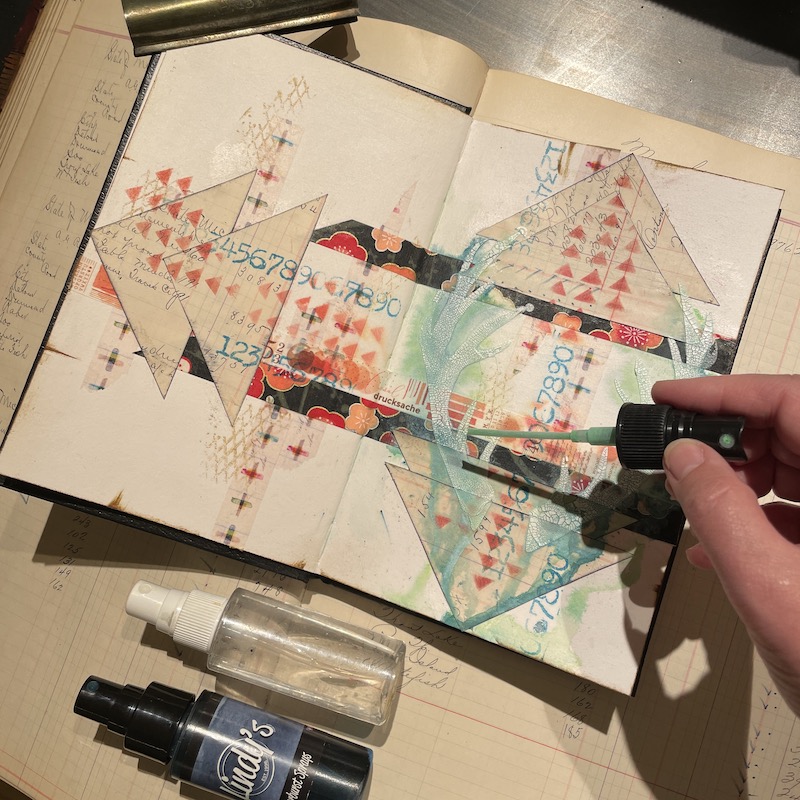
Step #4 Spray Inks: Color the Antlers with your favorite spray ink, I spritzed water over the crackle paste and used the applicator out of the bottle to touch around edges. (you could also substitute watercolors or water-soluble crayons or watered-down acrylic paint here if you don’t have spray inks. Build up with a few colors after heat setting.

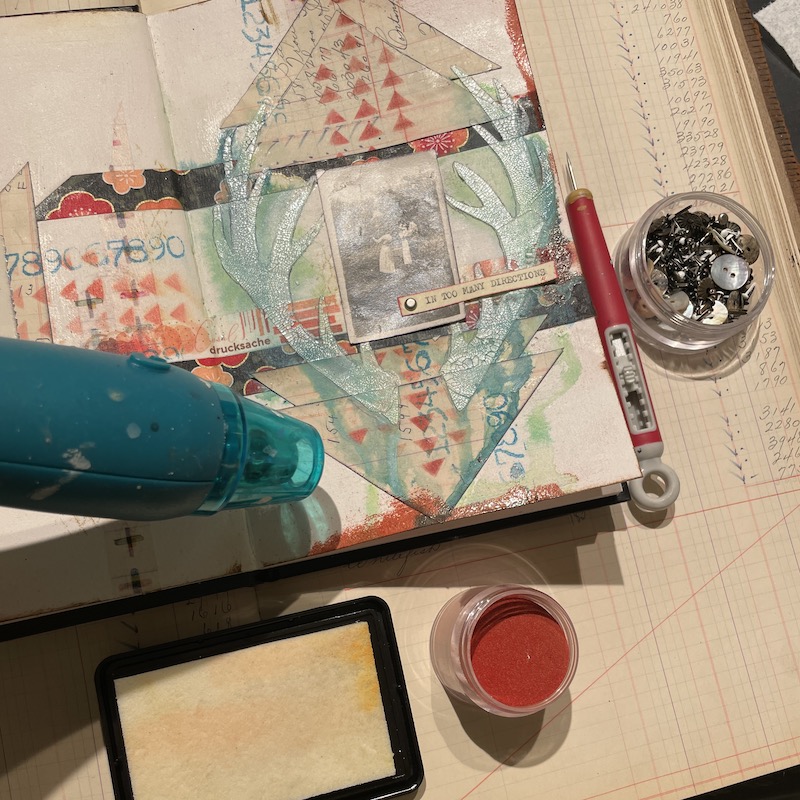
Step #5 Focal Point and Edges: Select 1 or 2 photos to place as a focal point, ink edges so they stand out, and glue down. I typed the phrase “pulled in too many directions” and affixed it with small metal Brads through both pages. The final detail consisted of edging the outside of all the pages with brown ink and smudging some clear embossing ink in a few spots around the edges. Heat set red baked texture powder for some edging drama.

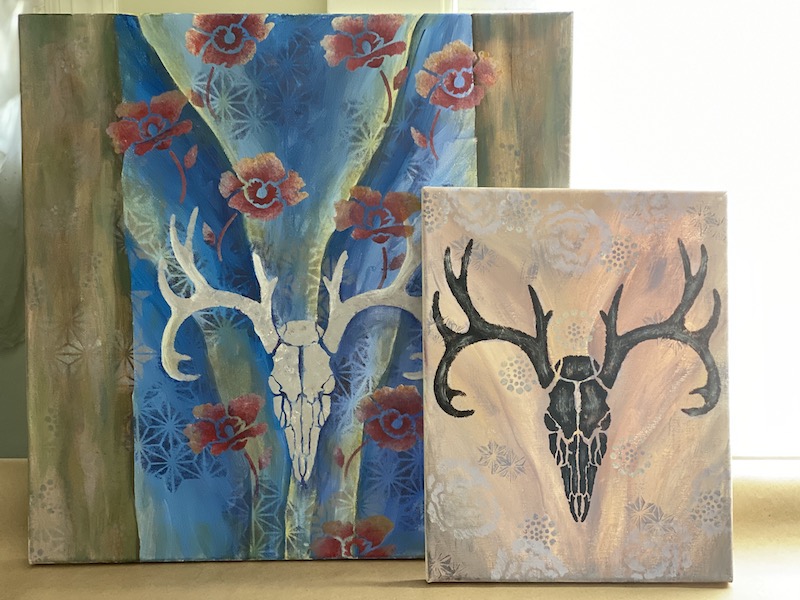
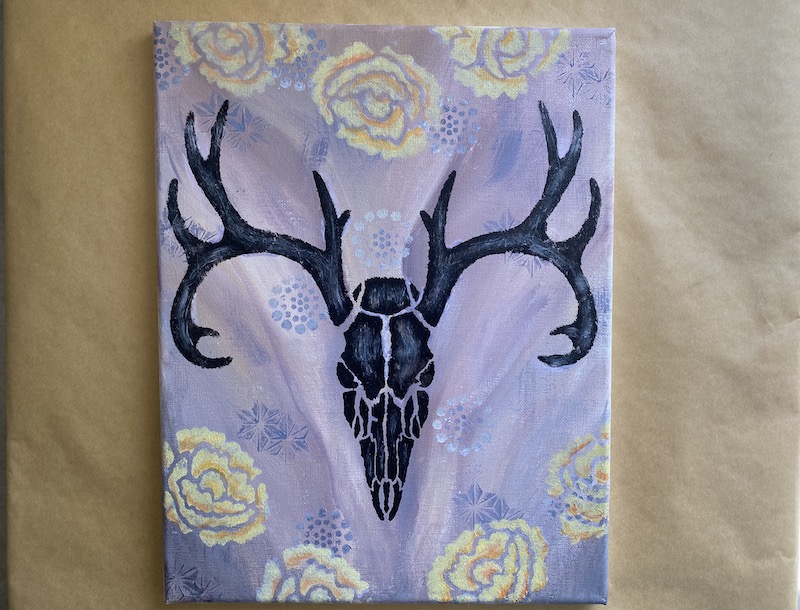
Here Are The Details!

Happy Journaling,
Tracy
@anonymous.palette

Do you create Mixed Media and papercrafts with Stencil1?
Please share with us on social @Stencil1 and #stencil1 


If you need inspiration it’s right here! Pride Month can be a great time to show your pride and your support of the LGBTQA+ community. Our Stencils work great for any quick signs or window installations, making t-shirts, cards, prints, or artwork. Showing your support and love will keep all of us fighting for basic human rights. The LGBTQA+ family should feel welcomed everywhere.

BE sure to scroll down on how to use these stencils and see some fun past Pride events we hosted!

A Fun Chalk Mural
Levi’s X Stencil1 DIY Event!
The Love Stacked Stencil Looks Great On Anything!
In Residence Showcase

Here’s a How-to Video Using the Equality 4 Pack Stencil

A Quick How To Video On an Ombre Effect on a Shirt

STENCIL1 Stencils make posters, window signs, t-shirts, and art all about Equality and Pride, a breeze. Here are our favorite stencils for these projects.

Unicorn Silhouette Stencil
Unicorn Silhouette Stencil Small
Rainbow Stencil
Love Stacked Stencil Small
Love Stacked Stencil
Equality Stencil 4 Pack
Stripes on Heart Stencil
Heart Dripping Small Stencil
Rainbow, Unicorn 4 Pack Stencil

Please share your PRIDE-ful Stencil1 creations with is @Stencil1 and #stencil1 Thanks!


Materials Needed:

Color Mixing

For this project, I used a pallet of muted spring colors. A mix of red and orange with a splash of green to dull it down for the lotuses with a mustard yellow made by mixing the deep yellow with what I used for the first layer of the lotuses. The blues I used for the Soft Chain Stencil were a mix of ultramarine and cobalt. The green I used for the leaves and in the radial pattern and Asian star pattern was a combination of deep yellow, cobalt blue, titanium white, and scarlet red. For the very muted purple, I added more cobalt blue and scarlet red to the green I had mixed. 

Process

I refinished my table first, but if you already have the surface you are happy with, you can skip this step. First, I lightly sanded and primed my table with a high quality water based furniture primer. I chose a pale blue latex paint for the table so my stencil patterns would stand out.

When dry, I used a yardstick to draw an X from corner to corner to ensure my pattern would be evenly distributed. I used two simple lines and based the placement of my stencils on that. No measuring or math was used in this project but if you are a stickler for symmetry, you may want to incorporate some of that.

I started painting with a burnt orange that I had mixed up and used a lightly loaded dry brush first and then did a second coat, using the stippling technique, building up two layers of paint. After painting in each coat, I used a blow dryer to keep the process moving along while avoiding smearing the paint already applied. Once all four lotuses were painted in, I painted in the second layer of the lotus stencil highlighting the flower with a mustard yellow, again using the dry brush, tapping technique.

For the Soft Chains Stencil on the corners, I used a teal in a dry first layer, then went back over with a deeper blue. Each time using very little paint and tapping with the brush to build layers and texture. Once that was dry, I added a free hand-painted leaf shape within each of the Soft Chain shapes in pale green. I felt it added balance to the design and fit in with the flower design.

Lastly, I used a very muted purple to paint in the center for the Asian Star stencil. My original pencil guidelines were still visible and I used that again as a guide to line up my stencils. After the light coat of purple, I went back in with the green I had used for the leaves on the corners and lightly peppered in some highlights. As a final touch, I used the same purple and green combo of colors to paint in the small radial design stencil in the corners.

This project was challenging and fun for me and it was really enjoyed the process as well as the finished product. I hope you do as well!

This project was made by our lovely friend, Teri @tjaneiro2 on Instagram
Please share your creations with us @stencil1.com


This project was a definite nod to the great artist Georgia O’Keefe. Ahead of her time in her work, she paved the way for women artists in Modern Art. From minimalist cityscapes to sensual flowers and glorious landscapes, her work is known around the world and inspired artists for decades.

Materials And Supplies:

Process

Color mixing

For this project, I mixed up some purples, pinks, and yellows to start. I used a lot of titanium white and mixed up a few darker hues to create a lot of shading and gradation for the background.

Step by step process

For the background, I painted out a few dark brown paint strokes using lines that would mimic the shape of the skull. I did some basic shading and gradation with different values adding white and blending pinks and yellows on the canvas.

Next, I stenciled in the radial pattern and Asian star pattern using colors already mixed on my palette and used variations of the colors I used in the background painting. I wanted the stencils to blend in but add texture and interest. I loaded the brush frequently and no water was added,  allowing for thicker layers of paint while preventing bleeding under the stencil. I used a small stencil brush for the radial pattern, tapping the thick paint on while holding the edges of the stencil down firmly. For the Asian star pattern, I used a flat paintbrush to sweep across the stencil in a few quick strokes to give the impression of the shape and uneven texture I was looking for.

Then, I mixed black and brown for the skull. I wanted the skull to have texture and be pretty solid in color, so I mixed up a little more color for that than usual. No water was added and I reloaded the brush frequently to get the amount of paint on the canvas that I wanted but built it up a little at a time. I used the tapping technique with a medium stencil brush, ensuring to press the edges of the stencil down firmly as I applied the paint.  After it dried, I applied highlights to the skull with dry-brushed light purple paint.

The final step was to use the stencil to paint seven flowers to create a border. The first layer was pale pink, then I went over that with a bright yellow with orange for shading and depth.

I had a lot of fun mixing colors and playing with sizes. A lot of the color mixing happened on the canvas, it was a really freeing process and the results were so different each time. I hope you have as much fun with this project as I did!

This project was made by our lovely friend, Teri @tjaneiro2 on Instagram
Please share your creations with us @stencil1.com


Stencils and Glass? Yes it’s a thing, a good thing!

BYOS – Bring Your Own Stencils, that’s what I did…to a glass making studio! Stencils can be used in so many mediums and my experimentation with glass produced some beautiful results if I do say so myself :). Here is how I used Stencil1 stencils with glass to make a hummingbird glass window ornament:

Materials You Will Need:

  • Detailed Birds Stencil 4 Pack
  • Tape
  • Glass Dust
  • Detail Brushes
  • Solvent
  • A Sturdy Flat Surface
  • A Small Spoon
  • Elmers glue
  • A Stove or Kiln or all this in a glass studio

I wanted to work on an optimistic, Spring themed image and the hummingbird was a perfect choice. It’s also great because it is a stencil design with a lot of bold open shapes, perfect for filling with glass powder!

I was provided a 7″ x 7″ white sheet of glass, that’s my surface for today! You have to wipe it clean with alcohol, no oil should be on the surface. I then planned the layout of the design and thought it might look best to turn my square glass shape to a diamond-like position and attach a chain to the top point for hanging.

I brushed in a little bit of watered down glue into the wing area and then sprinkled in glass powder.

I continued the process with a few colors of powdered glass. you can see here that I am creating ombre blended effects by the way I sprinkle the dust. I also always use my darker colors on face details, it helps to really see the detail of those features!

Here’s a shot of the different glass dust colors the studio offered. I love supporting small, local businesses like this. You don’t have to buy all the supplies, just visit, create, and everyone is happy! But yea, I also was like so how much is a kiln, haha! The art is addictive!

I also created a frame around the piece using these long sticks of glass, similar to hard pasta. It looked a little too structured for my taste so see what I did next…

I added these chunkier glass pieces around the edges to add some “atmosphere” to my little birds world. It adds some whimsy and texture. I then used a tweezer to adjust them to the composition I wanted.

Notice how I cut a small triangle shape up top and layered my hook in the layers of glass, a hook sandwiched between two pieces of white glass. The piece of white glass you see above the art piece is being used to simply prop up my hook so it doesn’t flop down while the glue is drying it inside the “sandwich”.

Once you remove the stencil, add your other elements of glass, you can use small tools to clean up your design. You can push some sand around, move shards around, and get it all to it’s final position before it get’s fired.

Your stencil has done it’s purpose and can be washed with warm soapy water. It’s ready for storage and to be used many more times!

The design was then spritzed with a very thin glue spray, almost like hairspray.

The piece was then placed on special paper that it sits on in the kiln. That’s me Eddie 🙂

Here’s a shot of the piece all finished, I am so happy with how the dust gets darker. Oh, forgot to mention I placed a small black glass bead for the eye. I think the eyes should pop in an image so this little bird got a nice dark eye.

Once completed, hang your piece proud! As shops reopen, please search for your local glass studios and bring Stencil1 stencils with you to try this technique. We would love to see what you make!

Please share your creations with us @stencil1.com


January 9, 2020

Here’s a wearable DIY for you – Handmade stencil-designed Sweatshirt and T-shirt. Here are the steps to make your own:

All you need is a T-shirt, LOVE stencil, black & white paint, paintbrush, and a plate to pour the paint on.

Place the Love Stencil (8.5×11) on your t-shirt. Use tape to create extra borders around the stencil. The tape is an optional step to make sure paint does not go over the stencil.

Pour out some red and black paint on a plate. We used Pebeo Setacolor fabric paint.

Start covering the stencil with red paint. Paint over the entire letters “V” and “E”, and only partially over the letters “L” and “O”. Do gentle tapping motion with your brush to get a better result.

Brush over the rest of the stencil with black paint. Go a little bit over the red paint to mix two colors and create an overlap.

Once you are finished painting the stencil, you are ready for the reveal.

Slowly remove the stencil to see the finished work. Let it dry and heat seal with an iron, inside out.

Now you need a sweatshirt and white paint and our Valentine’s Love Stencil.

Choose the desired area where your stencil design will appear. For our project, we chose a sleeve.

Place your stencil on the sweatshirt sleeve. Tape around the stencil borders to make sure no paint will get outside the stencil area. Pour a bit of paint on the plate, get the paint on the brush and start carefully tapping white paint over the stencil.

Once you have covered the entire stencil area with white paint, it’s time to lift the stencil.

Lift to reveal your design. Gently peel off the stencil to see what you have created. Share your wearable art with us @stencil1