Στο νέο online παιχνίδι καζίνο του Nine Casino, εμπνευσμένο από τον κόσμο της κατασκευής στένσιλ, οι παίκτες μπορούν να δημιουργήσουν τα δικά τους μοναδικά μοτίβα για να ξεκλειδώσουν ειδικά επίπεδα παιχνιδιού. Gracze rywalizują o stworzenie najbardziej wyszukanych wzorów szablonów, które są następnie oceniane w grze pod kątem bonusów i nagród w kasynie MostBet Casino Immediate Byte Pro Neoprofit AI
DSC05459

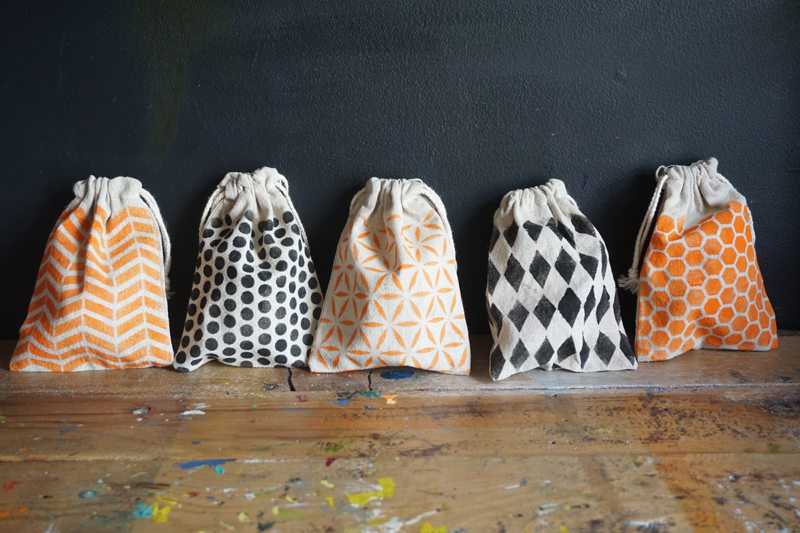
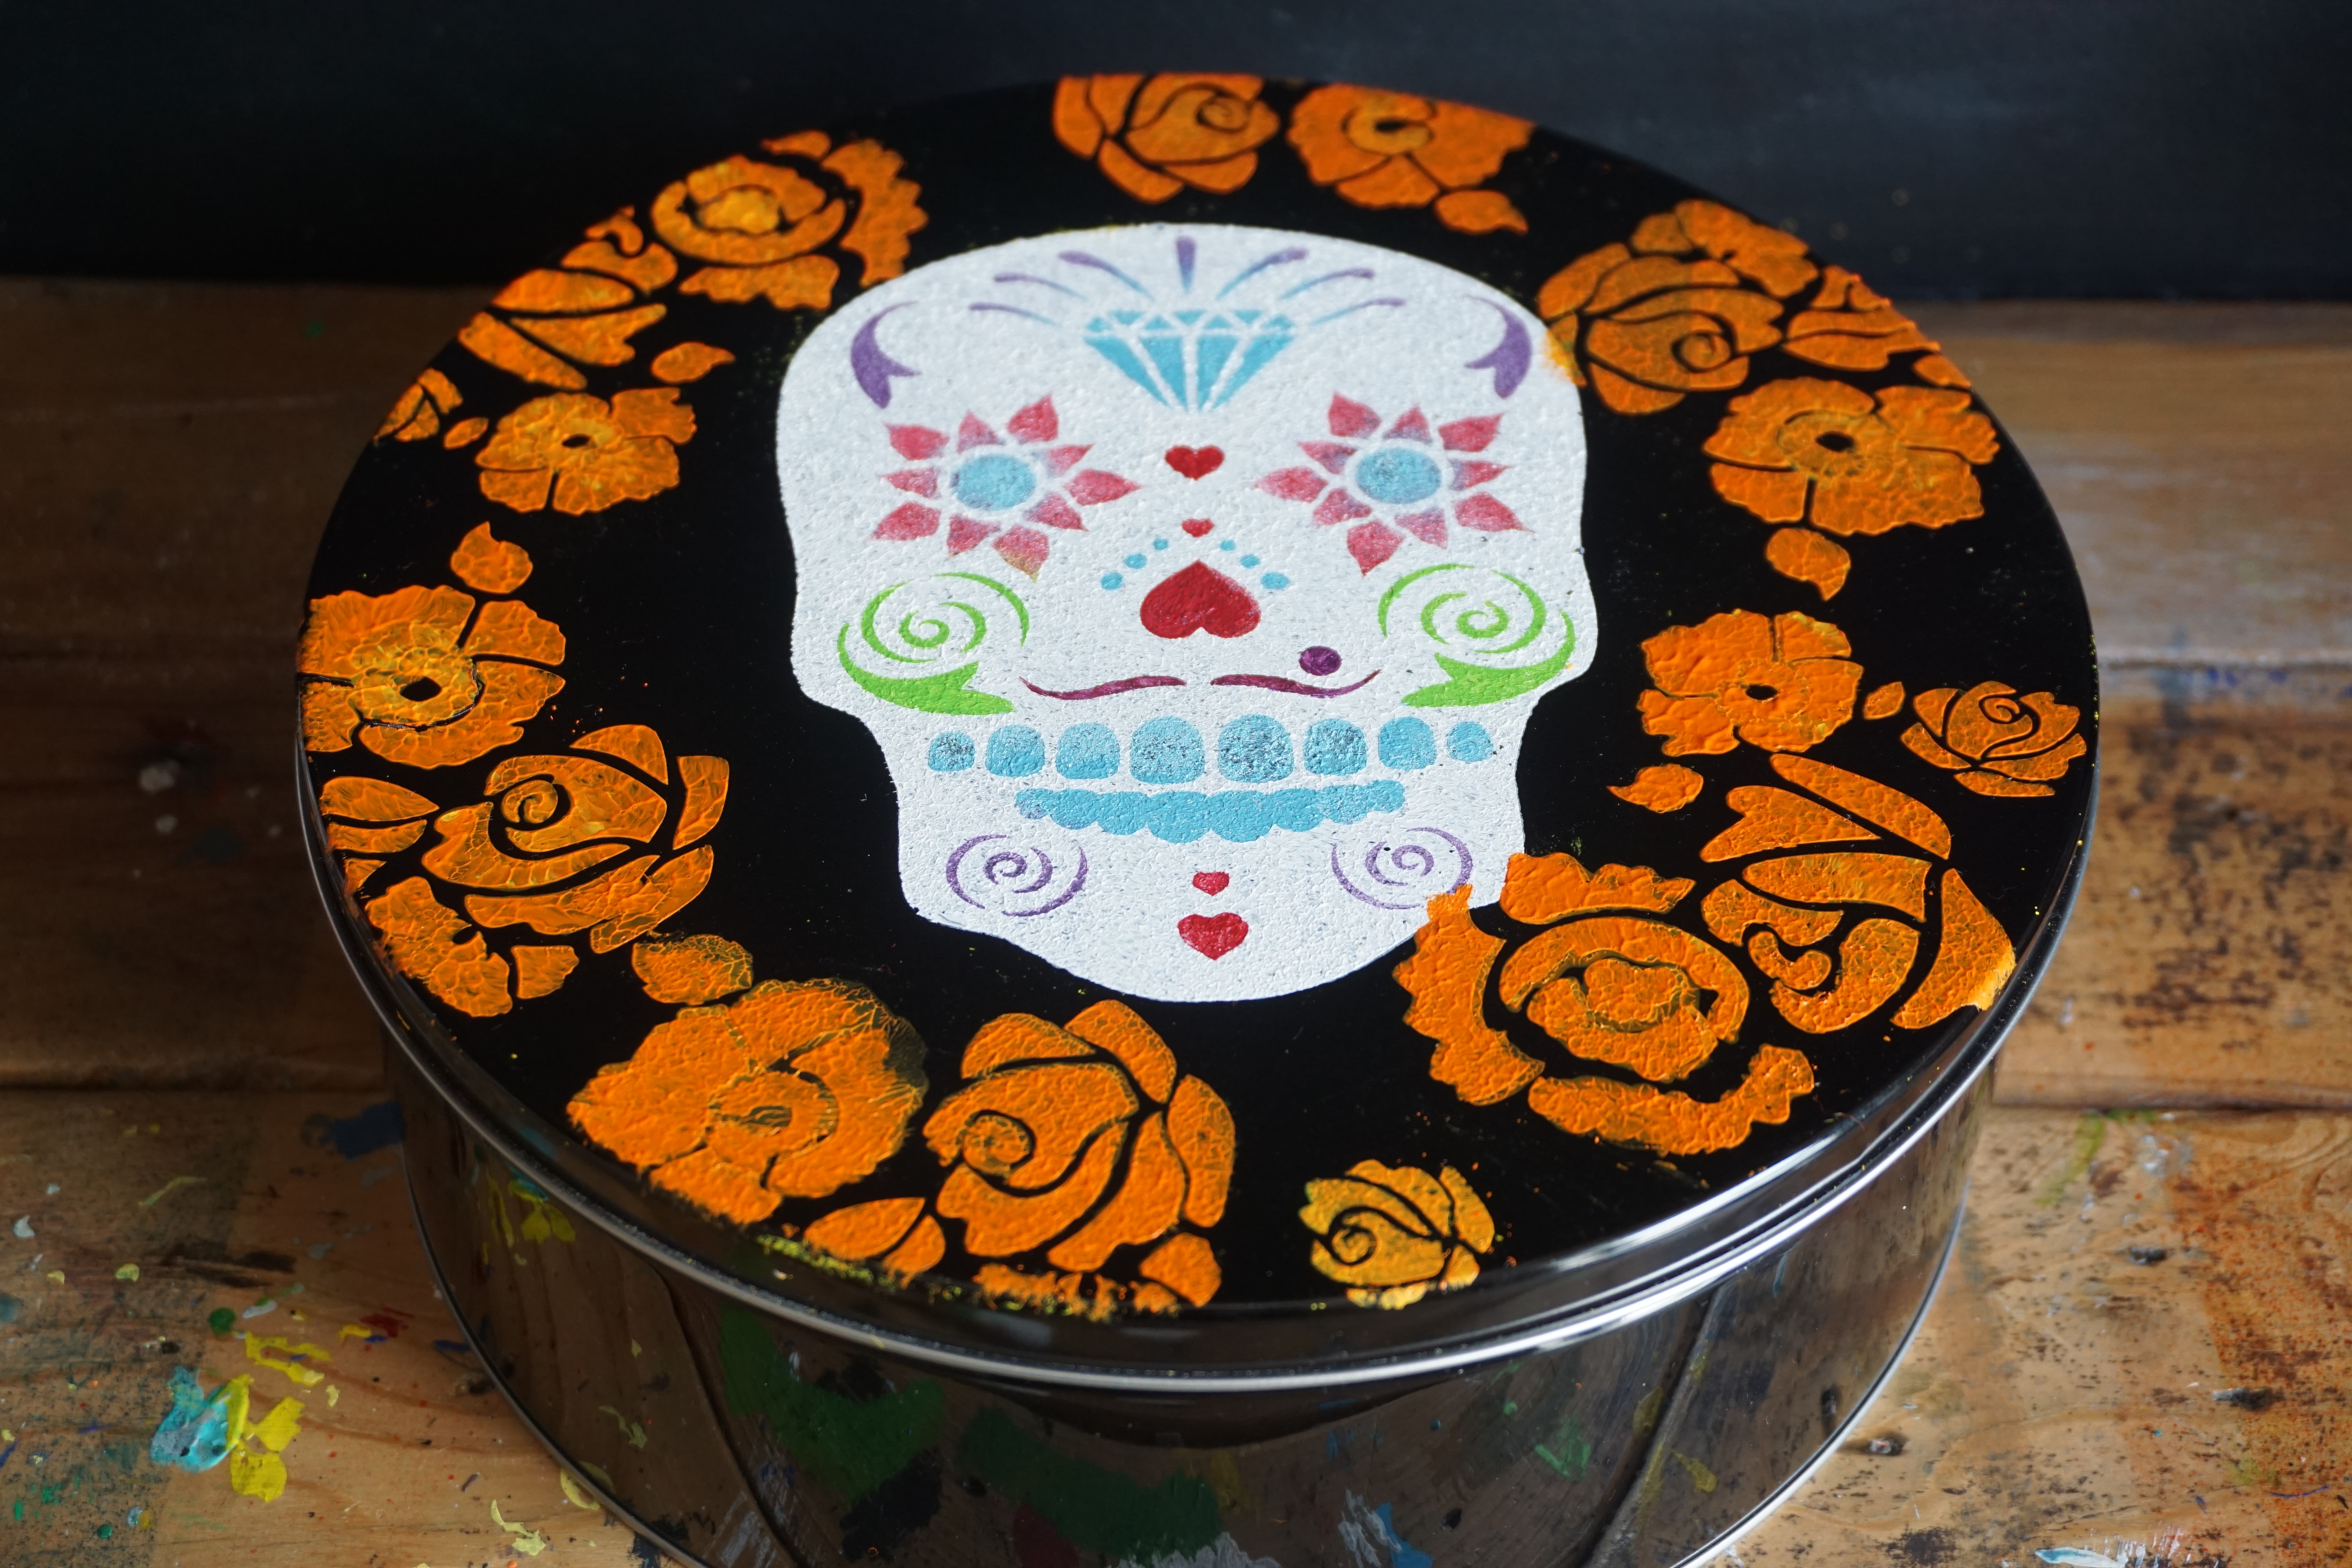
Here’s another Day of the Dead DIY for you all to try out: A tin container for you to fill up with treats in honor of the deceased!

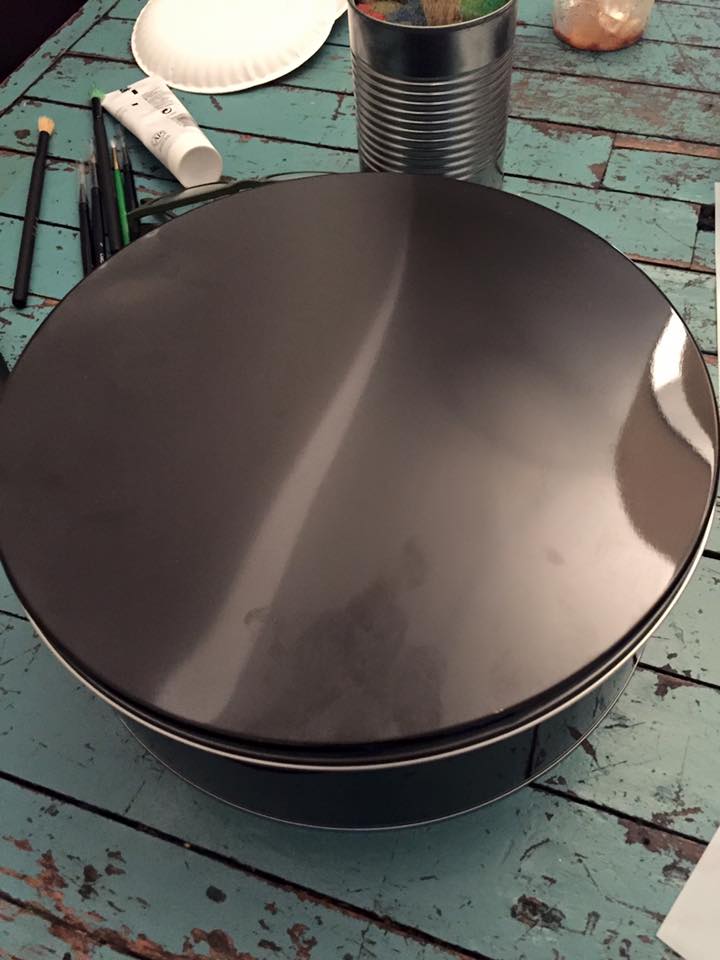
Things you will need: A black tin container, a variety of paint and paint brushes, a Stencil1 Floral stencil, and the Stencil1 2 Layer Sugar Skull stencil.

14232579_10154021442905889_2921792977759876422_n

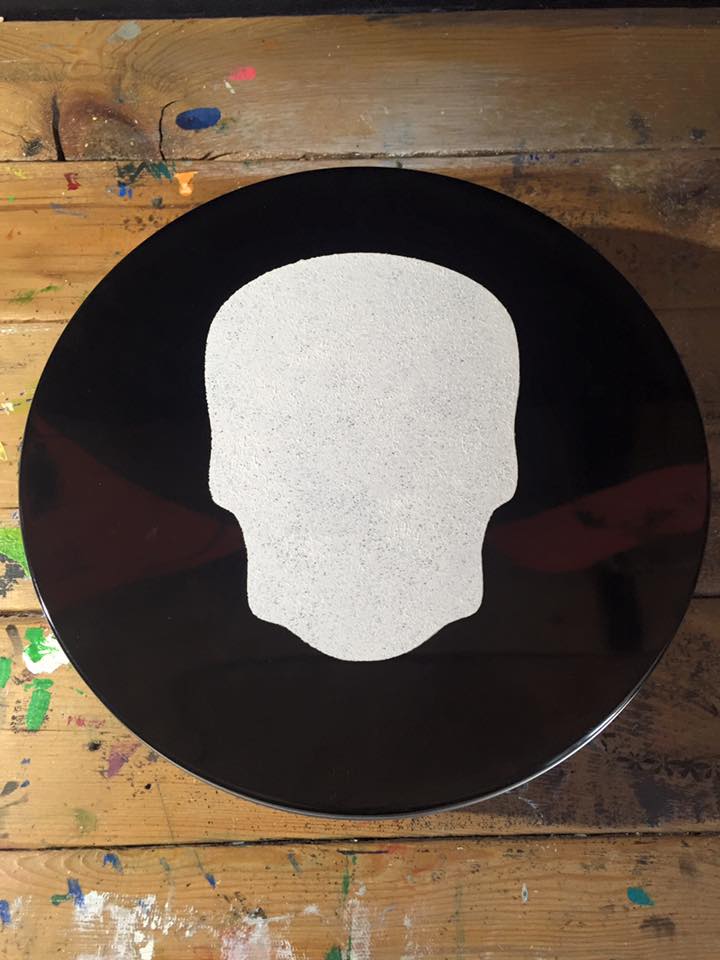
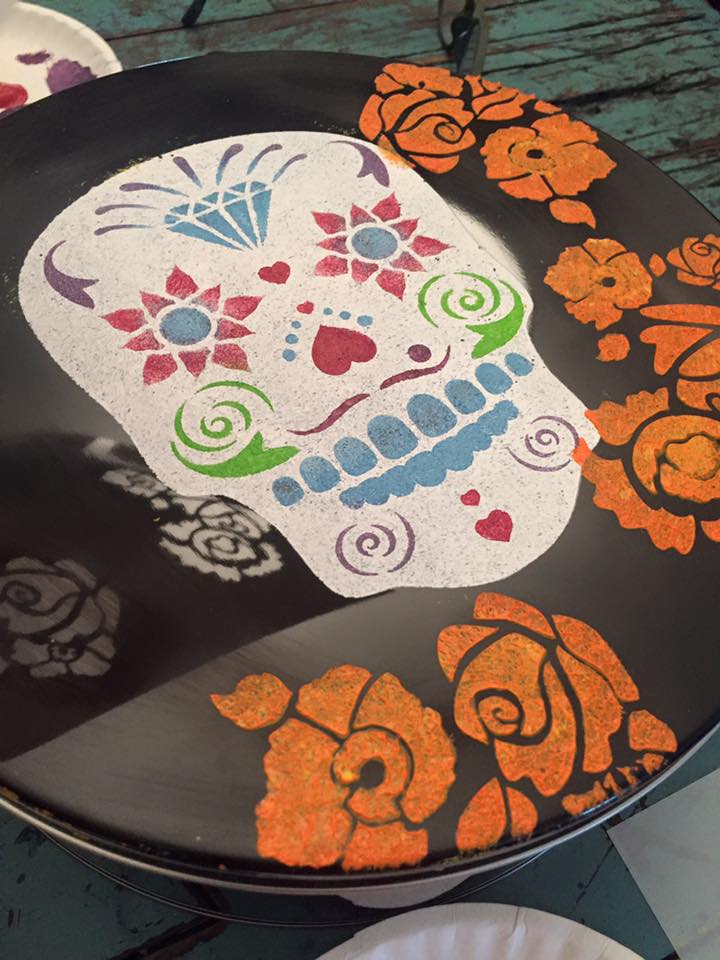
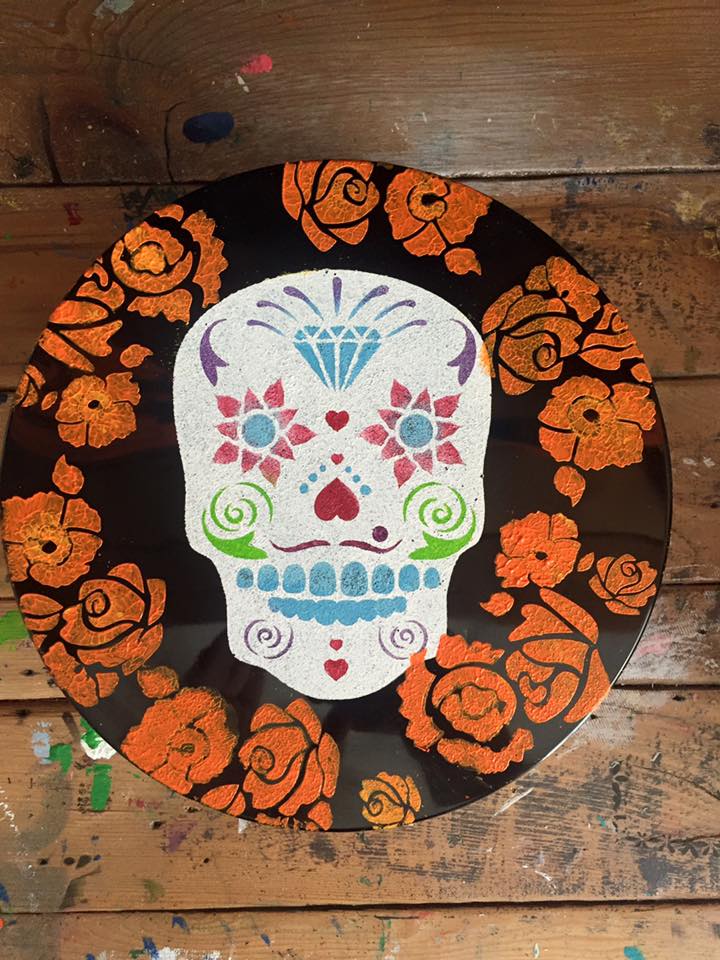
To start off, grab the first layer of the 2 Layer Sugar Skull stencil and place it in the center of the tin container. Paint it white and let it dry.

14202650_10154021442970889_8496813401913751327_n

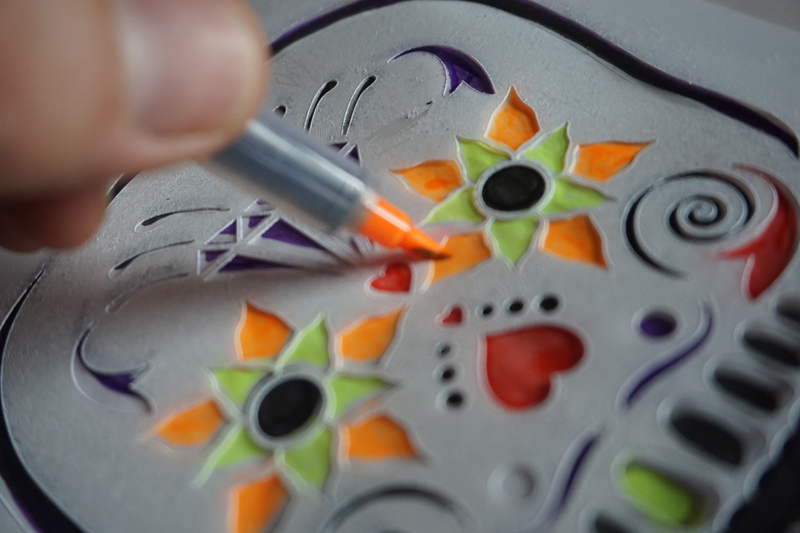
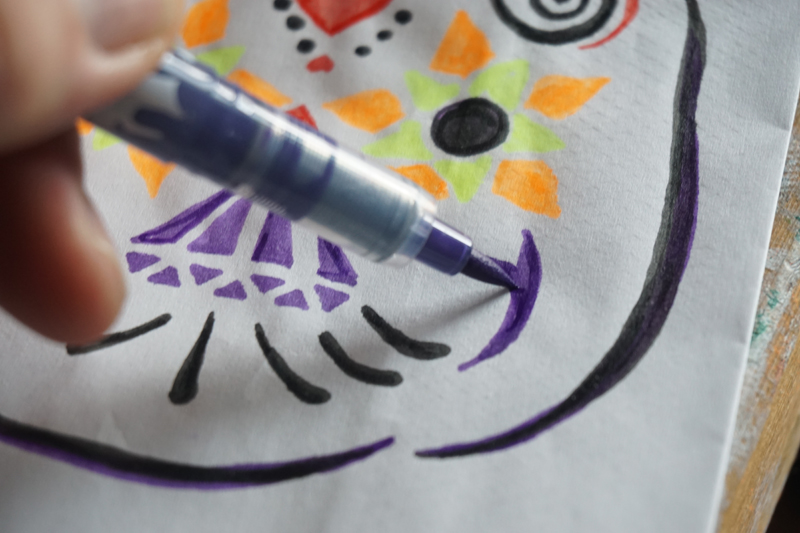
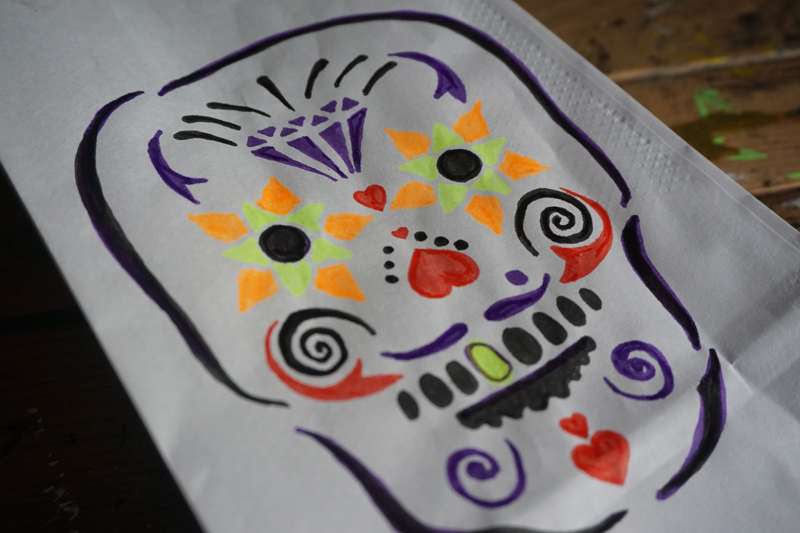
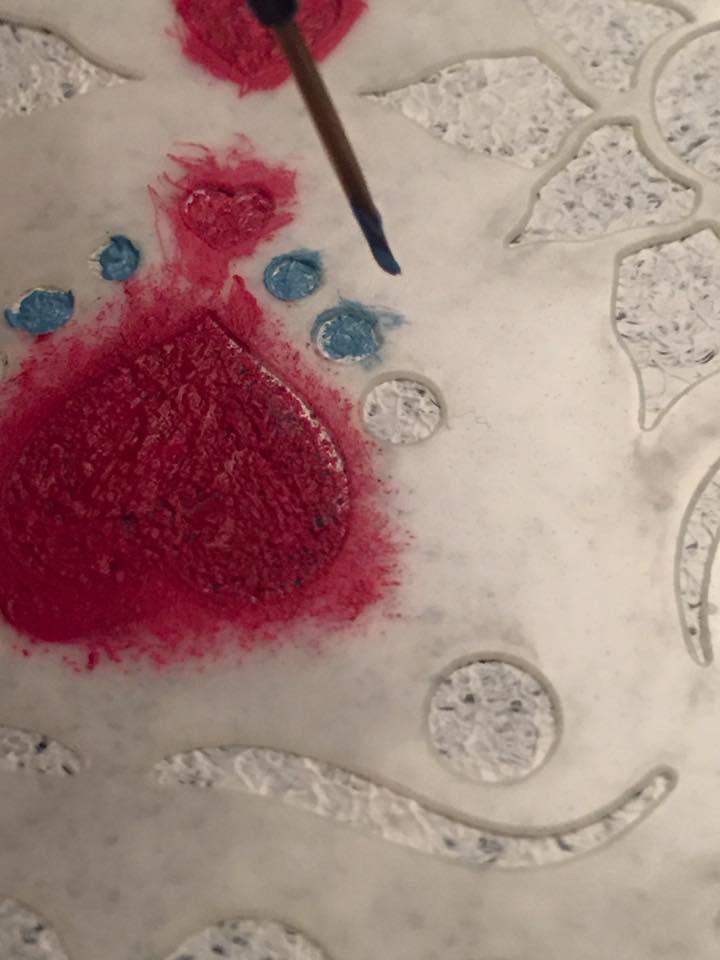
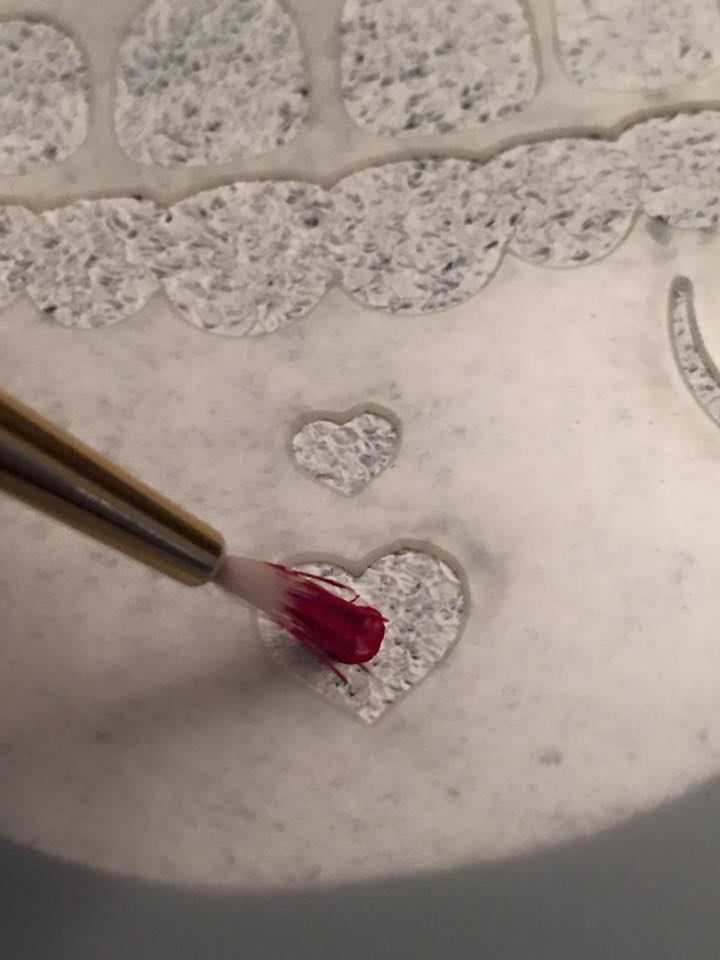
Once the first layer is dry, grab the second layer of the Sugar Skull stencil. Grab a smaller paint brush and start painting in the details with different colors. The more colorful, the more festive!

14192709_10154021443275889_1762158429616476212_n
14238354_10154021443020889_4931252615275303222_n

Next, grab a floral stencil. Here we used the Stencil1 Bouquet Pattern stencil and cut the flowers into different sections. This makes placing and painting the flowers around the tin container much easier!

14192158_10154021443380889_8779893840917765001_n

Once your paint has finally dried, be sure to fill the container with lots of treats and goodies!

14191974_10154021443435889_2257483230098018640_n

Stay tuned for more tricks and treats for Halloween 2016!


DSC05378

Don’t just give the kids one candy… Give them a whole bunch of treats in a bag made by you!

Things you will need: A plain cloth bag, black and orange paint and paint brush, and Stencil1 Small Pattern stencils.

Start of by grabbing the pattern of your choice and place it on the cloth bag. Here we are using the Stencil1 Diamond repeat pattern stencil.

DSC05343
DSC05352

Load up your brush with paint color of your choice. Since the pattern stencils are so detailed, it is essential to blot the excess paint off your paint brush by wiping it on a paper towel or plate. This prevents paint from bleeding underneath the stencil.

DSC05355

Start painting away!

DSC05356

You can either paint over the stencil evenly for a cleaner finish, or in this case, roughly to give a more distressed look.

DSC05359

Once the paint is dry, carefully remove the stencil to reveal the pattern.

DSC05364
DSC05367

Don’t forget to fill up the bags with lots of treats and goodies!

DSC05368

Check out how we did it step-by-step on this past Make It Monday!

YouTube Preview Image

Be sure to go to Stencil1 Facebook page every Monday at 2 PM EST for live streams of how-to’s and craft talk!

What goodies are you putting in your treat bags this year? Share them with us @Stencil1!


DSC05449

Welcome in the Fall season with new decor! Warm up your home with a sweet owl print to hang up for its wise eyes to see.

Things you will need: Brown paper, Stencil1 Sprayers metallic spray ink, paint brush and ink pad, and the Stencil1 Owl stencil.

DSC05409

Start off by coating your paper with a layer of the spray ink. Here, we are using the Stencil Sprayer metallic spray ink in Metallic Copper.

DSC05413
DSC05415

Not only does coating the paper with the spray ink give it a more vintage, worn out feel, it also gives off a metallic shine when held to the light!

DSC05416

Once the ink has dried, get the stencil, brush, and ink pad ready.

DSC05421

Load your brush up on the ink pad and start painting away! What’s great about stenciling with an ink pad is that you pick up the perfect amount of ink for your stencil! No blotting necessary.

DSC05433

Carefully lift to reveal the final image.

DSC05437

And there you have it! Hang it up as is or place in a frame to preserve your print.

DSC05442

Check out how we did it step-by-step on this past Make It Monday!

YouTube Preview Image

Be sure to go on the Stencil1 Facebook page every Monday at 2 PM EST for live streams of how-to’s and craft talk!


DSC05473

“Boo! Did I scare you?!” Get this “scary” little ghost on your shirt and scare the life out of your friends and family!

Things you will need: An orange shirt, paint and a paint brush, and the Stencil1 Ghost stencil.

Place the Ghost stencil in your desired location on your shirt. Add a little tape on the top and bottom of the stencil to keep it in place and to prevent painting over the edge of the stencil.

DSC05394

Load up your brush with black paint and start painting over the stencil in a dabbing motion. Be sure to remove any excess paint from the brush by wiping it off on a paper towel or plate to prevent the paint from bleeding underneath the stencil.

DSC05395

Once the paint is finally dry, carefully remove the stencil to reveal the final image.

DSC05405

Terrifying!

Check out how we did it step-by-step on this past Make It Monday!

YouTube Preview Image

Be sure to go to Stencil1 Facebook page every Monday at 2 PM EST for live streams of how-to’s and craft talk!


dayofthedead_paper_lantern_final

Day of the Dead or Dia de los Muertos is a holiday for remembering and honoring those who have passed. It is a festive, joyous time of celebration. Traditions connected with the holiday include building private altars called ofrendas, honoring the deceased using sugar skulls, marigolds, and the favorite foods and beverages of the departed, and visiting graves with these as gifts. The Day of the Dead is officially November 2 but festivities for the holiday span from Oct 31 to Nov 2. During this time it is believed that those who have passed return to their earthly homes to visit and rejoice with their loved ones.

In honor of those deceased, why not make them a beautiful paper lantern and light it for them? Or fill the bag with their favorite sweets and leave it with marigold flowers at their grave? Here’s how we made it:

Things you will need: A white paper lunch bag, a candle, Sharpie Stained brush tip fabric markers, and the Stencil1 Sugar Skull stencil.

DSC05512

Place the Sugar Skull Stencil on top of the bag. Using any Sharpie Stained brush tip fabric marker, start coloring in the Sugar Skull using the stencil as a guide.

DSC05506

Even though The Sharpie Stained brush tip fabric marker is specifically for fabric, it works just as well for paper! The tapered brush tip makes it easy to fill in any space and create thin or thick strokes.

DSC05509

You can choose to leave it as a treat bag, or add a candle inside and make it into a lantern.

DSC05503

Share your Day of the Dead creations with us @Stencil1!


Invitation1

You’re getting ready for the biggest Halloween party ever, but how are you going to tell people about it? Decorate a blank card with a Stencil1 Halloween stencil, like the Stencil1 Frankenstein stencil, and customize your invitation with all of your party information!

All of your guests are going to be impressed with your stenciling skills and they’re all going to have to come!

For a more detailed explanation and more how-to’s, check out Make It Monday on Stencil1′s Facebook Page!

Make It Monday
YouTube Preview Image

Be sure to go to Stencil1 Facebook page every Monday at 2 PM EST for live streams of how-to’s and craft talk!