Στο νέο online παιχνίδι καζίνο του Nine Casino, εμπνευσμένο από τον κόσμο της κατασκευής στένσιλ, οι παίκτες μπορούν να δημιουργήσουν τα δικά τους μοναδικά μοτίβα για να ξεκλειδώσουν ειδικά επίπεδα παιχνιδιού. Gracze rywalizują o stworzenie najbardziej wyszukanych wzorów szablonów, które są następnie oceniane w grze pod kątem bonusów i nagród w kasynie MostBet Casino Immediate Byte Pro Neoprofit AI
unnamed-2

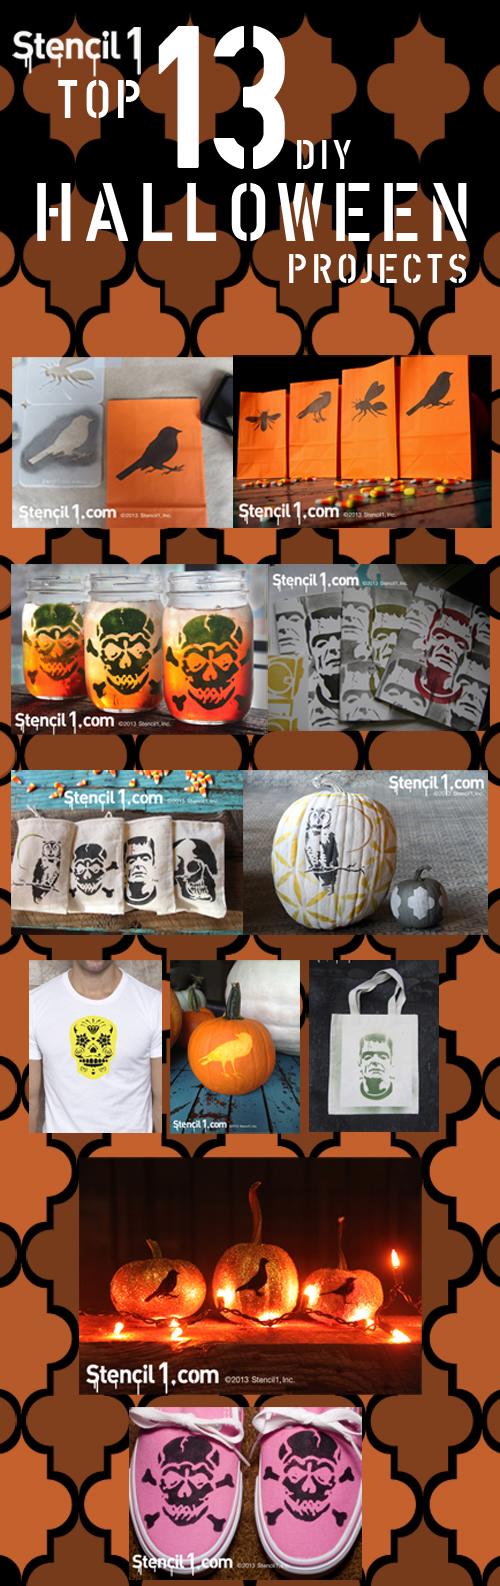
It’s scary but it’s true, many die-hard crafters and makers are creating Halloween projects now in Summer! Well, we think we have the best collection of Halloween stencils around! Skulls, bats, famed monsters, haunted housescute pumpkins, so many to choose from!

unnamed

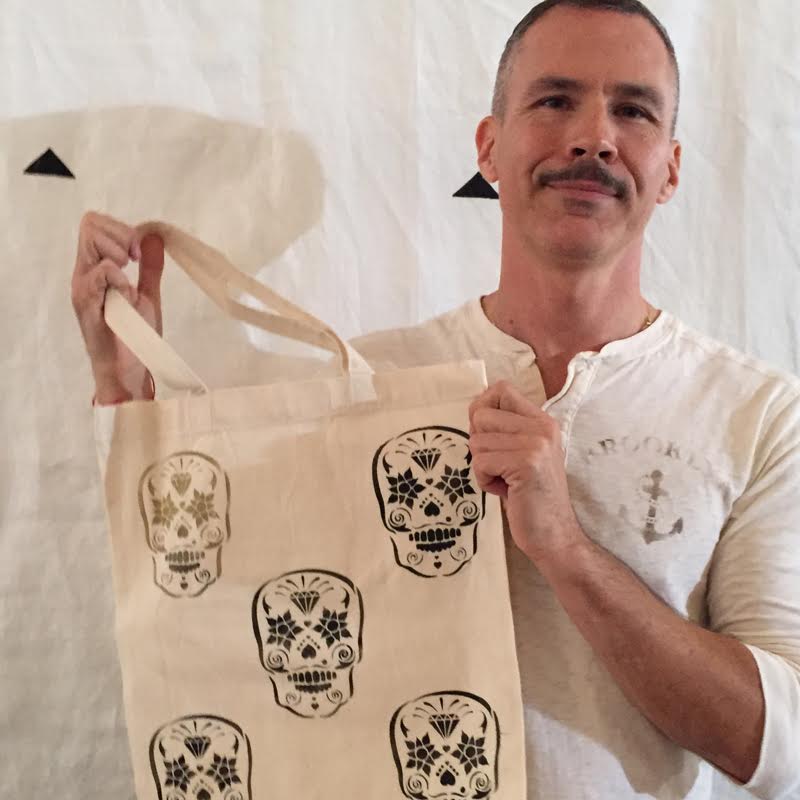
Even Martha Stewart likes Stencil1’s Halloween stencils, here’s owner Ed Roth with the queen of craft herself.

(Ed made her a tote bag or two using sugar skull stencils and bat stencils). We also have tasteful Fall themed designs like our regal Antlered Deer and Autumn leaves stencils if that is more your style.

unnamed-1

See all our Halloween stencil designs here and here is a round up of our top ten Halloween how-to projects! If you are on Pinterest,check out our Stencil1 Halloween board as well here. https://www.pinterest.com/stencil1/stencil1-halloween/

Want to check out more Halloween designs… Check out these scary stencils!
Frankenstein Trick or Treat Tote Bag

Halloween Stencil Set

Autumn Windows

Sugar Skull Tattoo

Halloween Goodie Bags

Pumpkin Tattoos

Pumpkins in Chains

Spooky Canvas Bags

Halloween Cards

Beetlejuice, Beetlejuice, Beetlejuice…

Queen Stewart goes Goth

Halloween Glitter Pumpkins and Glitter Apparel


Hey Stencilers,

Get organized, while staying stylish with this new how-to! We turned a pin board we found in a yard sale for $3 and transformed it into something totally chic. One man’s trash is another man’s treasure, indeed.

IMG_1240

Things you will need: Pin board, Stencil1 11 x 11 repeat stencils, Plutonium aerosol paint, spray adhesive (optional).

Step 1. Prepare your materials. Make sure your work area has appropriate ventilation, like the outdoors. Luckily, Plutonium aerosol paint is environmentally friendly and reduces the carbon footprint of aerosol spray by 50%! More info about their eco-friendly aerosol cans here.

Untitled-1

Step 2. Place your stencil on top of the pin board. For this tutorial, we used the Quatrefoil repeat pattern. Depending how large your pin board is, you may have to move your stencil around in order for it to cover the entire board. Easy for you, Stencil1 repeat stencils have registration marks built in the stencil to make sure your pattern stays uniformed! Tip: Spray some spray adhesive to the back of your stencil to prevent the stencil from shifting or paint bleeding underneath the stencil.

Untitled-2

Step 3. Shake up your spray can to ensure the paint is well mixed. Here, we used Plutonium’s Motown. Spray over the stencil until your pin board is evenly coated.

IMG_1184
IMG_1204

Step 4. Let your pin board dry for a few minutes before you remove the stencil.

IMG_1220

Step 5. Pin your notes, reminders, and even pictures to complete this pin board. Hang it somewhere you can always see it!

IMG_1258

Snap a picture of it, and share with us @Stencil1!


Ed_stencil_wall

Learn from Stencil1’s very own, Ed Roth! In this class, you’ll learn how to make your own DIY stencils and how to use them to create 3 different looks on your walls. You will also get 2 downloadable custom stencils for FREE when you purchase this class for only $4.99. Check it out now!

More classes from Ed are coming soon!

We are excited to be part of Good Housekeeping.TV, alongside some of the most awesome DIY-ers, such as Rachel Faucett from Handmade Charlotte, Paul Lowe from Sweet Paul Magazine, Brett Bara from Brooklyn Craft Company, and many more!! Check out GoodHousekeeping.TV for a full list of contributors and for more DIY projects, triple-tested recipes, home makeovers, tips, tricks and inspiration, in the highest-quality instructions from these experts.


Hey Stencilers!

Summer’s not over yet. Let’s enjoy this hot weather while we still have it! Try upcycling your plain swimwear with Stencil1 stencils! Guaranteed to have heads turning.

Things you will need: White swimwear, paintbrushes, Stencil1 repeat patterns, Tulip soft fabric paint, and piece of cardboard.

IMG_1100

Step 1. Gather your materials. Before you start painting, make sure you place the piece of cardboard between the material to prevent the paint bleeding from one side to the other. Here, we got these nylon swimming trunks from H&M. Place your stencil on top of your swimwear and hold in place. For this tutorial, we’re using the Shifted Rectangles repeat pattern.

IMG_1103

Step 2. Load up your brush with your desired color and paint away! Painting on nylon can be difficult, but it’s definitely not impossible. Try to take your time so that the material doesn’t shift too much. Patience is key!

IMG_1108

Step 3. Wait a few minutes until it’s dry before you remove the stencil.

IMG_1110

And that’s it! They’re ready to wear into the water. Show them off at the beach, pool, or wherever you please for whatever we have left of the Summer!

Snap a picture of it, and share with us @Stencil1!


Last weekend Stencil1 took its show on the road, and gave the people of Miami even more sunshine at the Soho Beach House. Children and teens of all ages created colorful t-shirts with a DIY attitude. But they are not the only ones that can create masterpieces. You too can create your shirts of art in a few easy steps!

Things you will need: Stencil1 Scallop Repeat Pattern, Stencil1 Turntable, Tulip Soft Fabric Paint, paintbrush, and t-shirt.

IMG_1008
IMG_1009

Step 1. Place stencil in desired location for your design. You can tape it in place with painter’s tape.

IMG_1018

Step 2. Choose the desired colors that you wish to paint with.

IMG_1024
IMG_1031

Step 3. Lightly dab paint onto t-shirt filling in the stencil. You can also blend colors for an ombre effect!

IMG_1043

Step 4. Once finished filling in the stencil, allow t-shirt to dry for a few minutes.

IMG_1053

Step 5. Remove the stencil for the t-shirt.

IMG_1058

Step 6. Once the first design is complete, you can layer! Place a second stencil in the desired location, we chose the turntable stencil!

IMG_1064

Step 7. Stencil in with a new color to make your design pop.

IMG_1070

Step 8. We filled it in with a dried brush look to simulate spray paint.

IMG_1071

Step 9. Repeat!

IMG_1089

Step 10. Allow t-shirt to dry, and then wear your masterpiece!

Snap a picture of it, and share it with us @Stencil1

But we are not done yet…

Check out a few photos from last weekend’s event in Miami!

brushes_800w

The event itself was fun, the kids did their thing. So many colorful paints were used!

youngest

One of the youngest attendees, Lucas, did a great job stenciling our Ranchero Stencil and further customized with Tulip Fabric Markers.


American_Made_Stencil1_promo_area_955x415


The judges at Martha Stewart have named Stencil1 a 2015 @AmericanMadeMSL Finalist.

On September 21, Martha will turn the voting over to the larger Martha Stewart American Made community. Friends, family, and all my Stencil1 community, you will have the opportunity to cast your vote for your favorite American maker, and one Audience Choice Winner will be announced on October 23, 2015.  As a small business that since it’s inception has been US made, I would be grateful for your vote.

Support & share my work to get involved! #AmericanMade2015

Here’s what I said about the importance of being American Made. Maybe this will inspire you if you are starting a business in America. Click below to see the full bio on Martha Stewart’s American Made site.

WHAT DOES AMERICAN MADE MEAN TO YOU?

American Made means everything, we started here in Brooklyn, NY & there are many opportunities provided to small business owners in America. We took advantage of free advisors, free legal services and more to start our business. American made starts with the American dream and for me that was to find freedom in doing my own thing. I started Stencil1 with an idea to make stencils that were modern, eclectic, & different and soon enough I had an online business running. I started by stuffing stencil orders in envelopes from my home! I then got some great press which lead to stores calling and wanting to carry my line. My line? I don’t even have packaging, I told the buyers. They said “figure it out, we want it”. I did. All these elements are a part of the American business – our value of press, our industrial capabilities, our vast love of technology, our freedom to use all of these resources. Stencil1 has now been in business for 10 years and all of our product is American Made.

VOTE HERE!