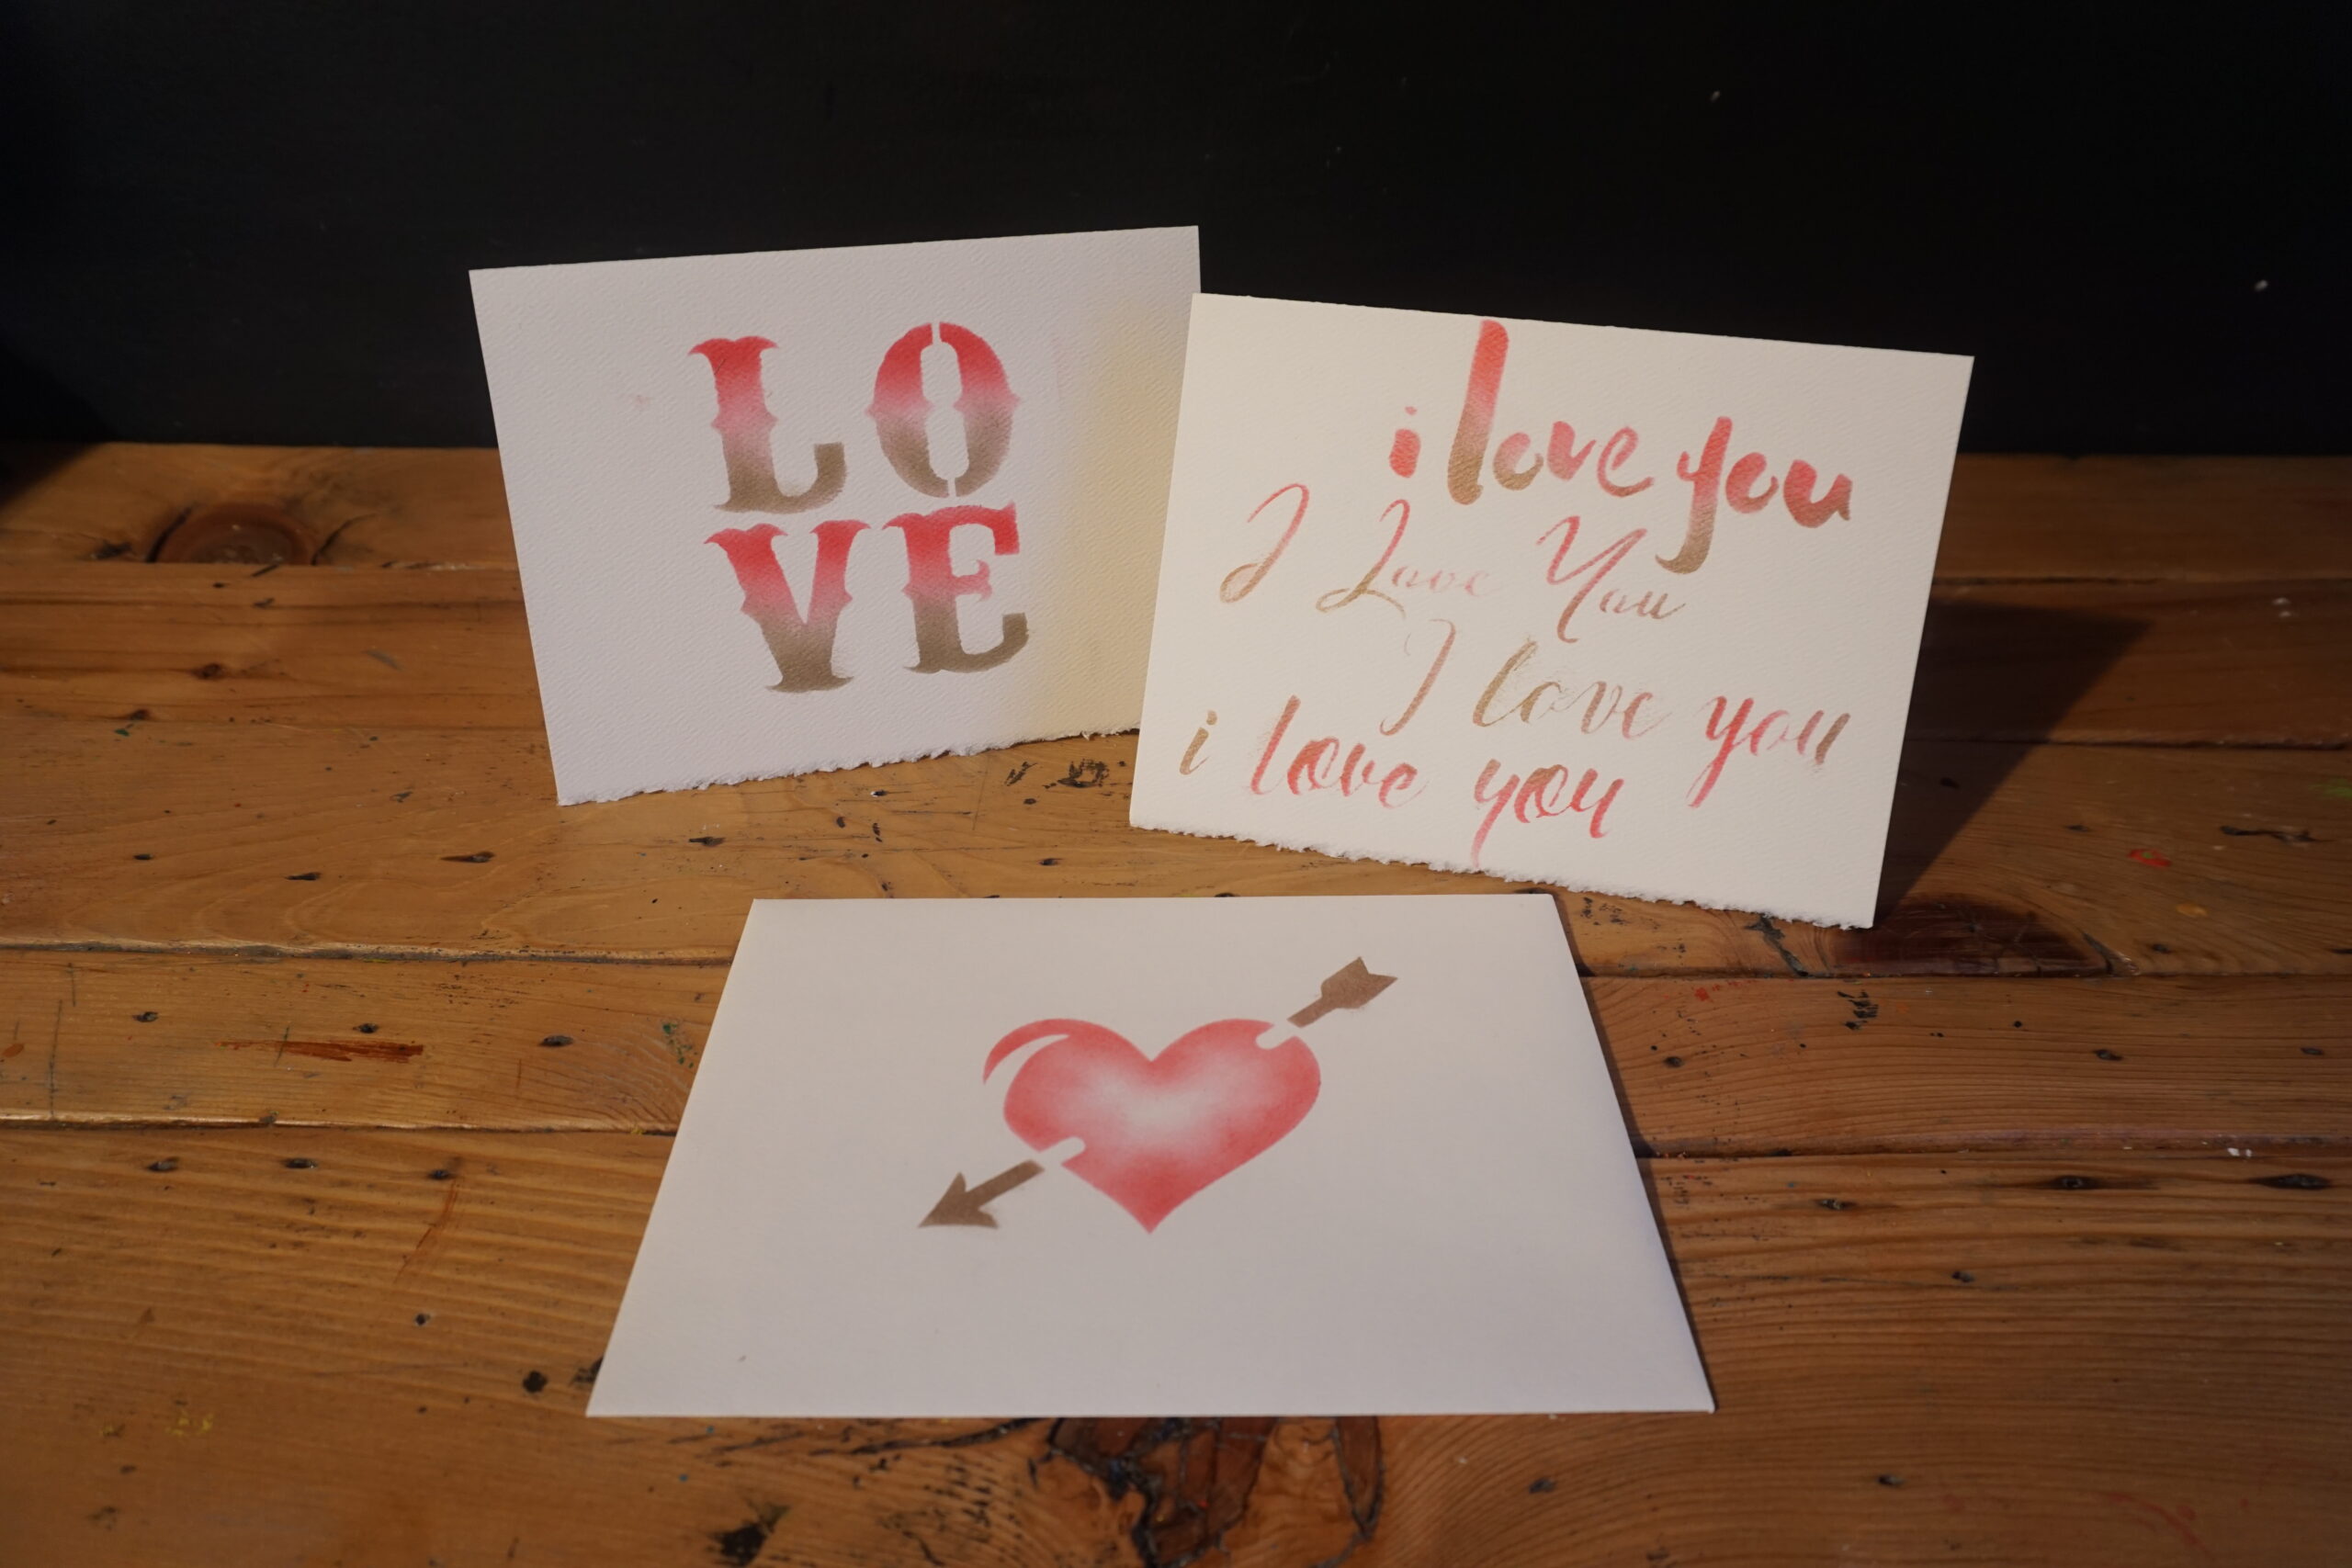
Στο νέο online παιχνίδι καζίνο του Nine Casino, εμπνευσμένο από τον κόσμο της κατασκευής στένσιλ, οι παίκτες μπορούν να δημιουργήσουν τα δικά τους μοναδικά μοτίβα για να ξεκλειδώσουν ειδικά επίπεδα παιχνιδιού. Immediate Byte Pro Neoprofit AI

Materials Needed

Process
First I measured out the center of my mat and worked the placement of my lettering around that.

I kept it very straightforward, centering the words about 8 and 1/2 inches in from the edge of the mat. Then I taped down my letters going all the way off the mat and securing the tape to the table, as it would not really stick to the doormat.


Once I was satisfied with the placement of the letters, I then used a large 1-inch stencil brush to tap into the paint. The first application was with a very dry brush, then I went in a little heavier with the second and third coats.


For this project, you really have to give it a heavier hand in order to get into the mat fibers so you get a uniform look. For the border, I used the leopard print stencil.


I used more paint on the brush at the edges and a drier brush towards the center to give it a faded look as the pattern gets closer to the lettering. After it dries, you can spray it with a layer of clear shellac for extra durability.

Happy Crafting!
~ Teri @tjaneiro2 on Instagram


Do you create Mixed Media and Home Decor Updates with Stencil1?
Please share with us on social @Stencil1 and #stencil1 


This Was Such a Great Find! By luck, we came across an abandoned wooden octopus! We weren’t sure what to do with him since he was so large. Black paint with gold accents sounded perfect though.

Materials Needed:

This is very small and simple project. Here is the process.

Step 1: Washing The Octopus. We used a hard bristle brush and soap to wash the octopus. Some of the blue paint came off but no worries, we can cover this up later.

Step 2: Let it dry out, Use Black paint or black Gesso to cover up the octopus

Step 4: Using the Octopus Stencil and some tape, I placed it down in the head of the octopus. I went in with Gold acrylic paint and felt like it wasn’t enough. I wanted to give the golden octopus a little bit of depth so I started to mix the gold with Gel Matte Medium.

Step 5: Just go ahead and layer the paint and medium with the stencil. Allow it to try between each application.

Step 6: Now Add the Chevron pattern to most of the tentacles, leaving a lot of black space to balance the composition.


Step 7: Go back and clean any rough edges with a flat shader brush in the size extra small. And You’re Done!

Art is a Love Language
~ Yuli, Stencil1 Team Member

Do you create Mixed Media and papercrafts with Stencil1?
Please share with us on social @Stencil1 and #stencil1 


Stencils and Glass? Yes it’s a thing, a good thing!

BYOS – Bring Your Own Stencils, that’s what I did…to a glass making studio! Stencils can be used in so many mediums and my experimentation with glass produced some beautiful results if I do say so myself :). Here is how I used Stencil1 stencils with glass to make a hummingbird glass window ornament:

Materials You Will Need:

  • Detailed Birds Stencil 4 Pack
  • Tape
  • Glass Dust
  • Detail Brushes
  • Solvent
  • A Sturdy Flat Surface
  • A Small Spoon
  • Elmers glue
  • A Stove or Kiln or all this in a glass studio

I wanted to work on an optimistic, Spring themed image and the hummingbird was a perfect choice. It’s also great because it is a stencil design with a lot of bold open shapes, perfect for filling with glass powder!

I was provided a 7″ x 7″ white sheet of glass, that’s my surface for today! You have to wipe it clean with alcohol, no oil should be on the surface. I then planned the layout of the design and thought it might look best to turn my square glass shape to a diamond-like position and attach a chain to the top point for hanging.

I brushed in a little bit of watered down glue into the wing area and then sprinkled in glass powder.

I continued the process with a few colors of powdered glass. you can see here that I am creating ombre blended effects by the way I sprinkle the dust. I also always use my darker colors on face details, it helps to really see the detail of those features!

Here’s a shot of the different glass dust colors the studio offered. I love supporting small, local businesses like this. You don’t have to buy all the supplies, just visit, create, and everyone is happy! But yea, I also was like so how much is a kiln, haha! The art is addictive!

I also created a frame around the piece using these long sticks of glass, similar to hard pasta. It looked a little too structured for my taste so see what I did next…

I added these chunkier glass pieces around the edges to add some “atmosphere” to my little birds world. It adds some whimsy and texture. I then used a tweezer to adjust them to the composition I wanted.

Notice how I cut a small triangle shape up top and layered my hook in the layers of glass, a hook sandwiched between two pieces of white glass. The piece of white glass you see above the art piece is being used to simply prop up my hook so it doesn’t flop down while the glue is drying it inside the “sandwich”.

Once you remove the stencil, add your other elements of glass, you can use small tools to clean up your design. You can push some sand around, move shards around, and get it all to it’s final position before it get’s fired.

Your stencil has done it’s purpose and can be washed with warm soapy water. It’s ready for storage and to be used many more times!

The design was then spritzed with a very thin glue spray, almost like hairspray.

The piece was then placed on special paper that it sits on in the kiln. That’s me Eddie 🙂

Here’s a shot of the piece all finished, I am so happy with how the dust gets darker. Oh, forgot to mention I placed a small black glass bead for the eye. I think the eyes should pop in an image so this little bird got a nice dark eye.

Once completed, hang your piece proud! As shops reopen, please search for your local glass studios and bring Stencil1 stencils with you to try this technique. We would love to see what you make!

Please share your creations with us @stencil1.com


January 9, 2020

Here’s a wearable DIY for you – Handmade stencil-designed Sweatshirt and T-shirt. Here are the steps to make your own:

All you need is a T-shirt, LOVE stencil, black & white paint, paintbrush, and a plate to pour the paint on.

Place the Love Stencil (8.5×11) on your t-shirt. Use tape to create extra borders around the stencil. The tape is an optional step to make sure paint does not go over the stencil.

Pour out some red and black paint on a plate. We used Pebeo Setacolor fabric paint.

Start covering the stencil with red paint. Paint over the entire letters “V” and “E”, and only partially over the letters “L” and “O”. Do gentle tapping motion with your brush to get a better result.

Brush over the rest of the stencil with black paint. Go a little bit over the red paint to mix two colors and create an overlap.

Once you are finished painting the stencil, you are ready for the reveal.

Slowly remove the stencil to see the finished work. Let it dry and heat seal with an iron, inside out.

Now you need a sweatshirt and white paint and our Valentine’s Love Stencil.

Choose the desired area where your stencil design will appear. For our project, we chose a sleeve.

Place your stencil on the sweatshirt sleeve. Tape around the stencil borders to make sure no paint will get outside the stencil area. Pour a bit of paint on the plate, get the paint on the brush and start carefully tapping white paint over the stencil.

Once you have covered the entire stencil area with white paint, it’s time to lift the stencil.

Lift to reveal your design. Gently peel off the stencil to see what you have created. Share your wearable art with us @stencil1


Stenciled bibs!
Stenciled bibs!

These creations were made by Noelle of Lucky Kitty. How amazing are they? This is such an affordable and fun way to throw a DIY baby shower. Each of your guests can make something for your bambino. Thank you Noelle for sharing these with us. And I like that hubby joined in, I’m all about guys getting into this too! Great job! Make sure to check out the Chimp Poodle combo or as I called it, a Choodle! Now I so want a baby!