Στο νέο online παιχνίδι καζίνο του Nine Casino, εμπνευσμένο από τον κόσμο της κατασκευής στένσιλ, οι παίκτες μπορούν να δημιουργήσουν τα δικά τους μοναδικά μοτίβα για να ξεκλειδώσουν ειδικά επίπεδα παιχνιδιού. Immediate Byte Pro Neoprofit AI

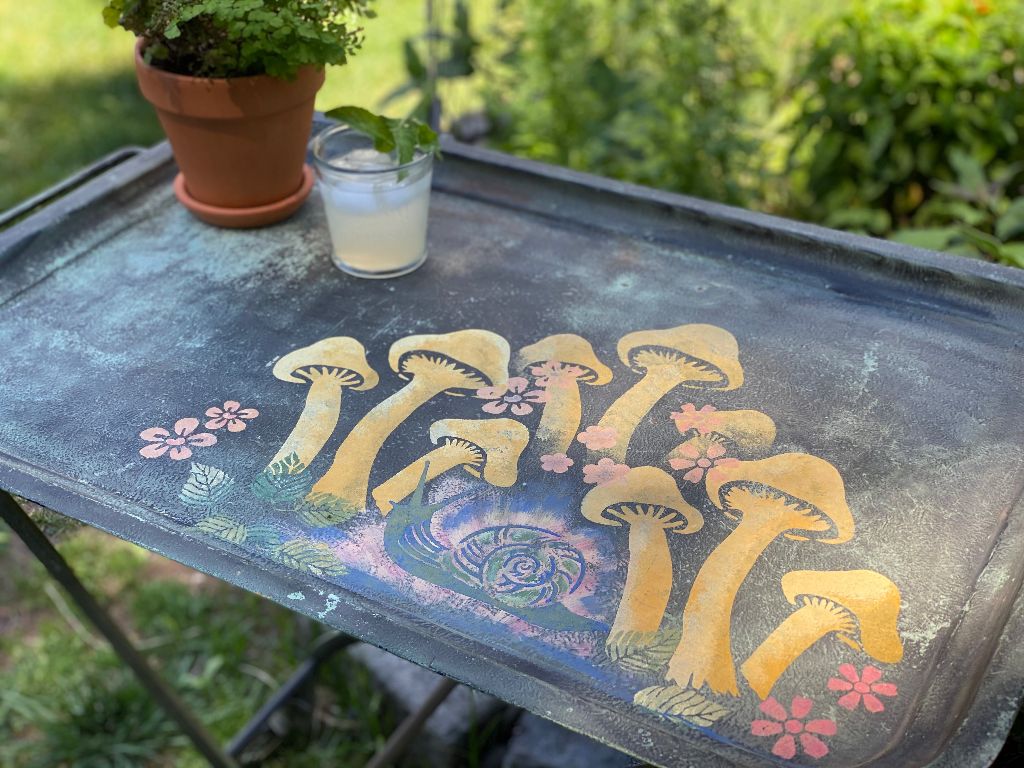
Here’s a DIY post that’s perfect for upcycling an old piece of furniture and giving it new life!This metal garden cart was actually someone’s trash and I decided to make it my treasure!Here’s how I stenciled the cart.

Materials you will need:

Metal cart
Assorted acrylic paints
Assorted stencil brushes
Mushroom stencil (8.5×11)
Spring stencil 4 pack
Snail and flowers stencil (8.5×11)
Matte clear coat spray

A group of garden themed stencils

Color mixing and process

The process was really fun and easy. I wanted to keep the colors somewhat consistent with what you might find in nature. I mixed a golden yellow for the mushrooms and a lighter, brighter yellow to highlight them.

Painting a mushroom stencil

I chose to use the stencil three times at varying heights to create depth.

Mushrooms stenciled on a garden cart

Then I mixed a bright blue for the snails first coat because the green I wanted to use would get lost against the green background without it. Then I went over that with the green, leaving some blue peeking through in spots to lift the snail off the background. I decided on a soft pink, with hints on orange and red for the flowers and used the green from the snail and a lighter yellow for highlights on the leaves.

Painting a snail stencil

I added metallic gold to everything I mixed up. After everything dried, I did two quick coats using a rust-proof, matte clear coat spray.

A garden cartwith stenciled designs

I loved doing this project, not only were the stencils adorable and fun but they also were easy to use on this surface. I love making something beautiful for my garden that I can use while spending time outside with friends.

Happy Crafting!
~ Teri @tjaneiro2 on Instagram


Do you create Home Decor Updates with Stencil1?
Please share with us on social @Stencil1 and #stencil1 


I sort of have a tin can obsession. I think they are a beautifully designed object. And as a container, there are so many re-uses for them. I especially like to paint them to give them some newness.

tincan_howto_Stencil1_1

I used a basic paintbrush and various colors of Folk Art new Multi-surface paints for these cans. Two coats did the trick. Final use for them?

tincan_howto_Stencil1_2
tincan_howto_Stencil1_3

An urban herb garden for my window sill!  Of course you can use them as pencil holders, vases, and more. What would you do with some colorful painted tin cans?

tincan_howto_Stencil1_final

To make this herb garden you’ll need 4-6 clean tin cans, paint, paint brushes, soil and a variety of herb plants or seeds. Once you are finished decorating your cans replant different herbs (or seeds) into the tin cans. Have some fun incorporating the name of your herbs into your design! An optional step to make your herb garden last a little longer is to punch a few wholes at the bottom of the cans and add some pebbles before you add the soil. This will allow some water to drain out. If you follow this step, consider placing your garden on a small tray to catch the water.