Στο νέο online παιχνίδι καζίνο του Nine Casino, εμπνευσμένο από τον κόσμο της κατασκευής στένσιλ, οι παίκτες μπορούν να δημιουργήσουν τα δικά τους μοναδικά μοτίβα για να ξεκλειδώσουν ειδικά επίπεδα παιχνιδιού. Immediate Byte Pro Neoprofit AI

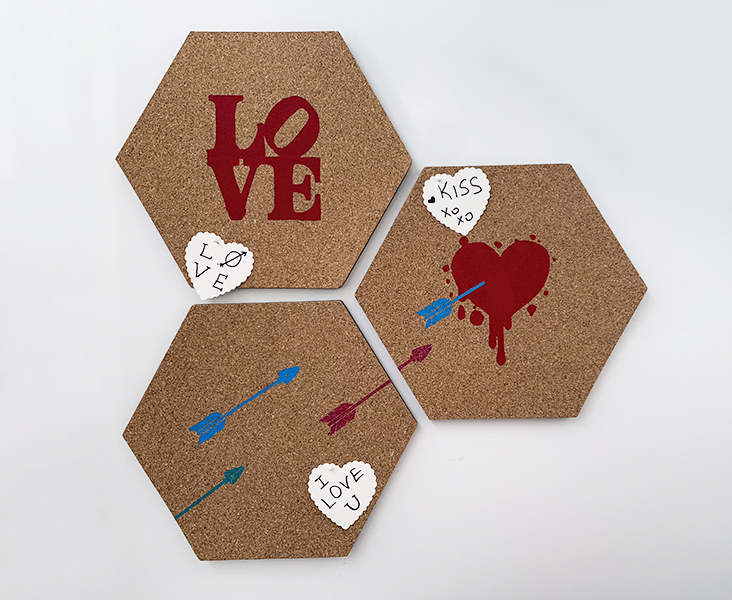
These hexagon cork boards add a modern look to your home or office and they’re practical for pinning to-do lists, family photos, and other lovely reminders. Valentine’s Day is coming soon, so I thought it would be a great theme to use for this cork board decor.

Grab what you will need – In this craft project, I used 3 hexagon cork boards from Target; Pebeo red, turquoise, dark pink paints; LOVE Stacked Stencil, Heart Dripping Stencil, Arrows Stencil, brushes, and painter’s tape.

Use your brush and dip it in red Pebeo paint. Don’t forget to do a tapping motion instead of a brush motion, to avoid running the risk of your paint getting under the stencil1.

Once you are done, remove the stencil.

Grab the LOVE stencil and begin painting it red.

Remove the painter’s tape and the LOVE stencil and check out your progress.

I wanted to do something extraordinary with the arrow stencils. I positioned the stenciled so that one portion would be on top of one corkboard and the rest of the arrow on another board.

Tired from Valentine’s default red, I grabbed other colors that I thought would look lovely with the heart.

After everything dries, you now have a chic and cool way to stay organized.

Here it is, a reminder to have LOVE in your day, every day! Share your LOVELY creations with us @stencil1


Cork boards are awesome because they can be great functional pieces of art. They take on paint really well and serve as a great surface to pin your daily reminders on. Not only will you be on top of everything you have to do, but your office will also look great!

To make this pin board, you’ll need: 4 8 ½” by 11” cork sheets, multi-surface paint, brushes, double sided mounting tape and our cherry branch 11 x 11 stencil.

Step 1: Lay out your four cork sheets side by side so that they form a square. Place your stencil on the top right corner of your square. Angle it so that it looks as if your branch is part of a big cherry blossom tree.

Stencil1_BlossomBoard_01
Stencil1_BlossomBoard_01b

Step 2: Using brown paint and a stencil brush, begin to paint in the branch. Make sure to use a dry brush technique, this means that you are using a very small amount of paint and applying several layers to make the color more saturated. Use an up and down dabbing motion to paint.

Stencil1_BlossomBoard_02

Step 3: Rinse your brush, or use a different brush to paint your petals white. If you are re-using your previous brush, make sure you dry it really well. Again, use very little paint and an up and down dabbing motion.

Stencil1_BlossomBoard_03

Step 4: We love the colors of cherry blossoms. To simulate that look, we used a dab of pink paint (paint your plate a little bit to get the excess paint off your brush) to tint parts of the petals a pastel pink.

Stencil1_BlossomBoard_04
Stencil1_BlossomBoard_05
Stencil1_BlossomBoard_06

Step 5: Use the stencil at different angles to paint some flowers and petals falling off the branch.

Stencil1_BlossomBoard_07
Stencil1_BlossomBoard_08

Step 6: Once your paint is dry, put a piece of double-sided mounting tape of the back of your cork sheets. Hang them up arranged like you painted them, but allow them to separate a little bit from each other.  Snap a picture of your pin board and show us what it looks like in your home or office! @stencil1

Stencil1_BlossomBoard_09
Stencil1_BlossomBoard_10
Stencil1_BlossomBoard_11