Στο νέο online παιχνίδι καζίνο του Nine Casino, εμπνευσμένο από τον κόσμο της κατασκευής στένσιλ, οι παίκτες μπορούν να δημιουργήσουν τα δικά τους μοναδικά μοτίβα για να ξεκλειδώσουν ειδικά επίπεδα παιχνιδιού. Immediate Byte Pro Neoprofit AI

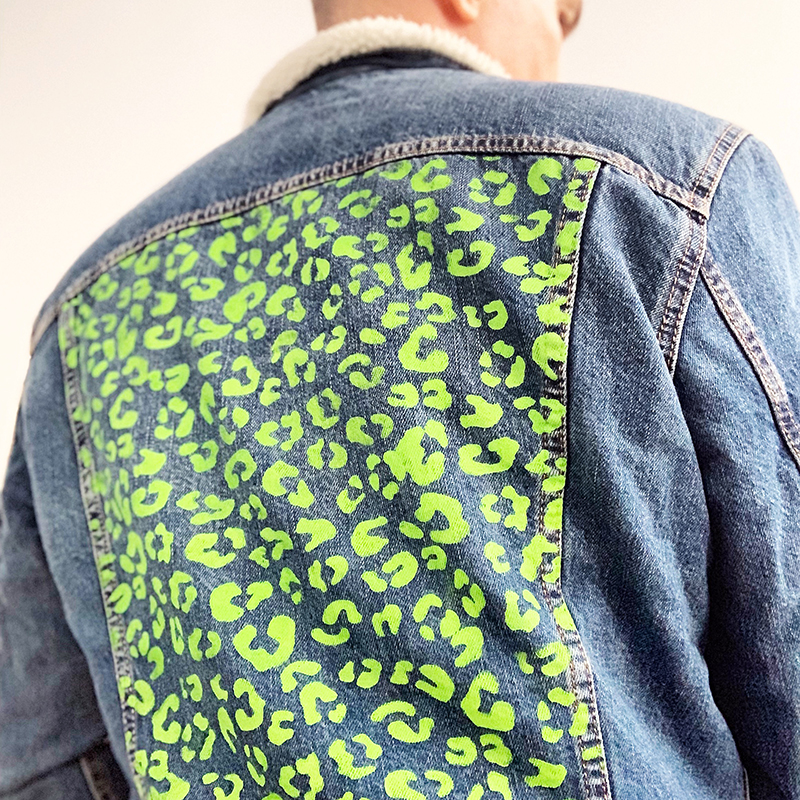
This great tutorial will show you how to turn any denim coat into a new style piece by using a leopard animal pattern stencil and bold colors.

We used a Levi’s sherpa winter denim coat and the Leopard Repeat Pattern Stencil (8.5″x11″)

Outline the back panel of your denim coat with masking tape to define the area you are painting.

Grab your brush and begin painting the stencil with the lime green fabric paint, we used Pebeo Spring Green Setacolor paint.

Do you see the 4 triangle shaped cut outs? Those are registration marks to repeat the design and create a repeat pattern. Place 4 pieces of tape under the stencil yet clear of the pattern and draw in the triangle shapes with a pencil. After you paint the first stencil in, you can shift the stencil to the left or right and line up the triangle marks to make this all repeat. WE have a detailed video on repeat patterns (shown on walls) here

When you are done painting the entire back panel, let it dry. Use an iron to make this craft long-lasting.

Now you are ready to flaunt your new lime green leopard coat. What will you customize? Please do show us @stencil1


A classic striped shirt from Universal Thread at Target just got even cooler with this lipstick and kiss stenciled embellishment.

We used the Diva 4-pack set, available at Target for this stenciled top DIY.

Start by inserting cardboard inside the shirt. Make sure it fits just right, don’t stretch the shirt too much or you will warp your design.

We wanted the lipstick to appear as if it’s in the pocket so we taped down the pocket to paint inside it a bit…

Next, place the lipstick stencil where you want the design to appear.

A few pro tips: Use small stencil brushes for designs such as the lipstick stencil as it will allow you to change colors for different areas and not color outside those areas. And pro tip #2, always use very little paint, it’s better to build up a few layers until the stencil design is filled in nicely rather than use too much paint and get blurry results with paint seeping under your stencil.

Oh yea, if the design is close to the edge f the stencil, place a piece of tape as a block so you don’t paint outside the stencil area!

Dry the lipstick design and place and paint the lips next. No need to wait for it to dry, lift up your stencil and see your work!

How hot is this top?! Wear it proud and send us your stenciled t-shirt images to @stencil1 so we can share them on the blog!


Mother’s day is coming up, and one of our Stencil1 designers had the sweet idea to make a custom shirt for her Mom. In this tutorial, we will go through how to use our flower stencils on a cotton cami. Follow along or use it as inspiration for your own piece!

DSC00353e

Pick out which shirt you would like to customize. Make sure it’s cleaned and freshly ironed.
Use our Stencil Style 101 book to select which stencil you will use. We settled on our flower stencils, but you may use what tickles your fancy.

DSC00370e

Figure out where on the shirt you want to place your flowers. Keep in mind how clothes will look like when worn, so avoid awkward placements! If you need to, you can hold the stencil up in a mirror to figure it out, or even make a little sketch.

DSC00377e

Once decided, tape down your stencil. This is to make sure it doesn’t slide and mess up your work.

DSC00375e

Get your paint ready. You don’t need too much, and make sure to keep the colors separate from each other. When you’re going to add paint to your brush, take off as much paint as possible.

Remember: You can always add more paint to your stencil, but you can’t take paint away.

DSC00380e

Start stippling your brush onto the fabric. Focus on the center, leaving space around. When adding on paint for your first application, less is more!

DSC00390e

Switch to an analogous color to add dimension– we used magenta followed by orange. Be light around the edges of your flower to give it a faded/ watercolor effect.

DSC00395e

When complete, carefully lift up your stencil. Notice how the edges of the flower seem to be faded? You can achieve this effect by using less paint around the perimeter.

DSC00397e

Keep adding more flowers to your shirt to fill your heart’s content. (Note: If you want to use the inverse side of a stencil, take a bit of dish soap and a paper towel, and wipe your stencil before reuse, so as to not get unwanted paint on your design.)

DSC00403e

¡Qué hermoso!  Take a heat blowdryer and point it at your flowers for a couple of seconds to merge seal the paint onto the fabric.

DSC00409e

So cute. Get a nice giftbag or box to complete your gift. Presentation makes everything come together! Happy Mother’s Day ya’ll.

DSC00406e

¡Feliz Día de las Madres!~