Στο νέο online παιχνίδι καζίνο του Nine Casino, εμπνευσμένο από τον κόσμο της κατασκευής στένσιλ, οι παίκτες μπορούν να δημιουργήσουν τα δικά τους μοναδικά μοτίβα για να ξεκλειδώσουν ειδικά επίπεδα παιχνιδιού. Immediate Byte Pro Neoprofit AI

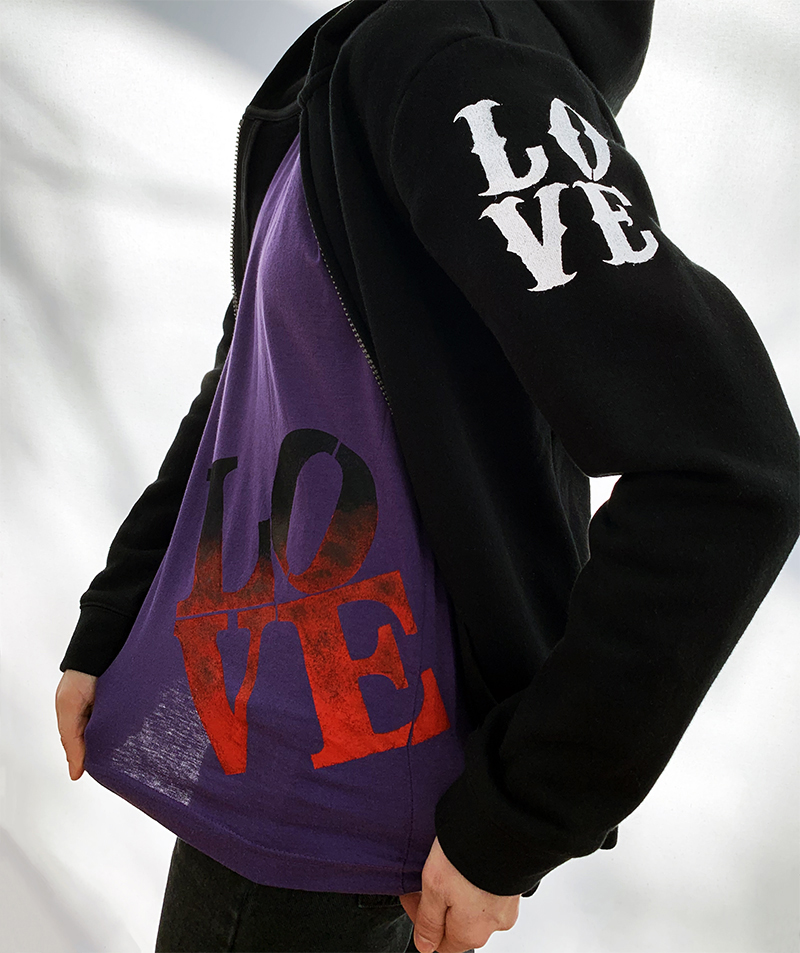
January 9, 2020

Here’s a wearable DIY for you – Handmade stencil-designed Sweatshirt and T-shirt. Here are the steps to make your own:

All you need is a T-shirt, LOVE stencil, black & white paint, paintbrush, and a plate to pour the paint on.

Place the Love Stencil (8.5×11) on your t-shirt. Use tape to create extra borders around the stencil. The tape is an optional step to make sure paint does not go over the stencil.

Pour out some red and black paint on a plate. We used Pebeo Setacolor fabric paint.

Start covering the stencil with red paint. Paint over the entire letters “V” and “E”, and only partially over the letters “L” and “O”. Do gentle tapping motion with your brush to get a better result.

Brush over the rest of the stencil with black paint. Go a little bit over the red paint to mix two colors and create an overlap.

Once you are finished painting the stencil, you are ready for the reveal.

Slowly remove the stencil to see the finished work. Let it dry and heat seal with an iron, inside out.

Now you need a sweatshirt and white paint and our Valentine’s Love Stencil.

Choose the desired area where your stencil design will appear. For our project, we chose a sleeve.

Place your stencil on the sweatshirt sleeve. Tape around the stencil borders to make sure no paint will get outside the stencil area. Pour a bit of paint on the plate, get the paint on the brush and start carefully tapping white paint over the stencil.

Once you have covered the entire stencil area with white paint, it’s time to lift the stencil.

Lift to reveal your design. Gently peel off the stencil to see what you have created. Share your wearable art with us @stencil1


I’ve posted earlier how Erica Domesek of P.S. – I Made This totally hooked it up by asking me to cut some of my stencil designs for the Sharpie DIY Fashion booth inside the tents at Fashion Week. Well, I went to the booth today to help out and stencil some stuff. I met the Sharpie people and a ton of fashionistas plowing into the booth to give it a go! Betsy Johnson provided a t-shirt that people also could stencil on. Check out all the pictures!


If you are in the Bay Area, tune into View from the Bay at 3pm today on Channel 7 ABC News. I was honored to tape a segment with energetic host Lisa Quinn in her stunning home. I  showed Lisa how to make t-shirts and more using the stencils from our book.  Not in the Bay area? Well, they also stream the show live on their website here.  Hope you like it!

bridge


So I have been seeing a lot of these gradient dyed shirts around lately, many which are NOT CHEAP. I like them but I always keep thinking, I could do that! I thought, ok, I’ll dip a shirt in dye but them I thought there is a more controlled way to do this. I used my Stencil1 Sprayers to really get that gradual change in color from dark to light! So I laid down this shirt that is light blue with dark trim. I decided to keep it simple and make the gradient blue as well. Starting at the bottom, I sprayed all along the bottom several layers, then moved upward doing a little less, then up more and even less,etc…Once it dries I will heat seal it with an iron and have a new summer shirt!

The gradient trend

The gradient trend

My Stencil1 sprayer gradient shirt!

My Stencil1 sprayer gradient shirt!


I was walking in midtown Manhattan one afternoon when this guy walked by wearing this awesome hoodie with our turntable stencil repeated on it. I had to ask “where did you get that?” and he told me his girlfriend made it for him. How nice, That made my day!