Στο νέο online παιχνίδι καζίνο του Nine Casino, εμπνευσμένο από τον κόσμο της κατασκευής στένσιλ, οι παίκτες μπορούν να δημιουργήσουν τα δικά τους μοναδικά μοτίβα για να ξεκλειδώσουν ειδικά επίπεδα παιχνιδιού. Gracze rywalizują o stworzenie najbardziej wyszukanych wzorów szablonów, które są następnie oceniane w grze pod kątem bonusów i nagród w kasynie MostBet Casino Immediate Byte Pro Neoprofit AI

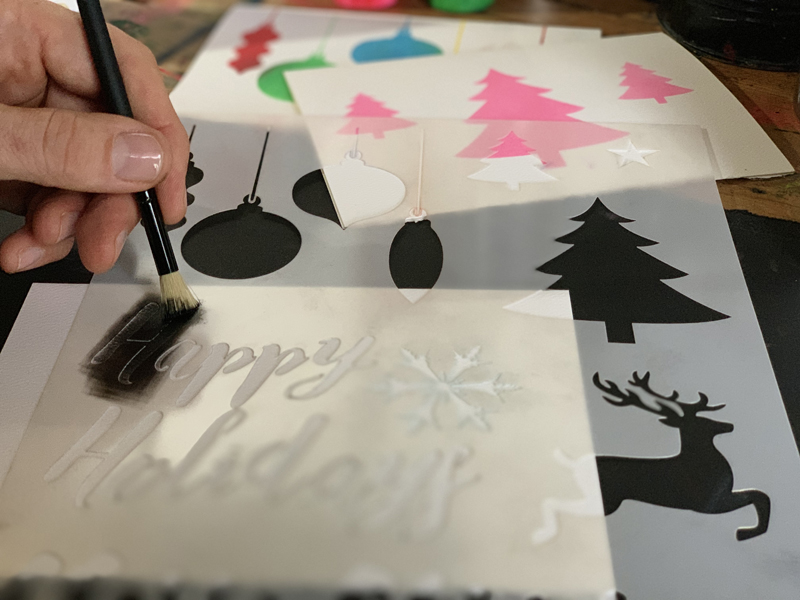
Stencils and Glass? Yes it’s a thing, a good thing!

BYOS – Bring Your Own Stencils, that’s what I did…to a glass making studio! Stencils can be used in so many mediums and my experimentation with glass produced some beautiful results if I do say so myself :). Here is how I used Stencil1 stencils with glass to make a hummingbird glass window ornament:

Materials You Will Need:

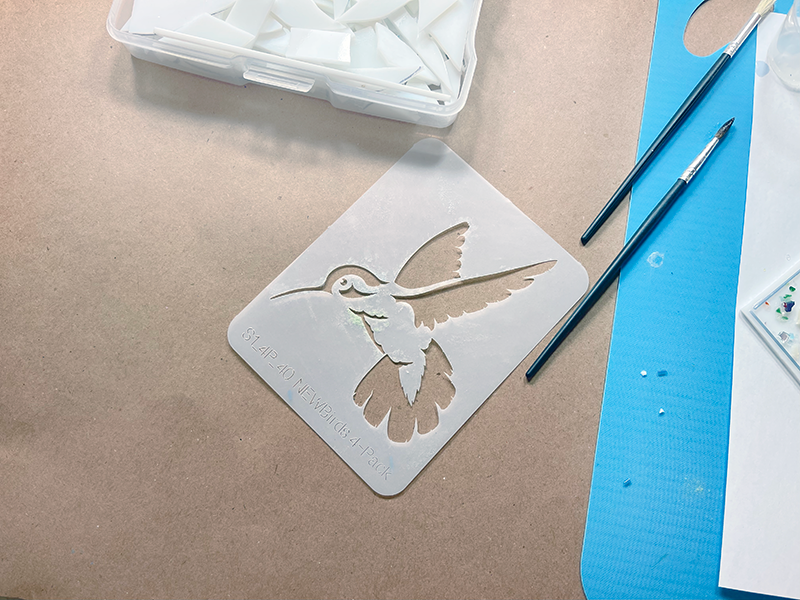
  • Detailed Birds Stencil 4 Pack
  • Tape
  • Glass Dust
  • Detail Brushes
  • Solvent
  • A Sturdy Flat Surface
  • A Small Spoon
  • Elmers glue
  • A Stove or Kiln or all this in a glass studio

I wanted to work on an optimistic, Spring themed image and the hummingbird was a perfect choice. It’s also great because it is a stencil design with a lot of bold open shapes, perfect for filling with glass powder!

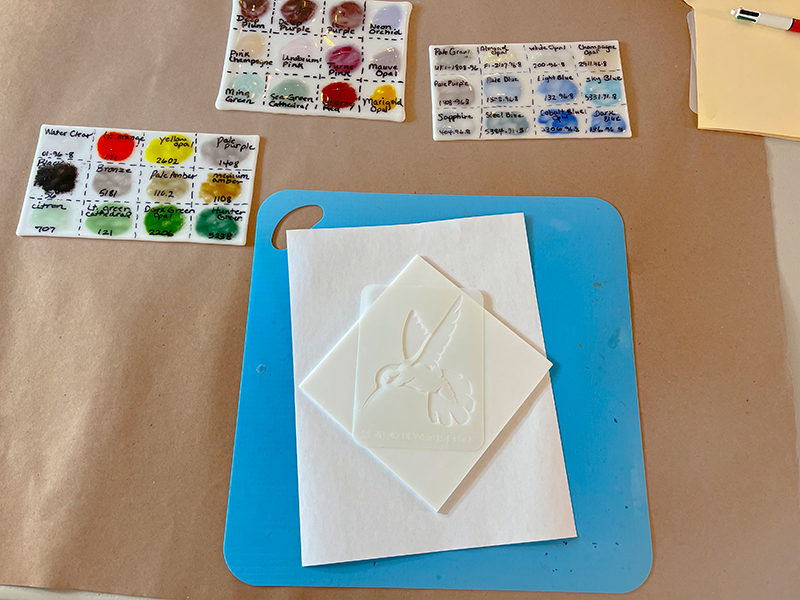
I was provided a 7″ x 7″ white sheet of glass, that’s my surface for today! You have to wipe it clean with alcohol, no oil should be on the surface. I then planned the layout of the design and thought it might look best to turn my square glass shape to a diamond-like position and attach a chain to the top point for hanging.

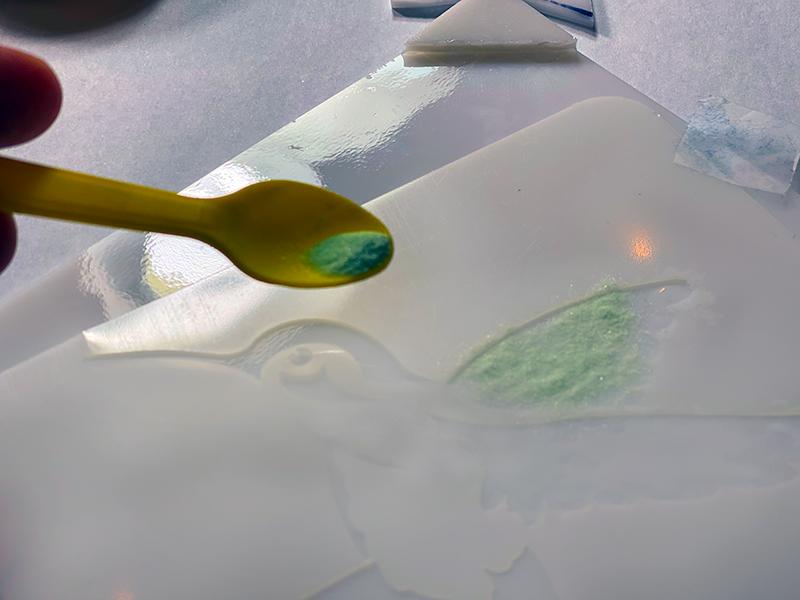
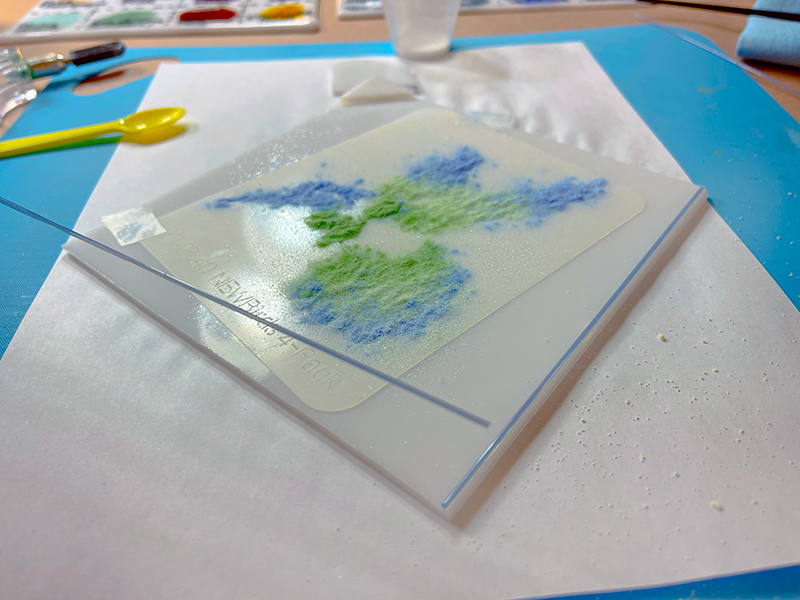
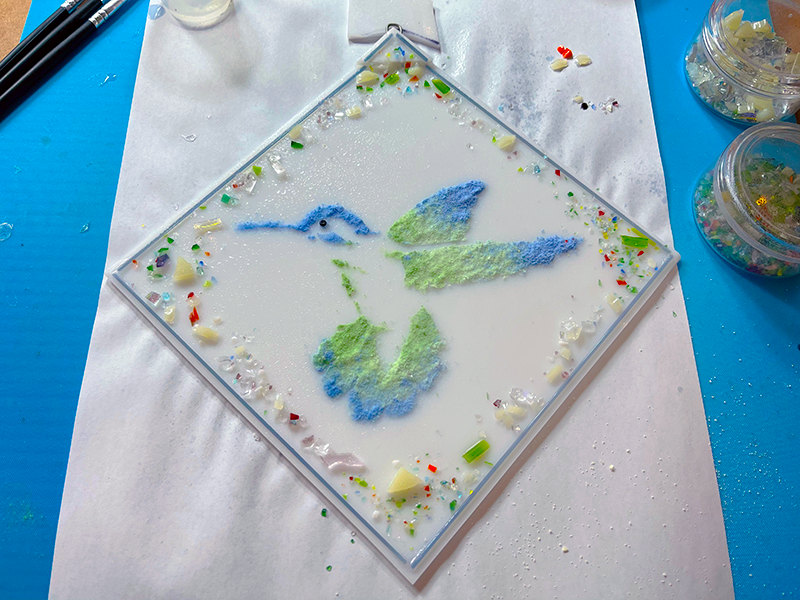
I brushed in a little bit of watered down glue into the wing area and then sprinkled in glass powder.

I continued the process with a few colors of powdered glass. you can see here that I am creating ombre blended effects by the way I sprinkle the dust. I also always use my darker colors on face details, it helps to really see the detail of those features!

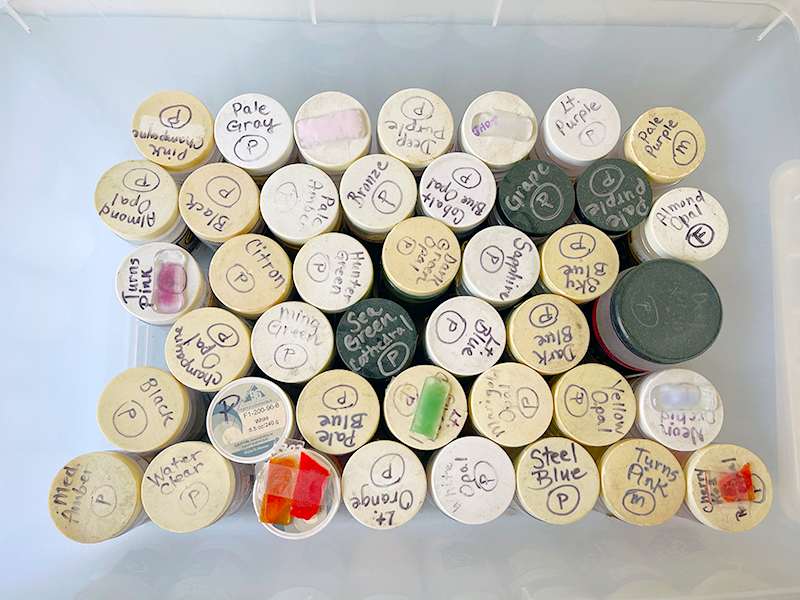
Here’s a shot of the different glass dust colors the studio offered. I love supporting small, local businesses like this. You don’t have to buy all the supplies, just visit, create, and everyone is happy! But yea, I also was like so how much is a kiln, haha! The art is addictive!

I also created a frame around the piece using these long sticks of glass, similar to hard pasta. It looked a little too structured for my taste so see what I did next…

I added these chunkier glass pieces around the edges to add some “atmosphere” to my little birds world. It adds some whimsy and texture. I then used a tweezer to adjust them to the composition I wanted.

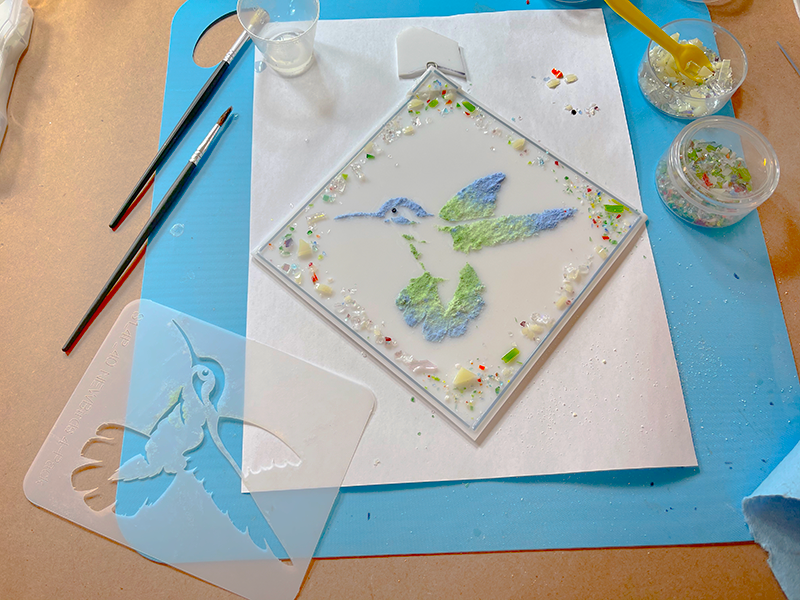
Notice how I cut a small triangle shape up top and layered my hook in the layers of glass, a hook sandwiched between two pieces of white glass. The piece of white glass you see above the art piece is being used to simply prop up my hook so it doesn’t flop down while the glue is drying it inside the “sandwich”.

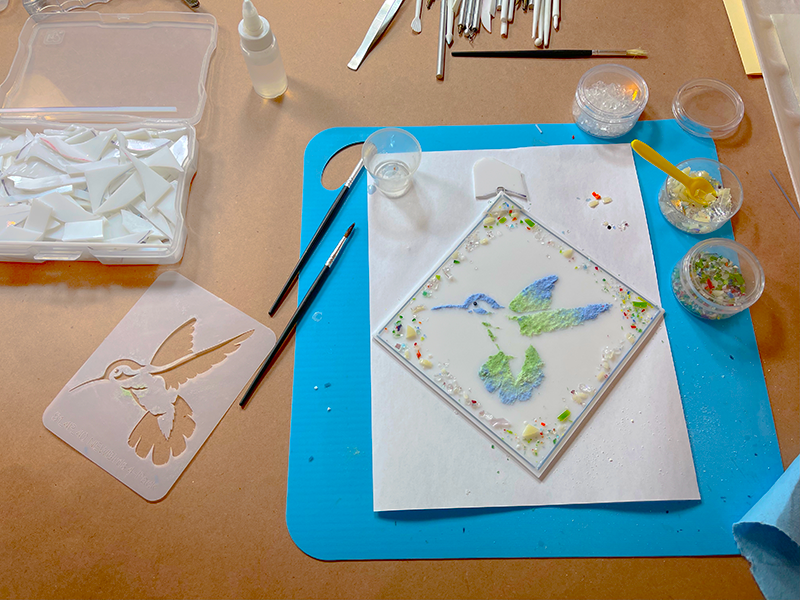
Once you remove the stencil, add your other elements of glass, you can use small tools to clean up your design. You can push some sand around, move shards around, and get it all to it’s final position before it get’s fired.

Your stencil has done it’s purpose and can be washed with warm soapy water. It’s ready for storage and to be used many more times!

The design was then spritzed with a very thin glue spray, almost like hairspray.

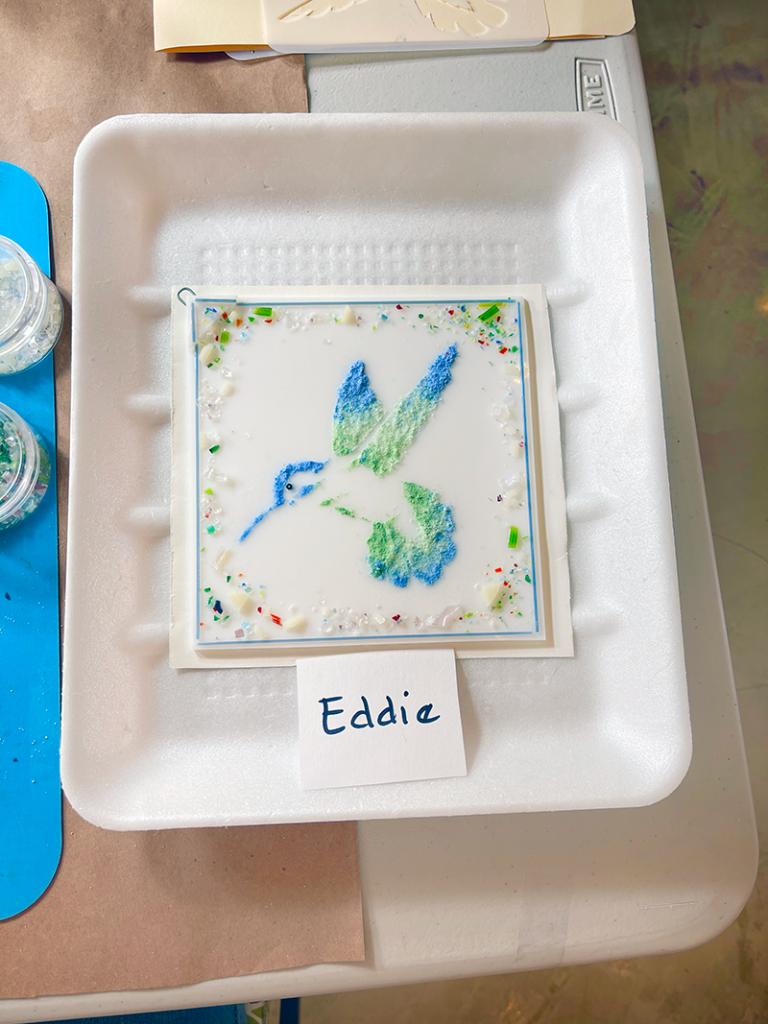
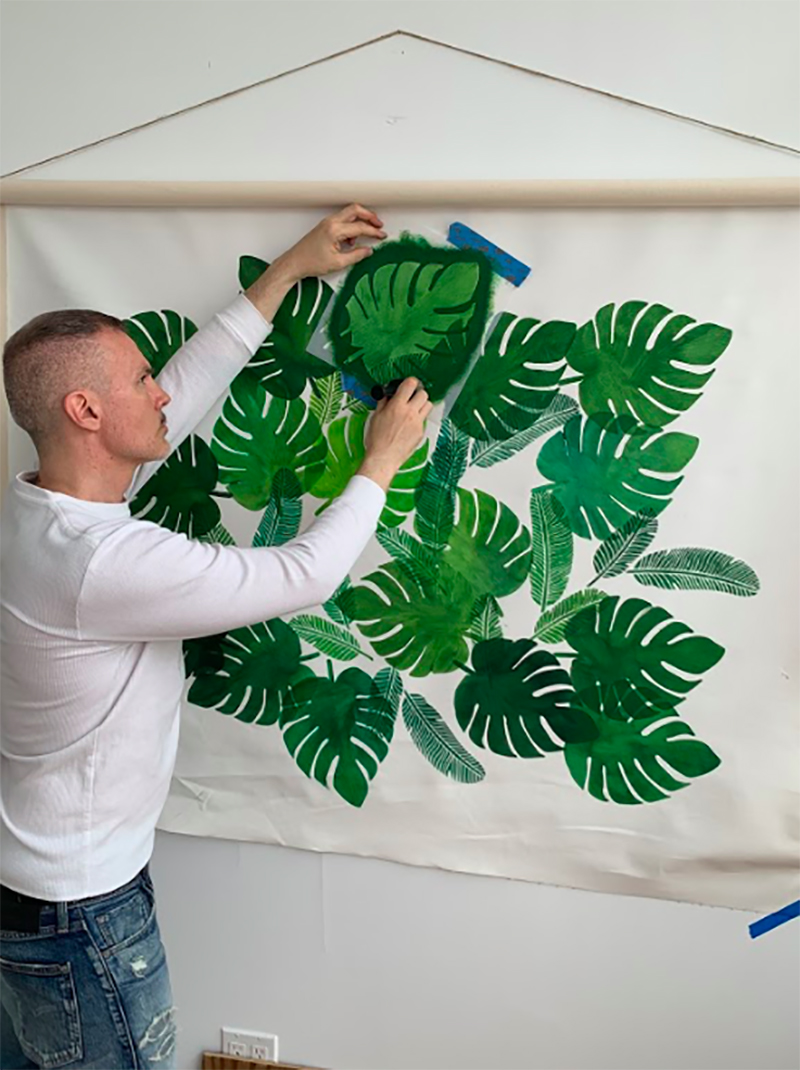
The piece was then placed on special paper that it sits on in the kiln. That’s me Eddie 🙂

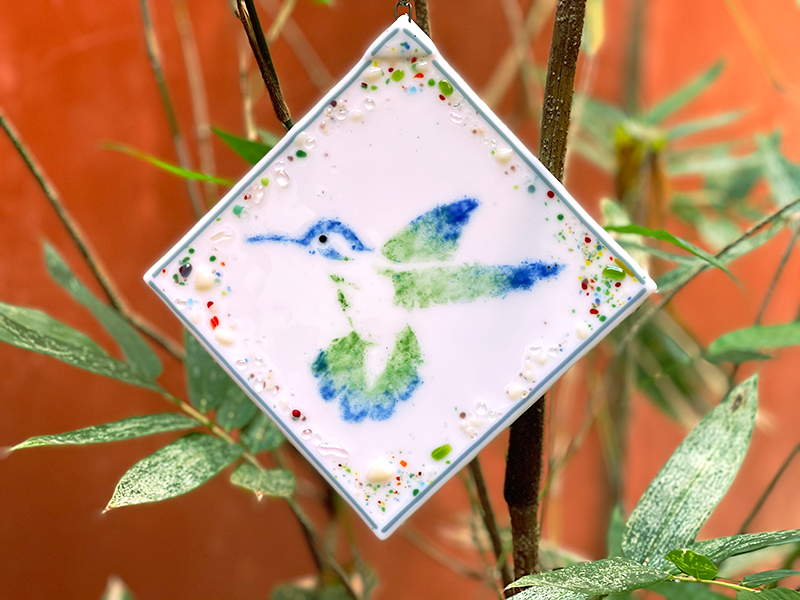
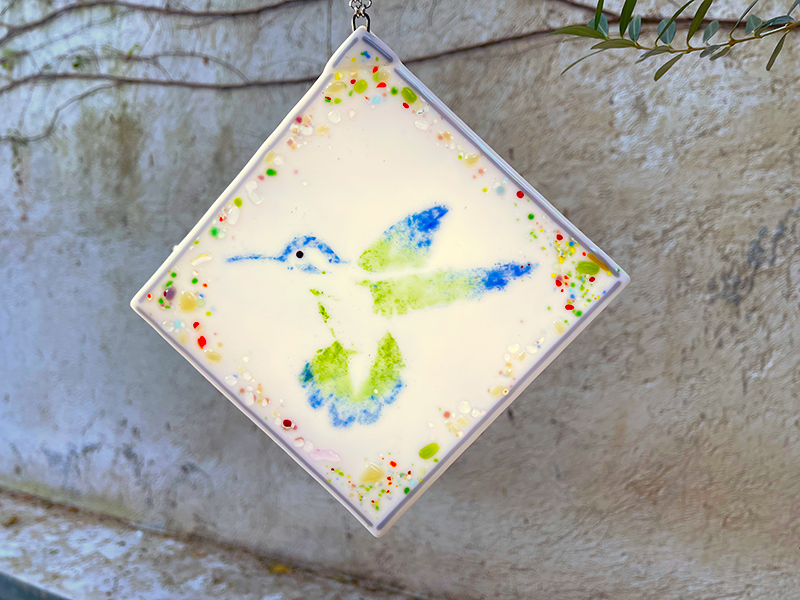
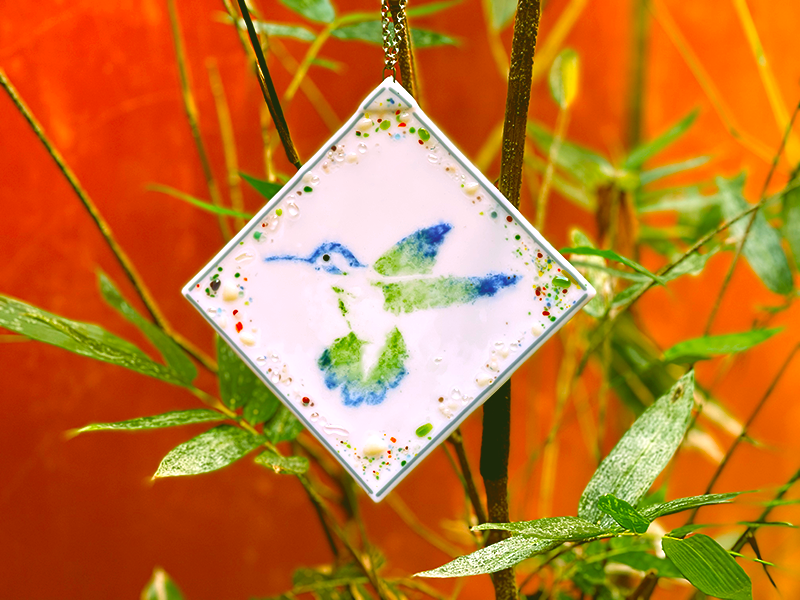
Here’s a shot of the piece all finished, I am so happy with how the dust gets darker. Oh, forgot to mention I placed a small black glass bead for the eye. I think the eyes should pop in an image so this little bird got a nice dark eye.

Once completed, hang your piece proud! As shops reopen, please search for your local glass studios and bring Stencil1 stencils with you to try this technique. We would love to see what you make!

Please share your creations with us @stencil1.com


Don’t let the special occasions pass simply because we can’t be with each other like we used to. Whether it’s a video call party or a 6-feet-apart-party where everybody is practicing safe social distancing, make the day extra special with:

Stenciled backdrops for online Zoom chats

Drive-By Birthday Party with Stenciled Signs

Stencils used: Cargo font stencil & Tiara stencil (8.5″ x 11″)

Stenciled gift boxes

Stamped gift box (yes we sell stamps too!)

Social Distance Picnic Party with Stenciled Blankets

Stenciled Cake

Stenciled napkins

Stenciled frames for their dear photos

Customized stenciled sneakers

Stenciled gift cards

For the baby shower parties:

DIY baby bibs

Simple baby onesies

For the parties with your furry buddies:

A very cute bandana for your pet


Enter to win a FREE Stencil1 Deer Wall Stencil!

Every week for the month of March, we will be giving out one Stencil1 Large Antlered Deer stencil.  A $29.99 value, for FREE! Perfect for your wall or any of your large-scaled DIY projects.

How-to Enter:

  1. Follow Stencil1 on either Facebook and/or Instagram.
  2. Share this post on any of your social media accounts.
  3. Tag @Stencil1 and hashtag #OhDeerStencil1
  4. Tell us how you will be using the deer stencil

Each account will count towards an additional chance to win, so be sure to follow us on all social media!

We will pick each winner randomly and announce the winner via social media every FRIDAY for the entire month of March.

For US customers Only!

Good luck, stencilers!


Want to make some on-trend artwork for your space? This project hits the bull’s eye! Follow the steps on how to decorate a wooden panel with our Arrows Stencil -Small (5.75″x6″) using Fleur paints, which can be found at Artist & Craftsman.

Things you need: a decorative wooden panel, Arrows Stencil -Small (5.75″x6″), and several bottles of colorful Fleur paint of your choice. We like these paints as they have a chalky finish.

Paint the entire wooden panel in one color to set a nice neutral background for your artwork.

Once you covered the entire wooden panel with your desired background color, let it dry for a few minutes.

Plan where you want your arrows to fall, we wanted the arrows centered to create balance in the piece.

Then mark your registration points with a pencil to create a repeat pattern for your artwork. Later you can remove the registration marks so they do not show on your final artwork.

At this stage, choose 4 different Fleur paint colors, and slowly pour a small amount of paint on a plate.

Next, you will need to take a brush and fill in the Arrows Stencil -Small (5.75″x6″) with Fleur paint. WE varied the colors on the arrows, you can go even more detailed if you wish, making each arrow contain a few colors.

When you are finished painting the Arrows Stencil -Small (5.75″x6″) with 4 different colors of Fleur paint, you are ready to lift.

Now you can reveal your artwork by pulling the Arrows Stencil -Small (5.75″x6″) up.

Then following the registration marks you have drawn earlier, place the Arrows Stencil -Small (5.75″x6″) around the other corners of the wooden panel, and cover it with your desired color of Fleur paint.

Finally, let your entire artwork dry and enjoy the results! Share your stencil creations with us @Stencil1


I sort of have a tin can obsession. I think they are a beautifully designed object. And as a container, there are so many re-uses for them. I especially like to paint them to give them some newness.

tincan_howto_Stencil1_1

I used a basic paintbrush and various colors of Folk Art new Multi-surface paints for these cans. Two coats did the trick. Final use for them?

tincan_howto_Stencil1_2
tincan_howto_Stencil1_3

An urban herb garden for my window sill!  Of course you can use them as pencil holders, vases, and more. What would you do with some colorful painted tin cans?

tincan_howto_Stencil1_final

To make this herb garden you’ll need 4-6 clean tin cans, paint, paint brushes, soil and a variety of herb plants or seeds. Once you are finished decorating your cans replant different herbs (or seeds) into the tin cans. Have some fun incorporating the name of your herbs into your design! An optional step to make your herb garden last a little longer is to punch a few wholes at the bottom of the cans and add some pebbles before you add the soil. This will allow some water to drain out. If you follow this step, consider placing your garden on a small tray to catch the water.