Στο νέο online παιχνίδι καζίνο του Nine Casino, εμπνευσμένο από τον κόσμο της κατασκευής στένσιλ, οι παίκτες μπορούν να δημιουργήσουν τα δικά τους μοναδικά μοτίβα για να ξεκλειδώσουν ειδικά επίπεδα παιχνιδιού. Immediate Byte Pro Neoprofit AI

These wood trees were from the dollar store. What better way to make them look not-dollar like than to paint them black and add some metallic pattern!


I used our Dots Repeat, Chevron Repeat, and Strings of Dots stencils. I have to say I am not a huge spray paint person because of lack of outdoor access, but I took it to the sidewalk and spray paint is my new best friend again. You can work so fast with spray paint! I coated them black.

It dried fast so I could then stencil patterns on top of the black
using silver and gold spray paint. Done!

Inspired by this project? Share your creations with us @Stencil1


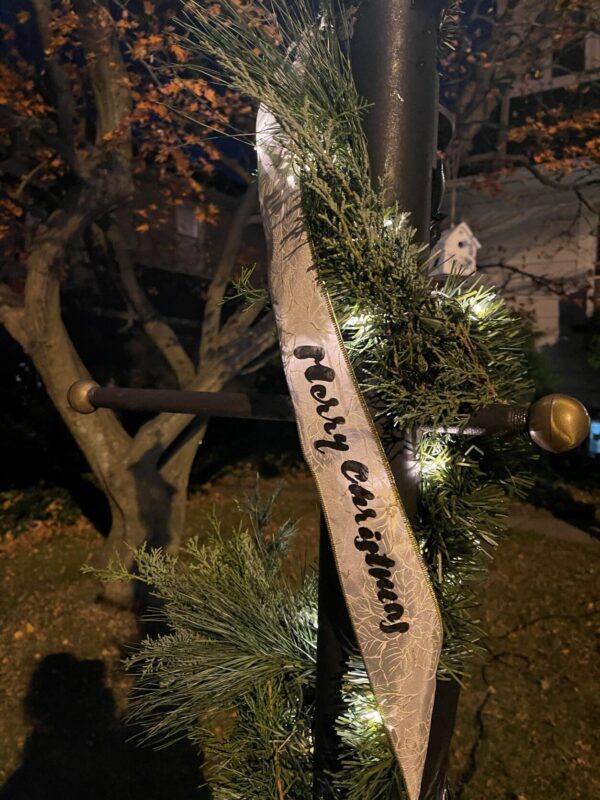
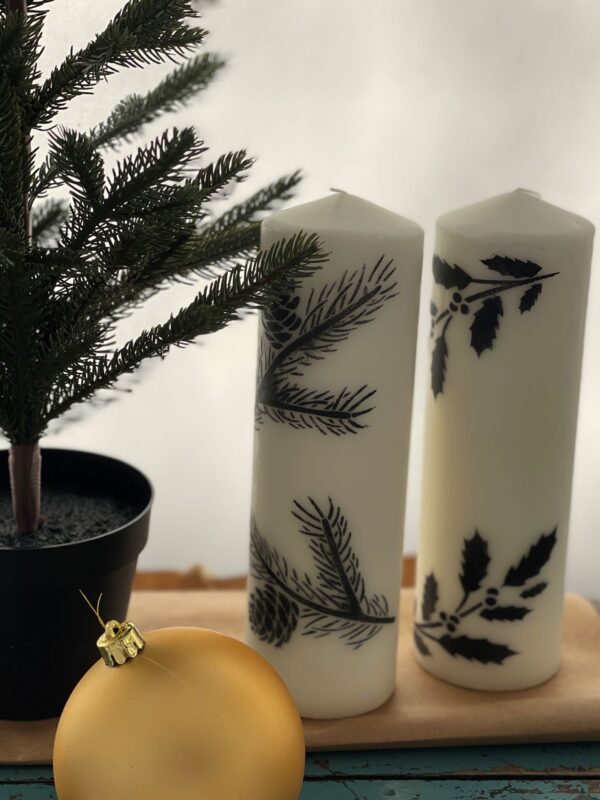
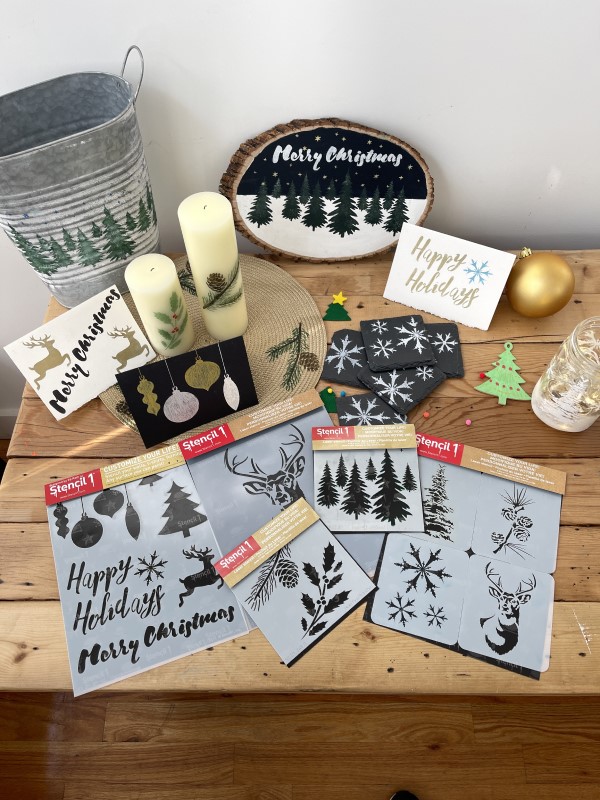
I stenciled Ribbon to use on a garland and wreath. Ribbon is very thin so be sure to work on a cardboard surface as the paint will bleed through.

I stenciled 9 feet of ribbon and alternated designs from Merry Christmas to the holly branch in black fabric paint.

The garland we purchased was pre-lit and came from Target. This made things easier but the garland is thin so Teri had the brilliant idea to fill in the garland around the light post with some real branches.

She also did this with an old fake wreath she had! Just a few branches really helped fill it up and make it all look like the real thing. The ribbon flows nicely around it all, giving it that handmade touch.

Inspired by this project? Share your creations with us @Stencil1


This DIY is my favorite one of the bunch this year and thank you IKEA for having these “Borrby” lanterns in stock! I purchased two of these lanterns in black and what’s nice is they stand about 17” tall, a nice bold statement!

This decor was thought out to be symmetrical and luckily with stencils you can flip them to do mirror images! I choose our Angel stencil in 8.5” x 11” but you can do whatever images you want for any season or just for decor.

I taped my stencil in place and grabbed some black spray paint. Spray paint and gloss are an excellent combination! I placed my stencil over the glass and taped it in place. I did a light even spray of paint and let it dry. I lifted the stencil off and it was done!

I did the same for the second lantern glass except flipped the stencil so the angels face each other when placed on each side of the entry. When planning this, make sure you are stenciling the inside of the glass so it stays protected from the elements.

I hand brush painted the smaller lanterns with our snowflake stencil. Balanced and tasteful, no?

Inspired by this project? Share your creations with us @Stencil1


Painting candles with water based acrylic paint is so satisfying. Our stencils bend nicely around curved surfaces!


I stuck with our black and white plan. These were later placed in the lanterns and so from the front of the lanterns you see the angel on the glass and the side view you get a nice stenciled view!

Inspired by this project? Share your creations with us @Stencil1


These little wood circular ornaments are so affordable and I was not sure where they would get used but I made about 24 of them.

Since I have zero patience, I spray painted them all black on both sides. I was not into brushing them all!

Then I placed them in groups of 4, close together, placed a pattern stencil over them, and sprayed silver and gold spray paint on them.

Teri filled the wreath with these and I love the results!

They took on this glam art deco look I love. And they are messy and painted looking which I think looks rich. You can slow down and do it neat if that’s more your style 🙂

Inspired by this project? Share your creations with us @Stencil1