Στο νέο online παιχνίδι καζίνο του Nine Casino, εμπνευσμένο από τον κόσμο της κατασκευής στένσιλ, οι παίκτες μπορούν να δημιουργήσουν τα δικά τους μοναδικά μοτίβα για να ξεκλειδώσουν ειδικά επίπεδα παιχνιδιού. Immediate Byte Pro Neoprofit AI

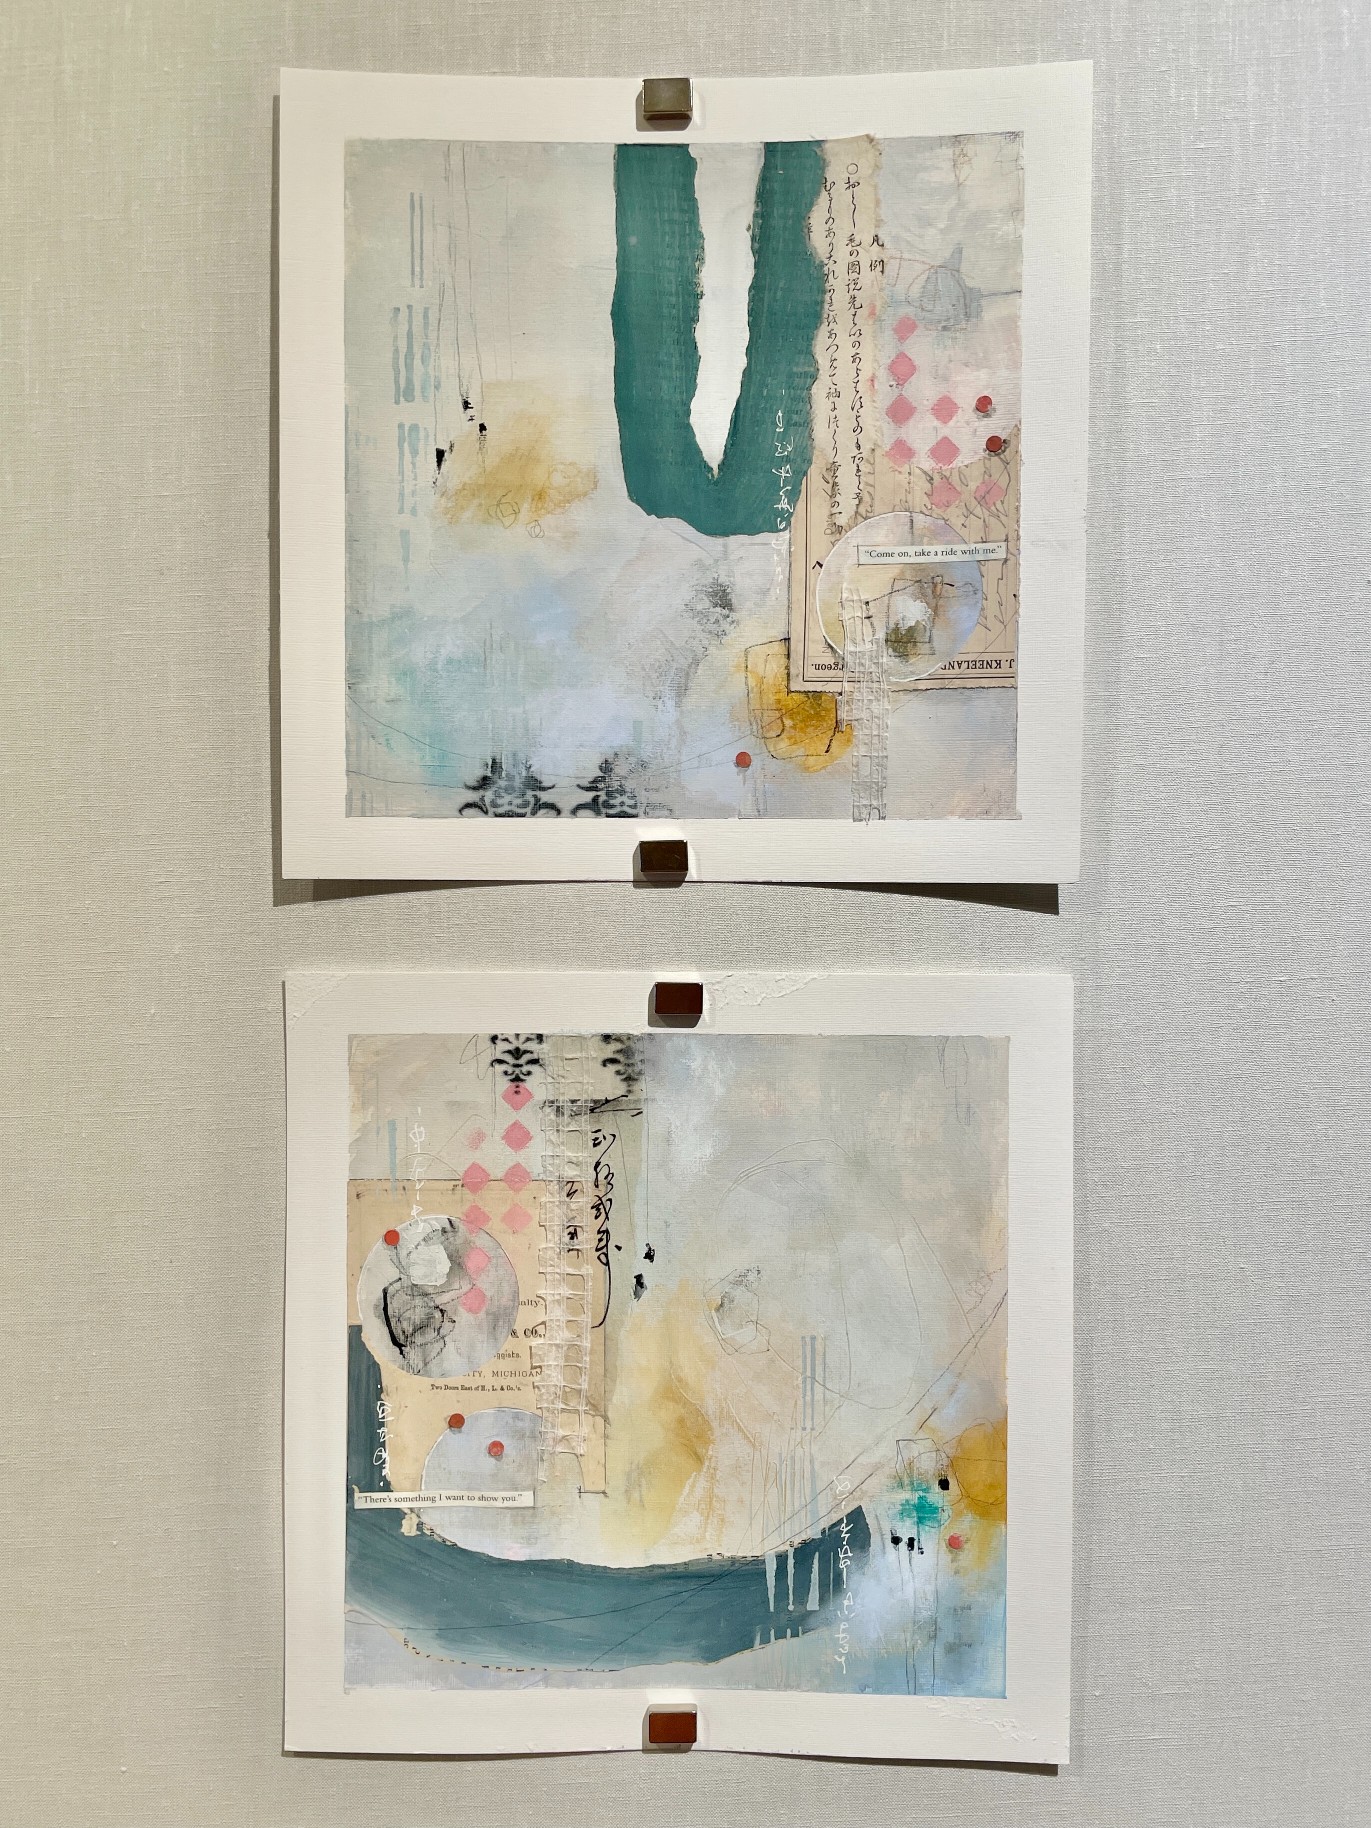
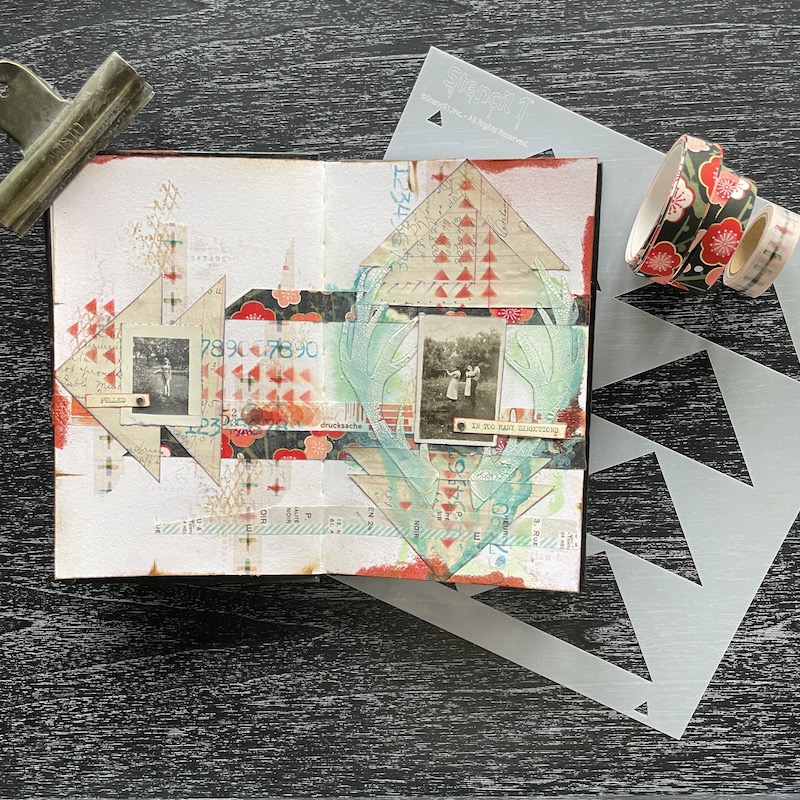
Hello! I usually work in pairs when creating art on paper and this project was no exception. I like to purchase works in pairs but this also hedges your bet of one work hopefully being a success.

works_on_paper

What you will need:

Diamond Stencil from the Pattern 8 Pack
Thatched Texture Stencil
Small Damask Stencil

Matte Acrylic Paints in Neutrals
Stabilio Black Pencil
Graphite Pencil
Watercolor Pencil (Ochre)
Water Soluble  and Soft Pastels   
White Posca Pen
Spray Paint (Black)
Paint Brush
Glue Stick and Gel Medium
Collage Papers and Found Words

Step 1: Mark Making

I began by taping off 2 pieces of 12” x 12” Strathmore Mixed Media Paper to a board.

Insert photo of gray grungy Swirled marks on paper

I used a Stabilio black pencil to make some marks as well as a mechanical pencil. Wet a brush and and touch this to the Stabilio on the papers to start creating some energy and covering up the white of the paper. Charcoal or Graphite works well also.

Step 2: Continue Developing your Background

gray and pink diamond pattern with 2 black round marks

Add some water activated pastels, charcoal, or water soluble pencils or crayons. Reestablish Black Stabilio over marks that you like. I used the Diamond Stencil from the Pattern 8 Pack and rubbed pastel right through the stencil with pink pastel and ended up reestablishing this pattern in later layers.

I selected 5 matte acrylics in Chalk, Antarctic, Buff, Seaglass and Koala and blended with both a brush and a brayer. I made marks in the wet paint with a skewer and added some other colors of pastel and marks with an ochre watercolor pencil.

2 papers side by side on easel with unglued collage elements

Step 3: Auditioning your Collage Elements

Select some collage elements that are speaking to you. Painted Papers, vintage papers, book pages, fortune cookies etc…

Step 4: integrate the Collage
Elements with Stenciling

I reinforced the Diamond Stencil marks with Pink Pastel over the collage elements and sprayed Fixative to secure the pigment on both works.

Thatched Stencil and Hand

Using a darker contrast Blue Gray Paint, dry sponge matte paint through the Thatched Stencil on both papers.

Step 5: Final Stencil and Marks

I placed the Small Damask Stencil at the bottom of one of the papers and the top of the other paper so they would align if stacked and sprayed black matte paint through the stencil after protecting the other parts of the media with paper towel.

black spray paint and paper towel

A few additional marks and color notes along with adhering some found words as a title and you have 2 finished Mixed Media Works on Paper ready to hang!

Hope you enjoyed!

Tracy Hickman
@anonymous.palette


Beginner Art Journaling in 5 Easy Steps…

Materials Needed:

Step #1 Washi Layer: Place several washi tapes down in a pleasing pattern across your pages. Add glue stick under the tape for permanence and a layer of clear gesso over top.

Step #2 Collage and Stamping: Using an old ledger page (or any collage paper you may have on hand) trace the Triangles 2 Aligned Stencil with a pencil and cut out triangles.

Step #2 Continued: Place triangles down in a pattern of your choosing, I overlapped mine. Glue down with a glue stick and cover in clear gesso. Add some stamping in red ink through the small triangle stencil in the Patterns 8 Pack Stencil to marry all the elements. I also added brown ink to a chain-link rubber stamp in a few areas and teal ink with a numbers stamp.

Step #3 Stencils: Place the Antlers Small Stencil down over the collage elements and hold in place with washi tape. Using a palette knife or gift card, spread crackle paste through one antler at a time when dry. Let crackles appear without heat setting for the best effect. 😉

Step #4 Spray Inks: Color the Antlers with your favorite spray ink, I spritzed water over the crackle paste and used the applicator out of the bottle to touch around edges. (you could also substitute watercolors or water-soluble crayons or watered-down acrylic paint here if you don’t have spray inks. Build up with a few colors after heat setting.

Step #5 Focal Point and Edges: Select 1 or 2 photos to place as a focal point, ink edges so they stand out, and glue down. I typed the phrase “pulled in too many directions” and affixed it with small metal Brads through both pages. The final detail consisted of edging the outside of all the pages with brown ink and smudging some clear embossing ink in a few spots around the edges. Heat set red baked texture powder for some edging drama.

Here Are The Details!

Happy Journaling,
Tracy
@anonymous.palette

Do you create Mixed Media and papercrafts with Stencil1?
Please share with us on social @Stencil1 and #stencil1 


Here’s a fun how to video where I show you how to create a cohesive framed art collage. What’s fun is you can customize the how-to using your favorite photos and favorite paint colors!

The ingredients you will need are:

Spray paint. In this case Krylon Indoor/Outdoor spray paint.

• Picture frames. In this case I used some Ikea picture frames. you can use vintage ones as well.

• Artwork. In addition to images I collected or cut out from books, i created a print using my anchor stencil and Stencil1 Spray Inks. I encourage you to make your own prints!

• Paper to work on.

• Hammer, nails, & a ruler to hang the art

YouTube Preview Image