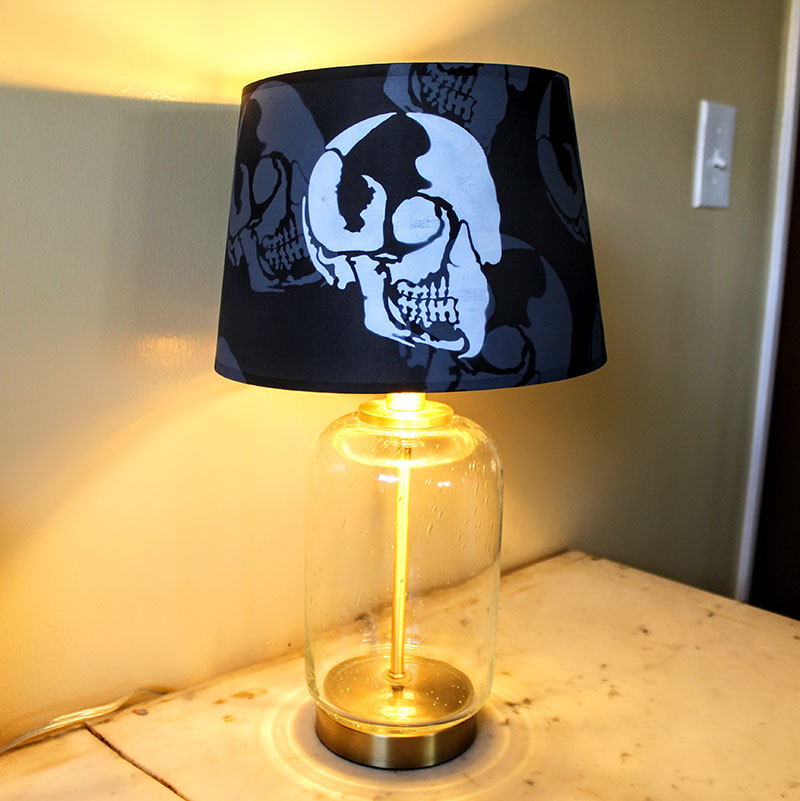
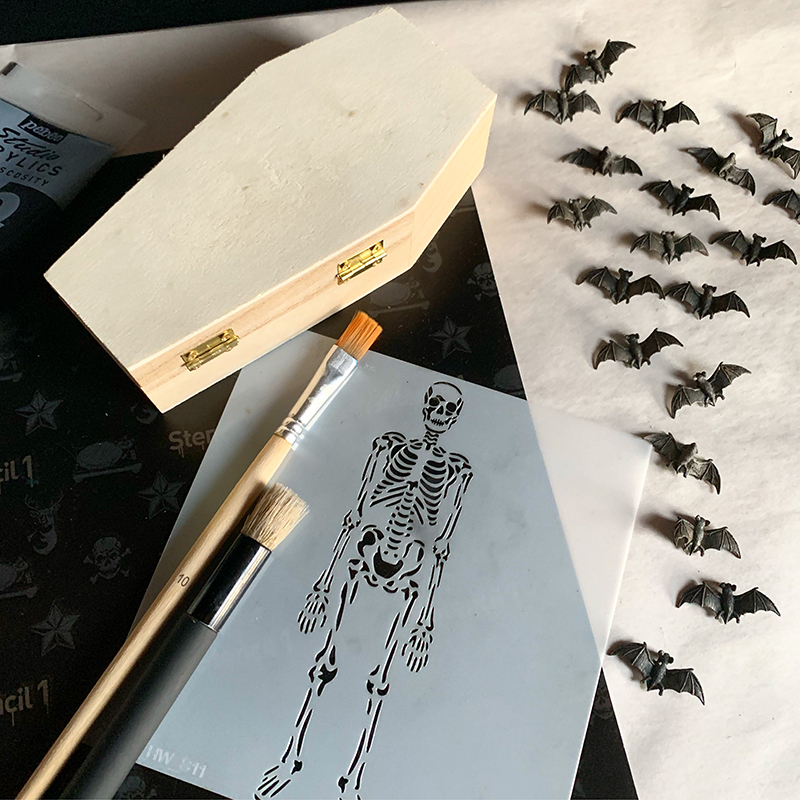
Στο νέο online παιχνίδι καζίνο του Nine Casino, εμπνευσμένο από τον κόσμο της κατασκευής στένσιλ, οι παίκτες μπορούν να δημιουργήσουν τα δικά τους μοναδικά μοτίβα για να ξεκλειδώσουν ειδικά επίπεδα παιχνιδιού. Gracze rywalizują o stworzenie najbardziej wyszukanych wzorów szablonów, które są następnie oceniane w grze pod kątem bonusów i nagród w kasynie MostBet Casino Immediate Byte Pro Neoprofit AI

Create Halloween candy bags with stencils for your kids to collect candy and have fun.

Things you’ll need:

Lay the stencil on top of your bag. Don’t worry if the entire stencil image on the bag. It will still come out great-looking.

Grab your green marker and paint the stem of the pumpkin.

Then, grab your orange marker to fill in the evil pumpkin.

Remove the stencil and check on your progress.

Try different Halloween stencils to create different Halloween candy bags

Try using a gel pen for the skeleton stencil which may need a finer tip to get all the details of the stencil.


If you are fond of decorating pumpkins for Halloween, then you’re no stranger to making custom pumpkin projects that let you add an extra touch to your Halloween decor. Get inspired by these pumpkin how-tos to make the holiday more special.

Pumpkins with a twist – wicked clay stems

3 Ways to Decorate Your Pumpkins Using Stencils

Beetlejuice Inspired Pumpkins!

Stencil Graffiti Pumpkins

Jack-o’-Stencil

A Chain-Themed Halloween!

Stenciled Pumpkins with a Twist

Please share your version with us @Stencil1


Halloween is a few month away, but I know many of you are already getting for it. Follow this Halloween how-to to throw something spooky into your wardrobe! And this DIY bleached shirt isn’t just for Halloween, it creates what is called a discharge print and can be used with any stencil design.

What you will need:

I recommend using bleach liquid gel. It’s a paste so it has a thicker consistency like paint. Don’t use liquid bleach.

Use a plate to pour a small amount of the bleach gel.

Place your stencil in the center portion of your shirt. Begin using your brush to start applying the bleaching gel.

You can using the rest of the gel that was left over in your plate to add a splatter look to your Halloween shirt.

Use a small amount to achieve this effect or you’ll have more of a stain rather than a splatter effect.

Once the bleach has lifted the color to your liking, you can dry it with a hair dryer.

Then place the stencil about 1/4″ offset from where you did the bleach layer to do a new painted layer. Using a tapping brushing motion, paint the stencil in with a vibrant green fabric paint. I used the classic green to paint Frankenstein on the shirt. I used a darker green around his eyes.

Then, I used my brush to add stylistic brush strokes around the stenciled Frankenstein. You can cover the Frankenstein image to avoid getting paint on it.

Now, let your shirt dry completely. Once dry, heat seal the design with an iron. Place a dish towel between your painted design and the iron, iron for 1 minute in each area.

You’re now ready to rock a Halloween vibe. Share your Stencil1 bleached shirts with us @Stencil1


Dying over this DIY, a stenciled mini coffin that you can fill with bones, bats, or any other Halloween surprise. I used a tiny wooden coffin I found at Artist & Craftsman that was too adorable to pass on. I decided to give a Stencil1 personal touch to it. Materials needed:

Paint the inside of the coffin with red paint. Give it a funeral casket look.

Dracula would be proud.

Once you’re done with the inside, pain the outside of the coffin with black. Yes, I used the red brush since I went from lighter to dark, wasn’t being picky!

Now it looks like a casket.

I used a string to hang the coffin so it could dry well without sticking to surfaces.

Take the skeleton stencil and place on the top of the coffin. Paint with white acrylic paint. It fits perfectly!

Now that the little guy is finished, let it dry and you’re done…or are you?

If you feel extra, you can follow this next step. Use Pēbēo Fantasy Moon Pearl Finish Paint to add a really nice and glossy look to the inside of the coffin, sort of lava like or blood!

This paint will take 2 days to dry. You can then fill your coffin with spooky surprises for anyone who dares to open it!


This How to will kick you Halloween decor up a notch as it’s colorful , fantastical, and fun! You will learn how to spray paint pumpkins, stencil pumpkins, and then add a wicked and fun twist to them with a clay stem!

Materials Needed:

Crayola Model Magic, Modeling Clay Alternative, Craft, 4 Ounce

If you don’t like spraypaint filling your home, you have to think outside of the box or in this case inside of the box. I wanted to spraypaint these pumpkins and have no marks from placing them down on paper while the paint was wet. I decided to hang the pumpkins. I opened one side of a cardboard box and got an old curtain rod to suspend the pumpkin. I screwed a screw into the stem and tied a cord on the screw, then tied the cord to the curtain rod. There we have it, a suspended pumpkin ready to be spray painted!

Detailed shot of the screw in the stem.

I wanted to go for a hyper fake look. Yes, I painted an orange pumpkin orange, well, florescent orange!

After letting your pumpkin dry for a good amount of time, use modeling clay to wrap the stem of your pumpkin and give it a more sinister twist. I used Crayola Model Magic clay which air-dries. This is a great project for kids as they will have fun twisting the clay into a stem shape. Leave your base of the stem thick enough to shape around the existing stem.

When you are done with your pumpkin, don’t stop there! If you have more pumpkins, keep at it. Here is one in a chalky mauve color. I was really trying not to use typical colors.

Here’s the HAPPY HALLOWEEN stencil in use. You can add extra bats to cover the pumpkin!

Don’t be spooked to try different colors as long as you’re having fun with this- here we did an ombre effect using two colors of spray paint!

Take a quick look at how I use the Halloween 4 pack to decorate my pumpkin. Stenciled skulls on this ombre pumpkin in colorful paints make you question traditional Halloween decor.

If your modeling clay is having a hard time staying up, use a string or tape to hold the stem upright and let it sit for some time, usually this clay dries overnight. See how we swirled some colors together?

What’s your colorful twist on Halloween? Please tag #stencil1 or @stencil1 so we can see!

Stenciled pumpkins with clay stems

For some spooky decor, look no further, learn how to create these monster portraits for unique, one-of-a-kind Halloween decor.

I sat outside with a cocktail at my favorite Brooklyn bar and taco truck for this one…Start by painting these oval canvases black. I found them at Artist and Craftsman and they are made by Fredrix. Love the shape as it in great vintage portrait look. I used our Frankenstein and Bride of Frankenstein stencils.

Let the black canvas dry.

Now, here I show you how to cheat and make a two layer stencil look but with a one layer stencil. What’s missing is the silhouette of the face so start by lightly stenciling in the face details in green.

Once it’s filled in, lift the stencil.

Here’s the trick – Use your painted areas to then paint in the silhouette area by hand.

Once that is dry, you can stencil in the detailed stencil again over the silhouette are, use black paint or a paint darker than your silhouette color.

Do the same for the Misses.

There they are, the king and queen of Halloween! Two misfits, bound together. Who is your favorite Halloween couple?

Hang them on a wall and add candles, dead flowers, spider webs and send us your best shot to @stencil1

HAPPY HALLOWEEN!