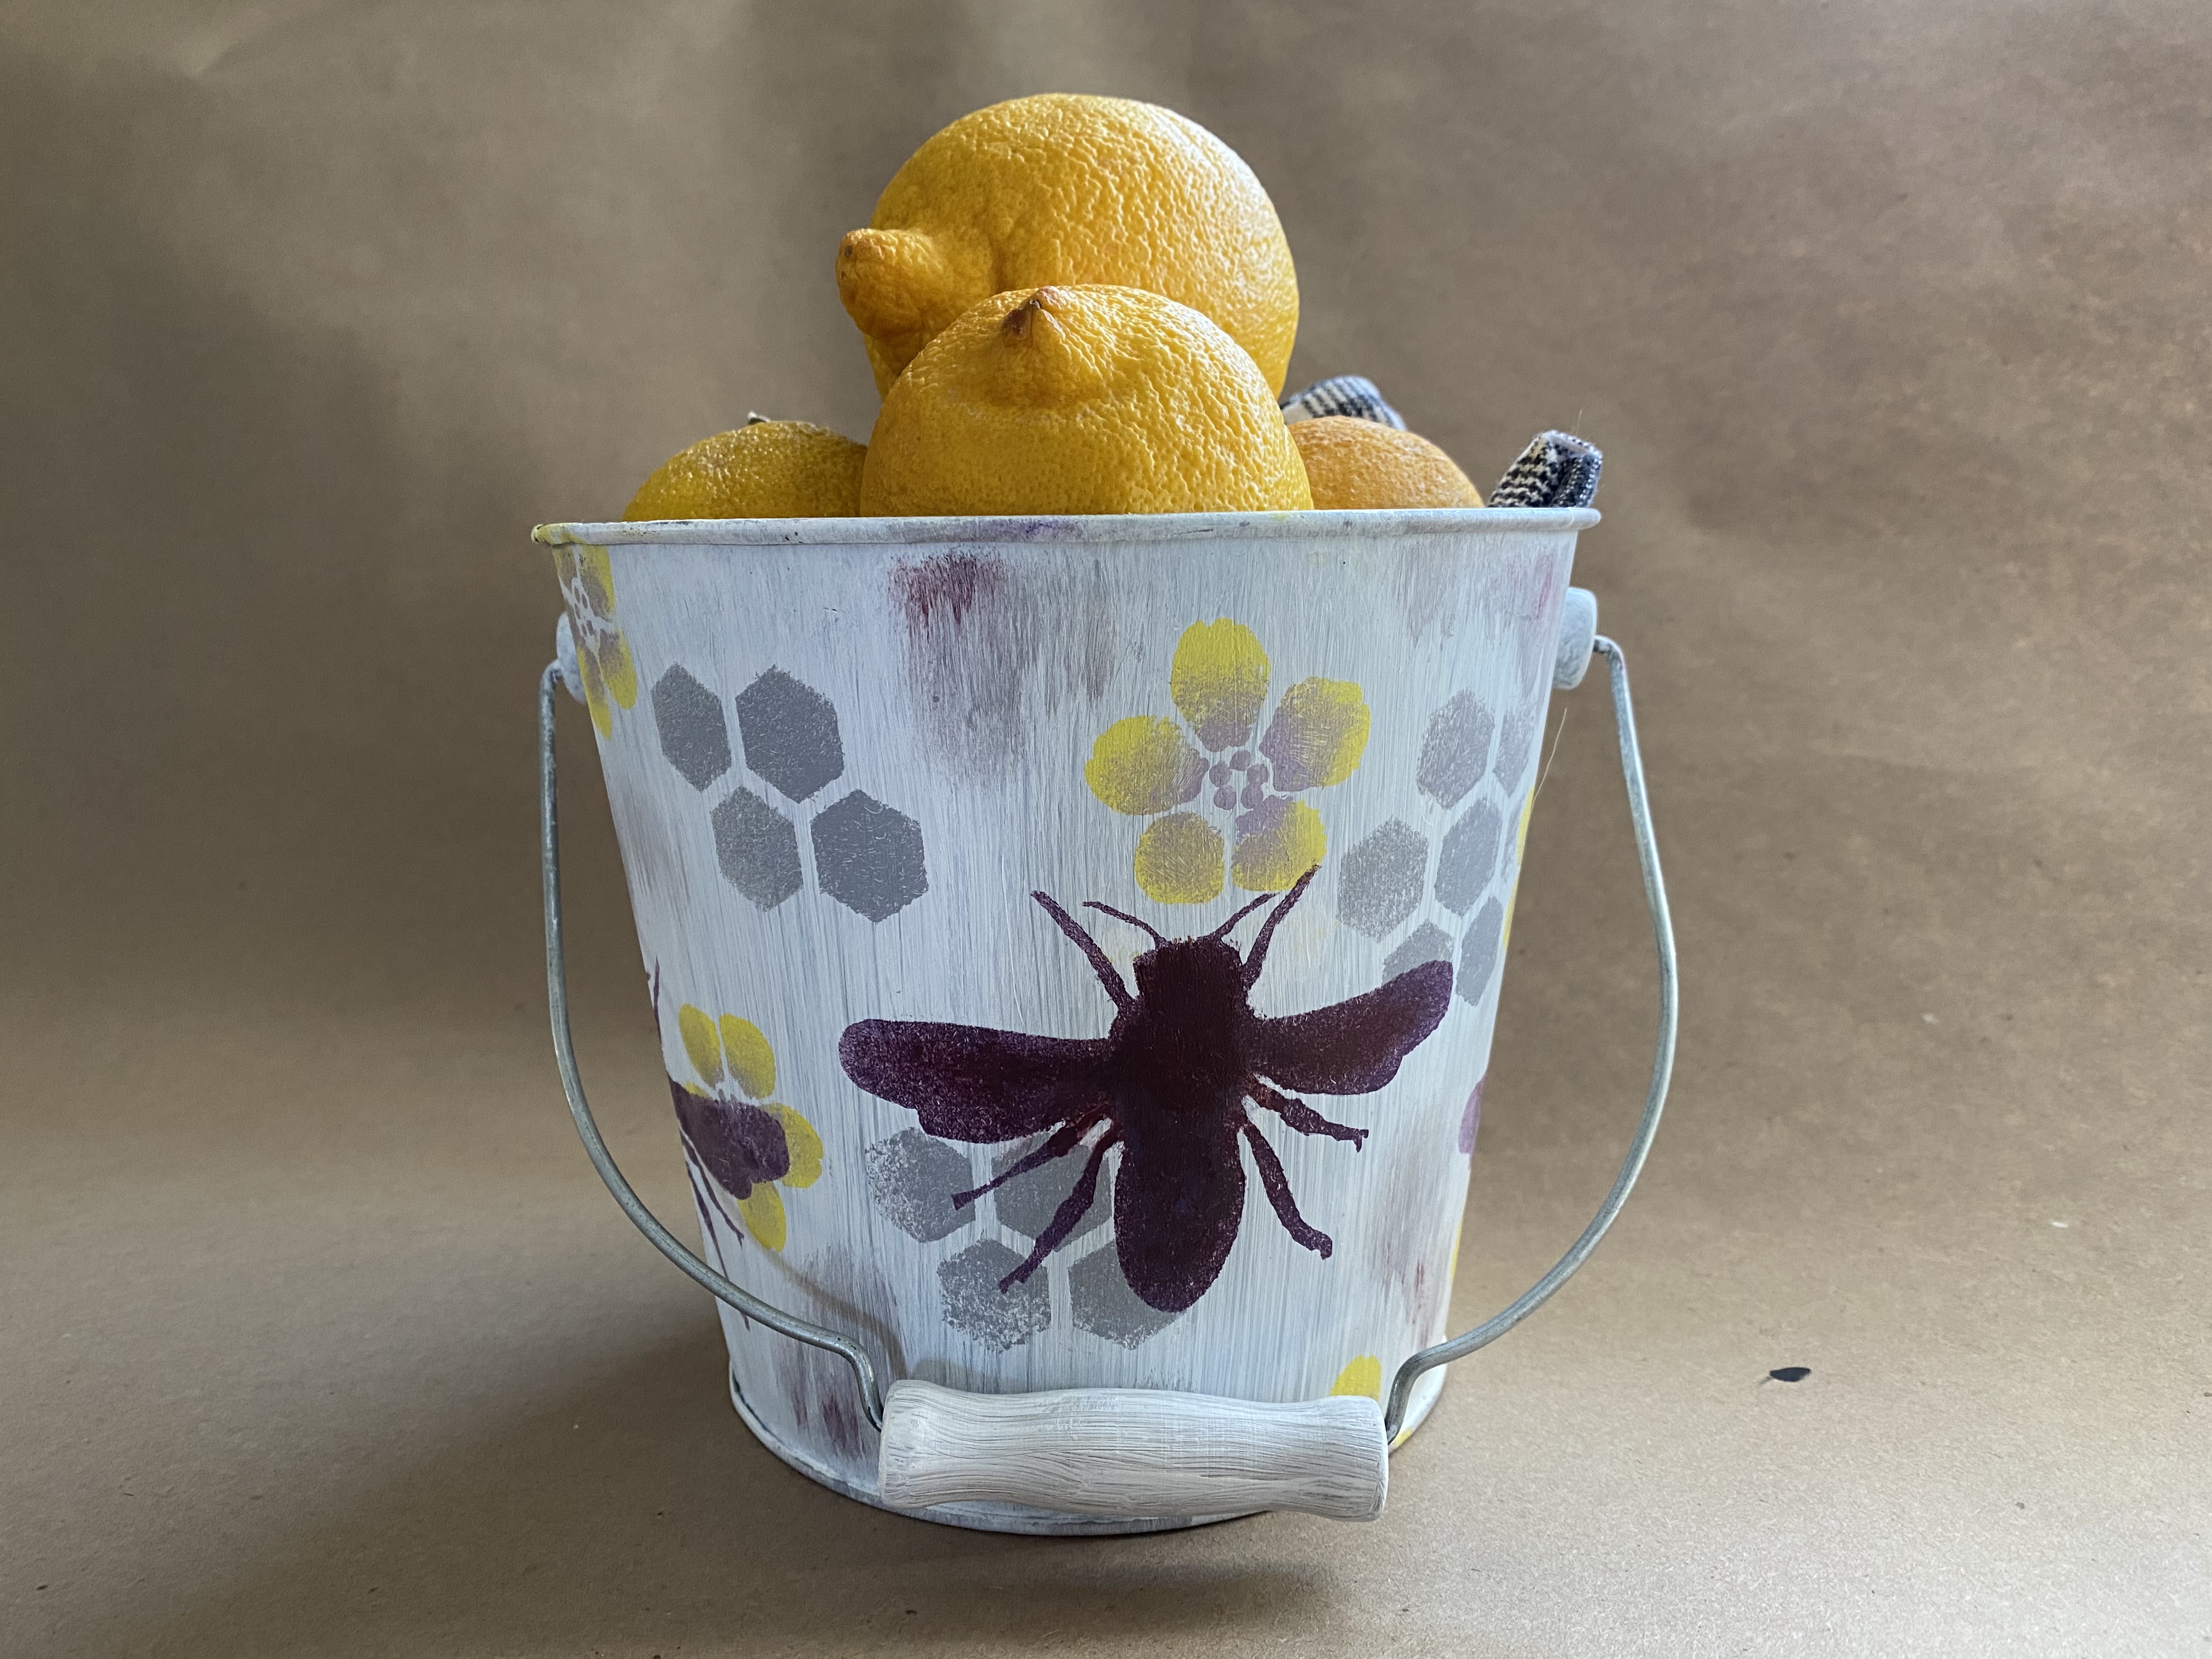
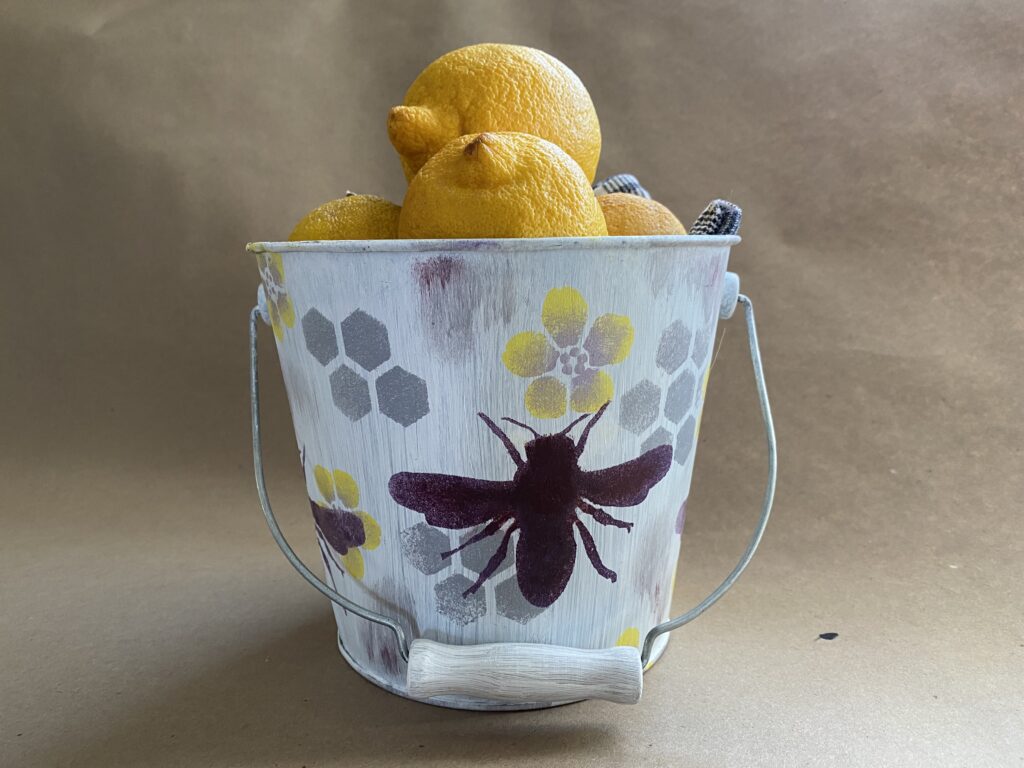
This time around I wanted to stencil a galvanized bucket. There are endless uses and I love the idea of personalizing it. I’m thinking of using mine to put planted herbs or fruits in and it definitely would be great for storing crafting tools and brushes!
Materials and Supplies
- Galvanized bucket
- White vinegar
- Assorted stenciling brushes
- Multi-surface/metal surface paints – purple, red, brown, yellow, and white
- Clearcoat spray
- The Stencil1® Bullet Journal Stencil Patterns + Bookmark #3 (5.75″ x 6″)
- The Stencil1® Birds and Bees Multipack 4ct – Stencil 8.5″ x 11″
- The Stencil1® Spring 4-pack bird, butterfly, blossom, leaves Multipack 4ct – Stencil 8.5″ x 11″
Mixing colors
I used titanium white diluted with a little water for a whitewashed base coat. I wanted muted colors to suggest age so I started with a soft, warm gray for the honeycombs. I mixed up a light purple And then a bright yellow as an accent on the cherry blossoms. For the bees, I mixed a dark purple and a medium brown.
Process
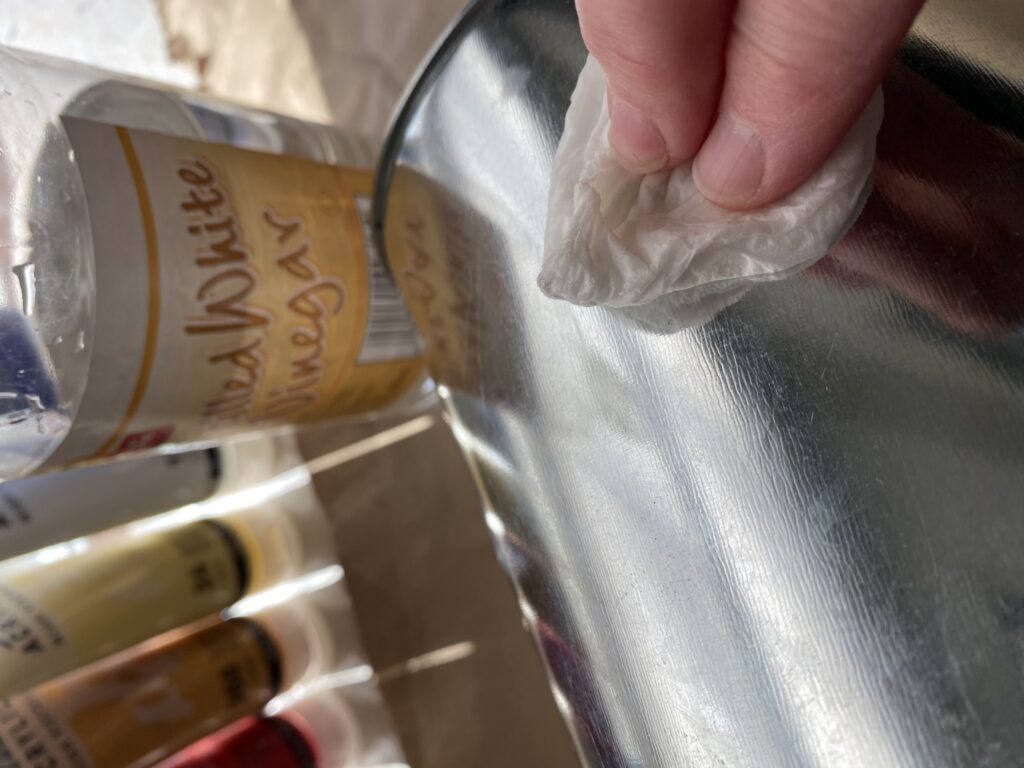
First, clean your bucket so it is completely clean and free of grease or debris. To make the paint adhere properly, use a rag or paper towel to fully coat the surface you want to paint with white vinegar. You can choose to use an etching spray primer instead of vinegar for an even stronger bond. The spray primer needs at least 3 hours to dry, so I went with the vinegar instead and it adhered just fine. As long as it gets the job done, no need to overdo it, just have fun!
Once you have primed your surface, you are ready to get stenciling!
I applied the whitewash base coat first. I used an old, ragged brush to accentuate the brush strokes adding texture while painting in vertical strokes. Once that dried, I applied my stencils, starting with the background. I used a gray color for the honeycombs and positioned them randomly toward the edges of the bucket.

For the cherry blossom, I used the lavender in the center and the brighter yellow on the edges, blending them as the colors met on the petals. It’s important to remember to use very little paint, just enough for coverage and not so much that it bleeds under the stencil.
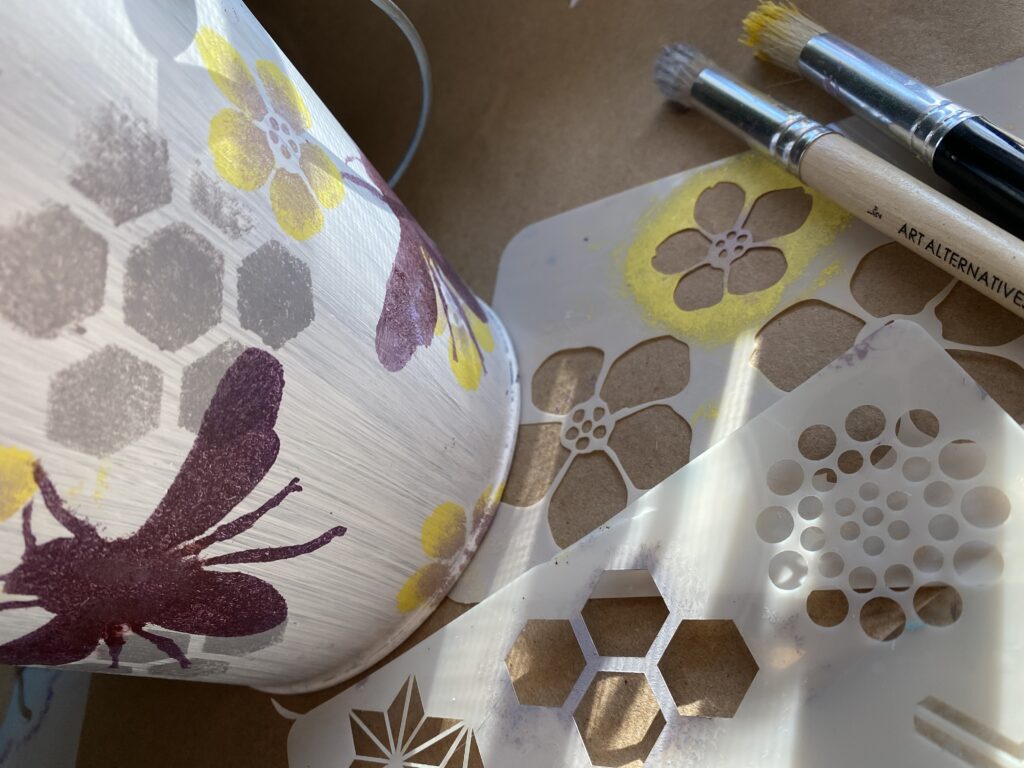
Finally, I positioned the first bee and then staggered the next, slightly below. I used a muted purple and brown for the bees so they would stand out from the background, but still keep in line with the overall weathered look of the piece. I added some random vertical brushstrokes in pale purple and gray in the larger spaces between stencils to add to the antiqued look.
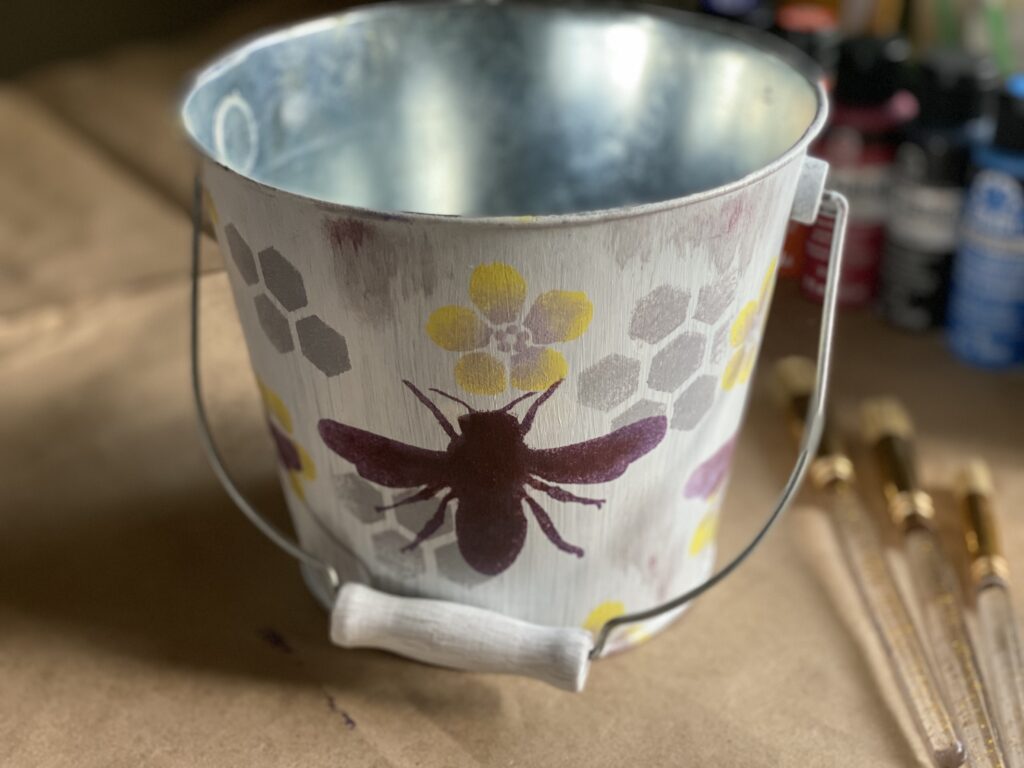
For durability, I used a clear coat spray to protect the base paint and painted stencil designs to finish the project.
This project was made by our lovely friend, Teri @tjaneiro2 on Instagram
Please share your creations with us @stencil1.com