Στο νέο online παιχνίδι καζίνο του Nine Casino, εμπνευσμένο από τον κόσμο της κατασκευής στένσιλ, οι παίκτες μπορούν να δημιουργήσουν τα δικά τους μοναδικά μοτίβα για να ξεκλειδώσουν ειδικά επίπεδα παιχνιδιού. Immediate Byte Pro Neoprofit AI

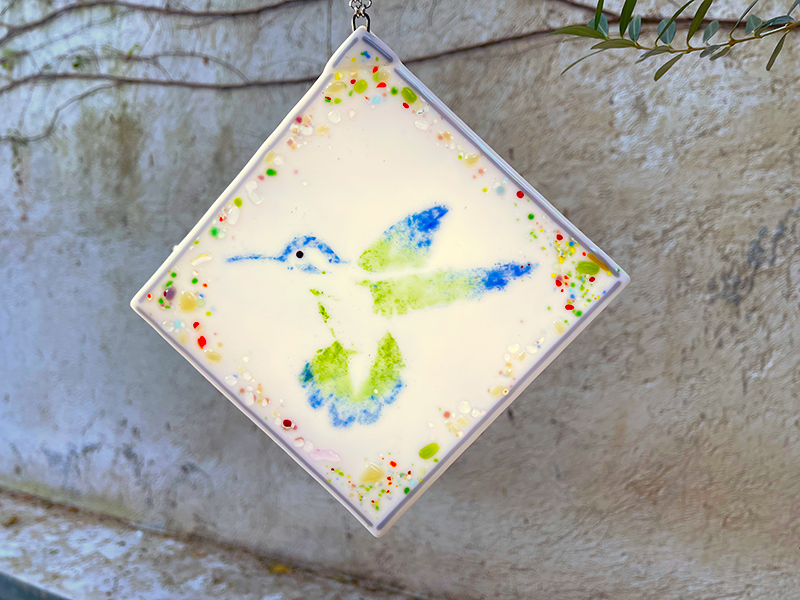
Stencils and Glass? Yes it’s a thing, a good thing!

BYOS – Bring Your Own Stencils, that’s what I did…to a glass making studio! Stencils can be used in so many mediums and my experimentation with glass produced some beautiful results if I do say so myself :). Here is how I used Stencil1 stencils with glass to make a hummingbird glass window ornament:

Materials You Will Need:

  • Detailed Birds Stencil 4 Pack
  • Tape
  • Glass Dust
  • Detail Brushes
  • Solvent
  • A Sturdy Flat Surface
  • A Small Spoon
  • Elmers glue
  • A Stove or Kiln or all this in a glass studio

I wanted to work on an optimistic, Spring themed image and the hummingbird was a perfect choice. It’s also great because it is a stencil design with a lot of bold open shapes, perfect for filling with glass powder!

I was provided a 7″ x 7″ white sheet of glass, that’s my surface for today! You have to wipe it clean with alcohol, no oil should be on the surface. I then planned the layout of the design and thought it might look best to turn my square glass shape to a diamond-like position and attach a chain to the top point for hanging.

I brushed in a little bit of watered down glue into the wing area and then sprinkled in glass powder.

I continued the process with a few colors of powdered glass. you can see here that I am creating ombre blended effects by the way I sprinkle the dust. I also always use my darker colors on face details, it helps to really see the detail of those features!

Here’s a shot of the different glass dust colors the studio offered. I love supporting small, local businesses like this. You don’t have to buy all the supplies, just visit, create, and everyone is happy! But yea, I also was like so how much is a kiln, haha! The art is addictive!

I also created a frame around the piece using these long sticks of glass, similar to hard pasta. It looked a little too structured for my taste so see what I did next…

I added these chunkier glass pieces around the edges to add some “atmosphere” to my little birds world. It adds some whimsy and texture. I then used a tweezer to adjust them to the composition I wanted.

Notice how I cut a small triangle shape up top and layered my hook in the layers of glass, a hook sandwiched between two pieces of white glass. The piece of white glass you see above the art piece is being used to simply prop up my hook so it doesn’t flop down while the glue is drying it inside the “sandwich”.

Once you remove the stencil, add your other elements of glass, you can use small tools to clean up your design. You can push some sand around, move shards around, and get it all to it’s final position before it get’s fired.

Your stencil has done it’s purpose and can be washed with warm soapy water. It’s ready for storage and to be used many more times!

The design was then spritzed with a very thin glue spray, almost like hairspray.

The piece was then placed on special paper that it sits on in the kiln. That’s me Eddie 🙂

Here’s a shot of the piece all finished, I am so happy with how the dust gets darker. Oh, forgot to mention I placed a small black glass bead for the eye. I think the eyes should pop in an image so this little bird got a nice dark eye.

Once completed, hang your piece proud! As shops reopen, please search for your local glass studios and bring Stencil1 stencils with you to try this technique. We would love to see what you make!

Please share your creations with us @stencil1.com


Cork boards are awesome because they can be great functional pieces of art. They take on paint really well and serve as a great surface to pin your daily reminders on. Not only will you be on top of everything you have to do, but your office will also look great!

To make this pin board, you’ll need: 4 8 ½” by 11” cork sheets, multi-surface paint, brushes, double sided mounting tape and our cherry branch 11 x 11 stencil.

Step 1: Lay out your four cork sheets side by side so that they form a square. Place your stencil on the top right corner of your square. Angle it so that it looks as if your branch is part of a big cherry blossom tree.

Stencil1_BlossomBoard_01
Stencil1_BlossomBoard_01b

Step 2: Using brown paint and a stencil brush, begin to paint in the branch. Make sure to use a dry brush technique, this means that you are using a very small amount of paint and applying several layers to make the color more saturated. Use an up and down dabbing motion to paint.

Stencil1_BlossomBoard_02

Step 3: Rinse your brush, or use a different brush to paint your petals white. If you are re-using your previous brush, make sure you dry it really well. Again, use very little paint and an up and down dabbing motion.

Stencil1_BlossomBoard_03

Step 4: We love the colors of cherry blossoms. To simulate that look, we used a dab of pink paint (paint your plate a little bit to get the excess paint off your brush) to tint parts of the petals a pastel pink.

Stencil1_BlossomBoard_04
Stencil1_BlossomBoard_05
Stencil1_BlossomBoard_06

Step 5: Use the stencil at different angles to paint some flowers and petals falling off the branch.

Stencil1_BlossomBoard_07
Stencil1_BlossomBoard_08

Step 6: Once your paint is dry, put a piece of double-sided mounting tape of the back of your cork sheets. Hang them up arranged like you painted them, but allow them to separate a little bit from each other.  Snap a picture of your pin board and show us what it looks like in your home or office! @stencil1

Stencil1_BlossomBoard_09
Stencil1_BlossomBoard_10
Stencil1_BlossomBoard_11

toppic_stencil1

One year ago, I began chatting with Plaid Enterprises about licensing my designs to create a line together. Well, cut to January 2014 and I am psyched to announce my new Stencil1 Plaid-FolkArt stencil line!  These new designs are so bold and graphic, and many are designed as multi-layered. I demo’d this process in my booth at CHA (Craft and Hobby Association tradeshow). Oh my booth that the Plaid peeps totally customized Stencil1 style – built a reclaimed wood and plumbers pipe table, hand jig-sawed some Stencil1 patterns and birds for more DIY décor, my booth just stated what I am all about- old meets new, industrial chic.

So,  I met the greatest people all day and it seemed to me that everyone really enjoyed the layering process. Here’s some pics of the happy crafters:

I shared the Plaid booth with the amazing Cathie & Steve and their new Mod Podge products. They introduced the world to the deco den trend and scored some design awards for their MOD MELTER. Inspiring!

Also to my side, was Candie Cooper, showing the gals how to make some on-point jewelry. Look at this pic I took of Candie’s handmade talents:

Then, Pinterest genius and ball of energy Rachel Faucett of HANDMADE CHARLOTTE was demo’ing her new stencil line on silk scarves. This release she focused on world culture influence, pattern, beautiful stuff! She also has these cutesy wood stitchables I need to get my hands on. Oh and some highly usable sticky backed stencils for stenciling rounded surfaces like glasses, clay pots, and other not so flat surfaces!

Rachel

I was visited my NY gal Erica Domesek of PS I Made This and we reminisced. Also got a hug from the genuine, and ever knit-savy Vickie Howell. I wish I had a pic of her loose yarn necklace, I’ll bug her for a shot of it.

I met store buyers, shop owners, crafters, locals, and travelers and had such a great time hearing each person’s connection to the industry.  Some even called me Big Daddy, those in the know of the legendary Ed “Big Daddy” Roth.  At night, I got to see some good old friends of whom have supported me for years including craft wife Jaderbomb and ever generous and supportive Jen Perkins as well as meeting new one’s – artists, crafters, business owners, and bloggers – all so excited to talk shop. We are all so fortunate to work in a creative field!

CHA was such a success and you will soon see the line out in major art and craft supply stores as well as on Stencil1.com   To think of my designs reaching more people is very humbling, I hope you enjoy !


Nikki, our Stencil1 intern, transformed an empty spraycan into a beautiful collectors’ item inspired by a Montana spraypaint can. This spraycan would look great on your shelf next to your cute robot toys and other stencil1 graffiti art!

She started by painting the can black.

1_Paintitblack_photo 3
2_allblack_photo 4

Once dry, she stenciled it with our mini spraycan stencil and applied the details by hand.

3_stencil_spraycan_photo 5
4_paint_detail_Photo 6

Lastly, she painted the top green and attached it to the can.

5_finalcan_IMG_3526

Show off your spraycans @stencil1!


1. Paint it!

Owl_moroocanpetal_pumpkin_stencxil1
pumpkins_fashionable_Stencil1
pumpkins-tote_Stencil1

Make your pumpkins spooky with multi-surface paint! Try using one of our patterns stencils underneath your favorite halloween themed stencil!

2. Etch it!

stencil_raven_etched_pumpkin_Stencil1

Use a dremel to stencil your pumpkin and give it this unique look!

trace_raven_on_pumpkin_Stencil1

For an easy alternative, stencil your pumpkins with sharpie markers! This is a fast and simple way to get your house ready for Halloween!

You can use any of our stencils for these projects. Here are the ones we used:

Halloween 4-Pack

Owl

Birds and Bees 4-Pack

Antlered Deer

Royal Crown

Leopard Print Pattern

Moroccan Pattern