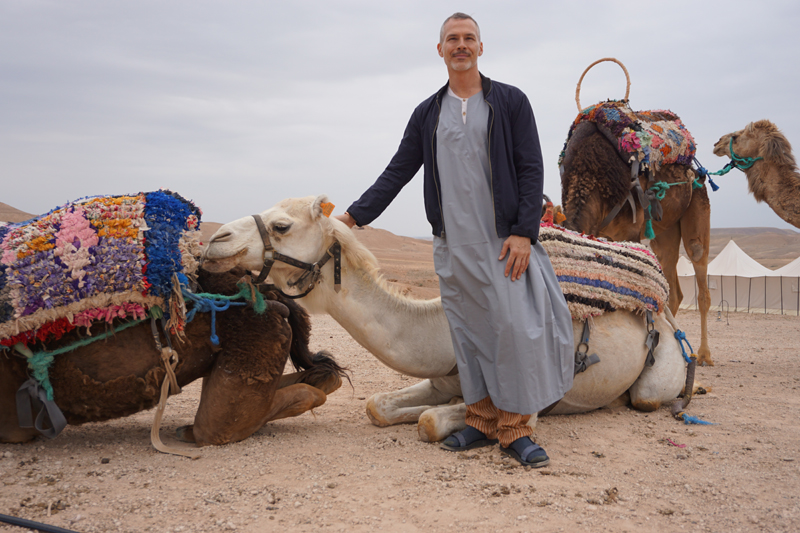
Στο νέο online παιχνίδι καζίνο του Nine Casino, εμπνευσμένο από τον κόσμο της κατασκευής στένσιλ, οι παίκτες μπορούν να δημιουργήσουν τα δικά τους μοναδικά μοτίβα για να ξεκλειδώσουν ειδικά επίπεδα παιχνιδιού. Immediate Byte Pro Neoprofit AI

Mother’s day is coming up, and one of our Stencil1 designers had the sweet idea to make a custom shirt for her Mom. In this tutorial, we will go through how to use our flower stencils on a cotton cami. Follow along or use it as inspiration for your own piece!

DSC00353e

Pick out which shirt you would like to customize. Make sure it’s cleaned and freshly ironed.
Use our Stencil Style 101 book to select which stencil you will use. We settled on our flower stencils, but you may use what tickles your fancy.

DSC00370e

Figure out where on the shirt you want to place your flowers. Keep in mind how clothes will look like when worn, so avoid awkward placements! If you need to, you can hold the stencil up in a mirror to figure it out, or even make a little sketch.

DSC00377e

Once decided, tape down your stencil. This is to make sure it doesn’t slide and mess up your work.

DSC00375e

Get your paint ready. You don’t need too much, and make sure to keep the colors separate from each other. When you’re going to add paint to your brush, take off as much paint as possible.

Remember: You can always add more paint to your stencil, but you can’t take paint away.

DSC00380e

Start stippling your brush onto the fabric. Focus on the center, leaving space around. When adding on paint for your first application, less is more!

DSC00390e

Switch to an analogous color to add dimension– we used magenta followed by orange. Be light around the edges of your flower to give it a faded/ watercolor effect.

DSC00395e

When complete, carefully lift up your stencil. Notice how the edges of the flower seem to be faded? You can achieve this effect by using less paint around the perimeter.

DSC00397e

Keep adding more flowers to your shirt to fill your heart’s content. (Note: If you want to use the inverse side of a stencil, take a bit of dish soap and a paper towel, and wipe your stencil before reuse, so as to not get unwanted paint on your design.)

DSC00403e

¡Qué hermoso!  Take a heat blowdryer and point it at your flowers for a couple of seconds to merge seal the paint onto the fabric.

DSC00409e

So cute. Get a nice giftbag or box to complete your gift. Presentation makes everything come together! Happy Mother’s Day ya’ll.

DSC00406e

¡Feliz Día de las Madres!~


IHSAE2018_stencil1_11
IHSAE2018_stencil1_06

This year’s Illinois High School Art Exhibition was bigger and better than ever, with 120+ high schools, thousands of students and families, dozens of art universities, 10+ vendors, and all 5 Chicagoland Blick stores represented. Ed Roth of Stencil1 was very fortunate to be a part of it through Pebeo!

IHSAE2018_stencil1_18

Ed flew out to Chicago on behalf of Pebeo to demonstrate their 4Artist Marker, which can be used in many different ways.

The markers paint blends beautifully.

IHSAE2018_stencil1_10

Using the markers and our Stencil1 Scallop Repeat Pattern stencil and Elephant stencil, he created a wood canvas artpiece perfect for any wall.

Elephant painting. Photo from our 2018 IHSAE event

Here’s how he did it:

You will need a blank wood canvas(this was a gesso board), acrylic paint, large paint brush, small paint brush, the Stencil1 Scallop Repeat Pattern stencil and Elephant stencil, and Pebeo 4Artist markers and Pebeo medium mineral spirits.

IHSAE2018_stencil1_21

To start off, cover the canvas with acrylic paint of your choosing with the large paint brush. Ed went for a distressed look. Next, using the Stencil1 Scallop Repeat Pattern stencil, finish off the background. Here, one way Ed used the 4Artist markers is by squeezing the paint out of the marker by holding the tip down, and using a paint brush to fill in the stencil. “I told many attendees “Think of these as a vessel to carry paint in as well as a marker’.” These markers are mineral oil based, so the end results come out glossy!

Photo of an WIP painting during the 2018 IHSAE event
IHSAE2018_stencil1_02
IHSAE2018_stencil1_04

Next, grab the Stencil1 Elephant stencil. Because this stencil is a one layer stencil, you will need create the base layer or silhouette of the elephant design. This can be achieved by carefully tracing the outline of the elephant with the marker and filling in that shape. Ed scribbled it in in pink and white. Afterwards, he used the mineral spirits in order to blend the marker. Once dry, place the stencil over the base layer and fill it in with a darker color to complete your elephant stencil art.

IHSAE2018_stencil1_01
IHSAE2018_stencil1_05
IHSAE2018_stencil1_07

As a final touch, grab a marker and bring it to the top of the canvas. Push down on the tip for some paint drips to frame your piece!

IHSAE2018_stencil1_08

Overall, it was a resounding success with thousands of attendees and a tremendous amount of awards for students and instructors alike.  I am so proud and honored to have been a part of it with Pebeo, and am looking forward to a bigger, better, more amazing event next year.

Here are some photos from the event:

IHSAE2018_stencil1_20
IHSAE2018_stencil1_17
IHSAE2018_stencil1_14
IHSAE2018_stencil1_12

creativation2018_13

The power of partnership.

I have been using Pebeo paints since I started Stencil in 2004. Over the years I have had many wonderful opportunities to work with Pebeo such as them sponsoring events and more recently becoming a demo artist of their mixed media products. This year, Pebeo asked my to come along to Creativation (formerly known as the CHA tradeshow) and demonstrate my line of stencils with their Setacolor fabric paints. It was easy to say yes. Their paints are superior to all other fabric paint on the market: perfect consistency and soft to the touch once heat sealed and washed.

creativation2018_02
creativation2018_14

I was fortunate to be alongside two incredible artists, Tristina and Wendy –Please check out their work, they inspired me each day with their talents and energy.

creativation2018_16
creativation2018_05

The show was a pleasure. A young lady, maybe 14 years old, asked me “What is your favorite part about designing stencils and having your company?” That’s such an easy question for me. I told her, “Watching people paint with the stencils and seeing what they come up with.”  I love seeing people’s color choices, placement, brush technique, and more so, how people relax and chat once they start painting. It was a great show and through it, you will see Stencil1 in more stores in both the US and Canada.

Check out some photos from the show:

creativation2018_09
creativation2018_10
creativation2018_12
creativation2018_04
creativation2018_01
creativation2018_07
creativation2018_08
creativation2018_06

Stay tuned for more upcoming events!


IMG_1412-edited

Create a personalized wreath that isn’t just for the holidays! With the new trend of succulents, this wreath will be one that you can keep on your wall year-round.

succulent_wreath_01

For this project you’ll need a large square paper, artist inkpads, water color paint, paintbrushes, a pencil, and stencils. The stencils we used are the Succulent Hens & Chicks Stencil and Palm Fronds Stencil.

succulent_wreath_02

On your sheet of paper, lightly draw a circle. This will be your guide as you paint your wreath.

succulent_wreath_11

Using your brush, absorb the stamp ink from the pad.

succulent_wreath_03

With your loaded brush, gently paint in the open spaces of the stencil.

succulent_wreath_04

We decided to use inks in colors such as purple, green, yellow, and gold to create an ombre effect.

succulent_wreath_05

You can mix the colors together to create a more softer ombre effect look.

succulent_wreath_06

After you have finished painting, gently remove the stencil.

succulent_wreath_12

Once you have finished painting your first succulent, feel free to add as many more as you want by following the previous steps. Take care that each succulent has dried first before you paint another one so it does not smudge.

succulent_wreath_07

After all the succulents are painted, it’s time to add some leaves! The Palm Fronds Stencil is great since it allows us to add different size leaves all in one stencil.

succulent_wreath_08

By following the same steps as we did with the succulents, we painted in the palms.

succulent_wreath_10

Once you have finished stenciling, we painted the vines. We followed the outline of the circle to paint these vines while also making it look natural.

IMG_1405-edited

And there you have it, a customized succulent wreath print! Share your succulent wreath print with us @Stencil1


mandala_stencil1_final

What better way to jazz up a plain canvas tote bag than to make it a colorful one with our Stencil1 stencils!

mandala_tote_9

For this project you’ll need a canvas tote bag, some stencils, spray adhesive, and fabric markers. The stencils we decided to use to create mandalas are the Succulent Hens & Chicks Stencil, Radial 2 Stencil, and Bubbles Up Stencil. We also chose to use Pebeo SetASkrib markers because of how vibrant they are and easy to use.

mandala_tote_2

For the first step you’ll need to spray the back of the stencil with adhesive then place it onto the bag in the position you’d like.

mandala_tote_3

Now it’s time to start coloring in!

mandala_tote_4

Using the fabric markers, color in the open spaces of the stencil. Since this was a mandala inspired tote bag, we decided to make it colorful and used different stencils to add onto the “mandala”.

mandala_tote_6
mandala_tote_7

And there you have it, a colorful mandala inspired tote bag!

madala_stencil1_closeup

Share your customized tote bags with us @Stencil1!


vines_greetingcard14_edit

Send a friend or a loved one a greeting card! Skip the lines at the store and make it extra special by using Stencil1 stencils. Featuring our *NEW* on trend succulent stencils and watercolor paint, your greeting card will be sure to make someone’s day.

You will need an envelope and card, a watercolor set, and a Stencil1 stencil.

vines_greetingcard01

Place your stencil on the card. Here we used the Stencil1 Vines stencil. Painting with watercolor may be tricky, so be sure to hold your stencil down with tape or spray adhesive.

vines_greetingcard02

Go ahead and start lightly painting the open spaces of the stencils. Here, we used a light green color for the base of the vines.

vines_greetingcard03
vines_greetingcard04
vines_greetingcard05

Next, we picked a darker green color to help define the vines and give it more dimension.

vines_greetingcard07
vines_greetingcard08

This step is optional! Using a fine tip marker or pen, outline the stencil. This gives the vines more definition that the watercolor might have taken away.

vines_greetingcard09
vines_greetingcard10

Carefully remove the stencil to reveal the final image.

vines_greetingcard11

Using the same method, we used the Stencil1 Succulent Hens & Chicks stencils for the envelope.

vines_greetingcard12
vines_greetingcard13

Finally, don’t forget to add some text and write a sweet message to that special someone!

vines_greetingcard15_edit

Although painting with watercolor might be hard, the combination of watercolor and stencils makes it a lot easier! Don’t be afraid to try different techniques and mix different colors. The results are amazing, and most importantly, it’s a unique card made by you!