Στο νέο online παιχνίδι καζίνο του Nine Casino, εμπνευσμένο από τον κόσμο της κατασκευής στένσιλ, οι παίκτες μπορούν να δημιουργήσουν τα δικά τους μοναδικά μοτίβα για να ξεκλειδώσουν ειδικά επίπεδα παιχνιδιού. Immediate Byte Pro Neoprofit AI

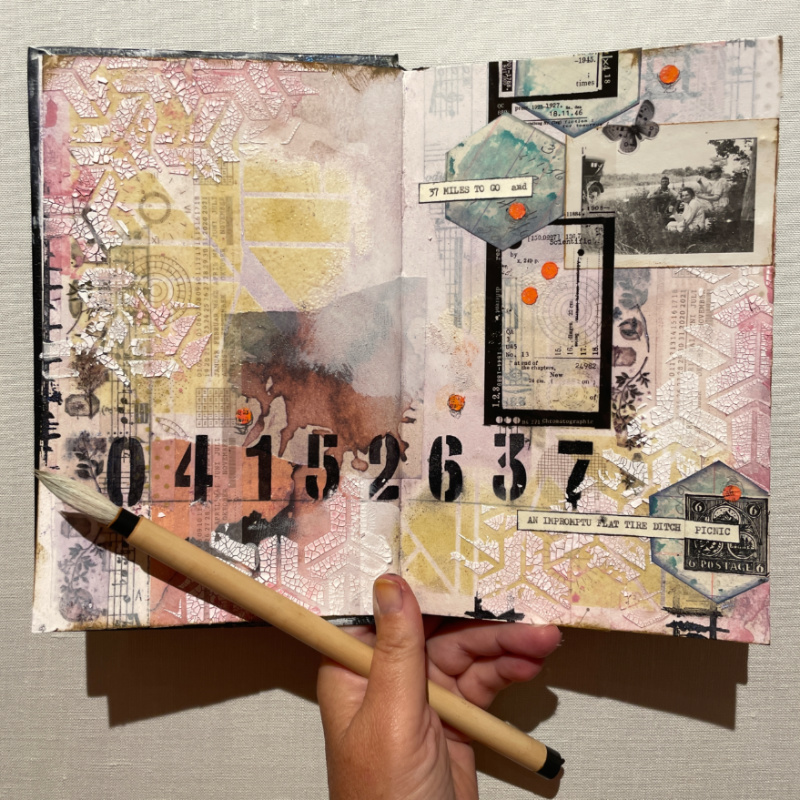
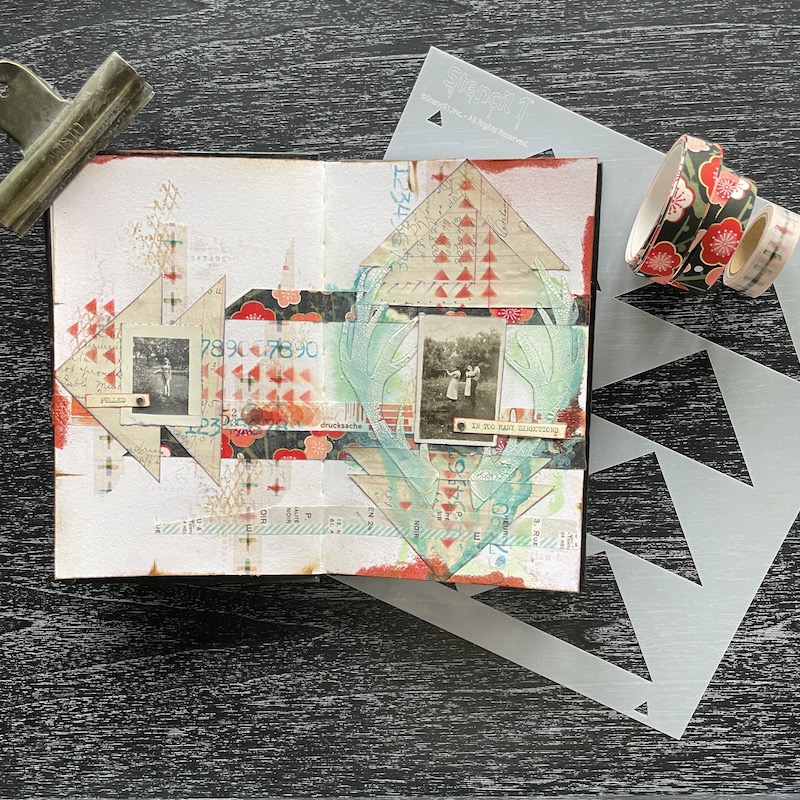
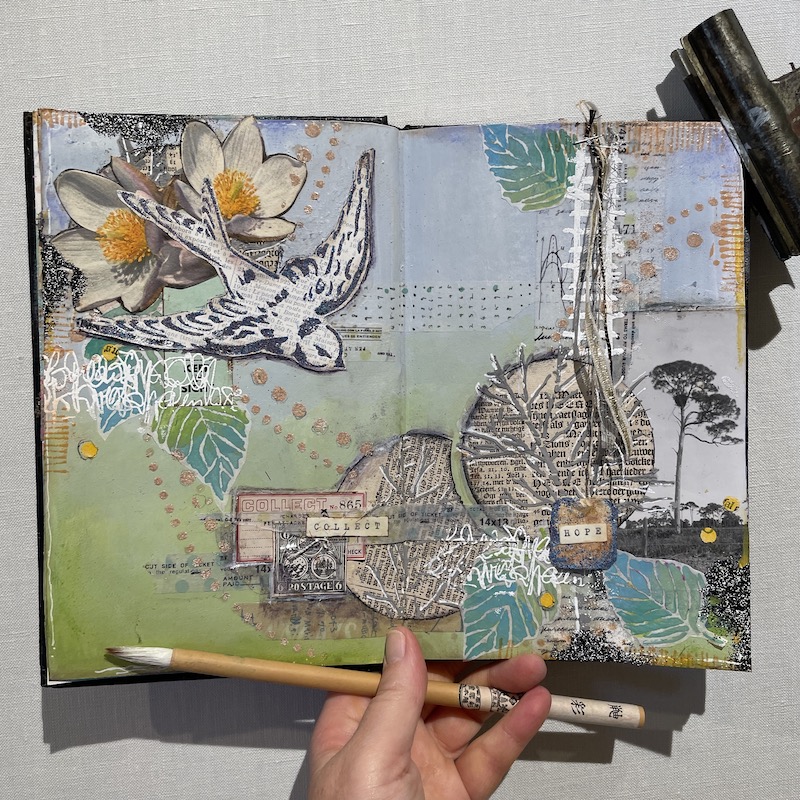
These easy Art journaling pages came together highlighting the Geo Pattern Stencil Small, the Y Repeat Stencil, the 1” Industrial Font Stencil and the Hexagon Stencil

What You Will Need:

Geo Pattern Small Stencil
Y Repeat Stencil
1” Industrial Font Stencil
Hexagon Stencil
Washi Tapes
Collage Papers and Ephemera
Clear and White Gesso
Clear and Black Ink Pad
Black and Vintage Beeswax Embossing Powders
Crackle Paste
Water Spray Bottle
A vintage Photo
Hole punch
Pastels and a Glue Stuck

Step 1:

Glue down some collage papers and place Washi Tapes under and over the collage papers. Cover both journal pages with Clear Gesso.

Step 2:

Place the Industrial Font Stencil horizontally and sponge Black Permanent Ink through the numbers 0 to 3. Replace the numbers 4 to 7 in between the gaps and repeat with black ink.

Step 3:

Place the Geo Stencil down in opposite corners and sponge embossing clear embossing ink through the stencil with a sponge. Sprinkle an embossing powder of your choice onto the ink and heat set to liquify the crystals. ( I used Vintage Beeswax for an encaustic look and to act as a resist for future rose paint to stand out from the pattern)

Step 4:

Create some white space and veil the edges of some of your collage squares with white gesso. I knew I would be placing the photo and the collage elements on the upper right hand portion and didn’t want that area to be too busy so I lightly applied the gesso to still see some of what was going on under but give a quieter backdrop to the focal point.

Step 5:

Place the Y Repeat Stencil around the edges leaving some blank spots and spread crackle paste through the pattern. (Immediately clean your stencil and let air dry).

Step 6:

Add some acrylic paint, ink or spray inks to some of the crackled pattern to highlight the cracks and spray with water to get the pigments to move. (I used a rose color acrylic paint)

Step 7:

Add a few grungy marks around the edges with a stamp and black ink. Use just part of a stamp so it’s not a big feature but an edging element.

Step 8:

Add some final collage elements. I glued down a vintage photo as a focal point and ran graphic film noir tape vertically over the photo with some remnant hexagons that were left over from another project. A typed quote “37 Miles To Go and An Impromptu Flat Tire Ditch Picnic” finished this journal entry along with some hole punched orange pastel circles for a little hit…

Hope you found some inspiration in these pages, happy journaling!

Tracy Hickman
@anonymous.palette


Two mixed media works on paper highlighting 7 wonderful stencils from Stencil1. This piece came together from a vintage postcard that I picked up at a flea market. The writing was obviously childlike and I thought it so funny that this child was sending a postcard to his Aunt asking if “she” was having a good time!

What you will need:

Radial 1 Stencil
Radial 2 Stencil
Hexagons Stencil
2” Industrial Alphabet Stencil
Small Chevron Stencil
Small Houndstooth Pattern Stencil
Thatched Texture Stencil
12”x 12” Mixed Media Paper
Straight Edge and Artist Tape
Lyra Graphite Water Soluble Pencil
Sandstone and Eroded Bronze Inks
Small Paint Brush
Diane Townsend Pastels
Painted Collage Papers and Ephemera
Spray Paint
Acrylic Paints, White and Clear Gesso
Glue Stick and Matte Medium
Gel Plate
Palette Knife
Archival Ink Pad
Liquitex Paint Marker

Place several horizontal and vertical lines with a T Square and Lyra Graphite Pencil to start establishing a pattern and breaking your white page.  Run a damp paintbrush over the lines to soften.  Using a water soluble peach pastel, scribble some shapes onto your pages.  Dampen with water or clear gesso.  Add some sweeping marks with a paintbrush and sandstone ink. Using a pencil, add some random messy script.

Add some overlapping painted collage papers and ephemera in random spots. Next, use some white gesso and off white acrylic paint with a brush and brayer to obscure some things, and blend some of the collage elements.

Using the Radial 2 Stencil, spray paint some colors through the stencil over the collage and backgrounds to marry the elements. (cover around the stencil with paper towel or scrap papers to avoid overspray)…

After adding a few more marks and a vintage postcard as my focal point, I used two stencils in these next layers: 2” Industrial font, sponging through white gesso  and Radial 1 Stencil, spreading molding paste through the circles.

Next, add some contrast with black permanent ink pounced through the houndstooth stencil on one of the papers and use the same ink through the Small Chevron Stencil on the other paper.

Almost there! The next layer consists of a fuchsia soft pastel being placed onto the Thatched Texture Stencil and scribbled through with some help from your finger ;), again connecting some of the collage and overlapping elements.

The final touches consisted of adding some eroded bronze ink with a paint brush through the radial pattern and modeling paste, spritzing with water until you like the coloring.  I added some cut hexagons using the Hexagons Stencil, Ink and a Gelli Plate and glued the hex’s in several spots on both papers.  

Attach some vertical texture and pattern with some vintage calligraphy and handmade open weave black fiber paper.

Finish with some hole punched yellow circles underlined with a fluorescent pink paint marker and voila you are ready to frame!

I loved using these stencils with that vintage postcard, “Dear Aunt Esther, Are you having a good time?” Hope you are inspired to make some mixed media works on paper yourself!

-Tracy

@anonymous.palette


Easy Art Journaling in 4 Easy Steps:

What You Will Need:

Chevron Stencil
Icons Stencil
Powerlines Small Stencil
Acrylic paint (Wolf Eye and Hint Of  Mint)
Paint Brush
Spray Paint (in Orange)
Soft Pastels (in Yellows)
Fixative
Black Ink Pad
Tags
Old Photo
White Gel Pen
Washi Tape
Glue Stick
Embossing Powders (Black and Red)
Clear Embossing Ink

Step #1,  Select Your Ephemera

Gather some collage elements, I used tags from an ephemera pack and two vintage photos and came up with a pleasing layout.  Set aside.

Step #2, Develop your Background

I blended 2 light blue/gray tones together in a messy way and let dry.

Place the Chevron Stencil across your pages and add some washi tape to keep in place.  Using Orange Spray paint, spray through the stencil.

Replace the stencil over the spray painted Chevrons and scribble in two shades of yellow pastel, blend with fingers and spray fixative to set the pigments.

Step #3, Inking and Embossing

Place the Powerlines stencil over the tag and sponge black ink through the pattern. (Black acrylic paint or gesso would be a good substitute).  Decorate any of the additional tags with collage papers and washi tape.  I used a scrap of yellow paper that I had hole punched and some black text washi for an industrial look.  I also added  a few washi tapes under the collage elements to anchor vertically under the tags and horizontally over them once they were glued.  

Place the Icons Stencil over the photo in a few spots and use a clear embossing ink pad to sponge through the star pattern in the stencil.  Sprinkle red embossing pattern over and heat set.

Using the same Icon Stencil,  place the arrow pattern vertically on the left page and sponge through clear embossing powder.  Sprinkle with black embossing powder and heat set.

Step #4, Final Details and Pull Out

I ended up adding a pullout tag on the right side by gluing down the next page in the journal to the back right page of my spread.  (Don’t use glue in the area where the tag would go, this creates the pocket…).  Glue an old photo to the tag and embellished with a piece of washi tape.  Add a few tiny rusty keys and a chain as an attachment through the tag hole. Voila, you have an interactive art page!

The last steps included some stamping around the edges with brown ink and smudgy embossing powder in Blizzard and White leading your eye to the focal images.  I added my edged title and glued down 3 yellow pastel hole punched circles and called it a day.

Happy Journaling!
Tracy Hickman
@anonymous.palette


Beginner Art Journaling in an altered book using Stencils two different ways.

Materials Needed:

Any hardback book or novel
Glue stick
Clear and White Gesso
Flourish Borders Stencil 8-pack
Thatched Texture Stencil
2 Quatrefoil Stencil Small
Blossoms Stencil
Color Infusions or Magicals 
 (You could substitute watercolors)
Painted Papers or Collage Paper
Acrylic Paint in San, Chalk, Periwinkle 
Washi Tape
Molding Paste
Water in a Spray Bottle
Chalk Paste in Sand
Watercolors
White Cotton fabric 
Embroidery Floss
Embossing Powder

Step 1: Prepare your Book
You can work in an art journal but recycling an old hardback book or novel laying around is a fun way to start journaling with little investment. I usually glue the left page to the page behind with a glue stick and do the same thing to the right page to reinforce the pages depending on the paper thickness. Next coat both pages in a layer of white gesso, A lighter coat see your text shows through, or do a couple of coats to cover completely. (It’s a good idea to tear out three or four pages between every journal entry to allow for thick layers that get built and then discarded pages can be used as collage elements

Use a couple painted papers, magazine pages or collage papers that you have laying around and tear into different width strips.

Step 2: Develop a Background
Using the glue stick, adhere your paper strips in a pleasing pattern onto your pages.
Choose one or two acrylic paints, (I chose a sand color lightened with white that blended in with the back of my dictionary page strips) Paint over the white gessoed blank background and blend in scrap paper strips.

Place the Thatched Texture Stencil over your painted papers and sponge sand-colored acrylic paint pounced through the pattern. (I love this stencil as it can be used vertically, horizontally, or on an angle for completely different effects and also stacked over top of itself to make a hatched pattern ;). This technique helps harmonize your collage paper strips with the background.

Step 3: Add Washi Tape and more Stenciling
Choose a few different Washi Tapes, masking tape can be substituted here. I always use a coat of clear gesso over the washi tape to let future mediums adhere better. Place the Quatrefoil 2 Stencil over the washi and pounce periwinkle paint through the stencil onto both pages.

Using the Thatched Texture Stencil a second time, spread molding paste through the pattern with a silicone brush, gift card, or palette knife, and let dry. 

Step 4: Final Layers with Stenciling Two Ways
Infusions or Magicals are small jars of pigments that can be sprinkled onto the page then spritzed with water so the colors magically appear. This technique was used over the dried molding paste Thatched Pattern. (It can be fun to tilt the pages this way or that for the colors to move around and you can also blot back the color if you don’t want it so vibrant)

Next, spread Sand Chalk Paste (or Molding Paste tinted Sand) through the Blossoms Stencil onto the discarded book pages and cut out when dried.

Using the same Blossoms Stencil, trace the pattern onto some plain fabric and use embroidery floss to stitch over the design. Glue the threads on the backside and when dry cut out your Blossoms. (This pattern embroidered on a pair of jeans would be fun!)

Step 5: Apply Blossoms and Final details

Glue your paper Blossoms down with a glue stick and glue your embroidered blossoms down with a thicker glue-like gel paste or fabric glue. Hand paint some details on your blossoms with watercolors and a white gel pen. I next cut out and adhered my quote, “Hope is a thing with Blossoms” and framed it with the Flourish Border Stencil by sponging clear embossing powder through the stencil and heat setting white embossing powder. Add some stamping with brown ink in a few spots and use the same brown ink around the edges of both journal pages. Finish by heat setting some Baked Texture Powder smudged onto a few areas over clear embossing ink and you’ve completed the first entry in your altered book! 

Happy Journaling!

Tracy Hickman
@anonymous.palette 

Do you create Mixed Media and papercrafts with Stencil1?
Please share with us on social @Stencil1 and #stencil1 


Beginner Art Journaling in 5 Easy Steps…

Materials Needed:

Step #1 Washi Layer: Place several washi tapes down in a pleasing pattern across your pages. Add glue stick under the tape for permanence and a layer of clear gesso over top.

Step #2 Collage and Stamping: Using an old ledger page (or any collage paper you may have on hand) trace the Triangles 2 Aligned Stencil with a pencil and cut out triangles.

Step #2 Continued: Place triangles down in a pattern of your choosing, I overlapped mine. Glue down with a glue stick and cover in clear gesso. Add some stamping in red ink through the small triangle stencil in the Patterns 8 Pack Stencil to marry all the elements. I also added brown ink to a chain-link rubber stamp in a few areas and teal ink with a numbers stamp.

Step #3 Stencils: Place the Antlers Small Stencil down over the collage elements and hold in place with washi tape. Using a palette knife or gift card, spread crackle paste through one antler at a time when dry. Let crackles appear without heat setting for the best effect. 😉

Step #4 Spray Inks: Color the Antlers with your favorite spray ink, I spritzed water over the crackle paste and used the applicator out of the bottle to touch around edges. (you could also substitute watercolors or water-soluble crayons or watered-down acrylic paint here if you don’t have spray inks. Build up with a few colors after heat setting.

Step #5 Focal Point and Edges: Select 1 or 2 photos to place as a focal point, ink edges so they stand out, and glue down. I typed the phrase “pulled in too many directions” and affixed it with small metal Brads through both pages. The final detail consisted of edging the outside of all the pages with brown ink and smudging some clear embossing ink in a few spots around the edges. Heat set red baked texture powder for some edging drama.

Here Are The Details!

Happy Journaling,
Tracy
@anonymous.palette

Do you create Mixed Media and papercrafts with Stencil1?
Please share with us on social @Stencil1 and #stencil1 


“Collect Hope” is a journal entry that was inspired by spring green grass and sky hues.

Materials and Supplies

An ombré of tones (iceberg, glacier Ice, teresa green, and zucchini) was blended together for the first layer. A layer of various washi tapes was next put down in a pattern over the paint, reinforced with a glue stick and a layer of clear gesso to protect…

I tinted some Modeling Paste with Gray Gesso and using a palette knife, spread through the Small Birch Stencil onto some vintage dictionary pages.  Using a 2” hole punch, punch out 3 circles of the pattern.

Next, I used the leaf stencil in the Spring 4 Pack with various acrylic paints (smurf, granny smith, and green patina) on tracing paper with great effect as it felt like watercolor and the background becomes translucent. Cut out the leaves.

I collected a vintage flower postcard and a black and white photo with some random ephemera and arranged my stenciled circles, leaves and cut-out flowers, etc. onto the pages, in a balanced fashion.  I moved them off to the side and pulled out my String of Dots Stencil to connect all the elements and create a sense of movement across the pages. Sponging on brown ink and then desert baked texture powder to highlight the dots.

The bird Stencil from the Spring 4 Pack became my main focal point.  I thinly spread some white gesso on a dictionary page and then sponged on black distress ink through to expose the bird and then replaced the stencil back over and sponged clear embossing ink through and added a purple-gray metallic powder and heat set to raise the pattern in the bird.  After cutting out and inking the edges of all the ephemera,  I adhered all the elements down with a glue stick.

The last steps included: adding some additional washi tape and punched small marigold circles on top of some of the elements, using 3 different stamps with embossing powders, adding some blue and green pastels around edges, and attaching some Japanese metallic yarns and an embossed tea bag with a stapler to the right page.  I typed out the words Collect and Hope and added them to the tea bag tag and the left page.  

Happy Journaling! ~ Tracy @anonymous.palette
Please share your creations with us @stencil1.com