Easy Art Journaling in 4 Easy Steps:
What You Will Need:
Chevron Stencil
Icons Stencil
Powerlines Small Stencil
Acrylic paint (Wolf Eye and Hint Of Mint)
Paint Brush
Spray Paint (in Orange)
Soft Pastels (in Yellows)
Fixative
Black Ink Pad
Tags
Old Photo
White Gel Pen
Washi Tape
Glue Stick
Embossing Powders (Black and Red)
Clear Embossing Ink
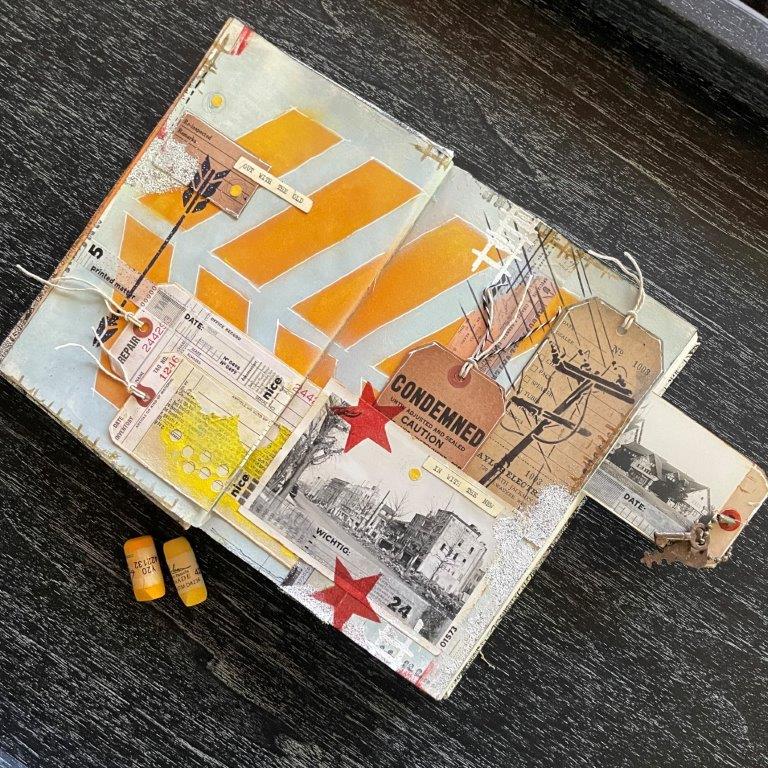
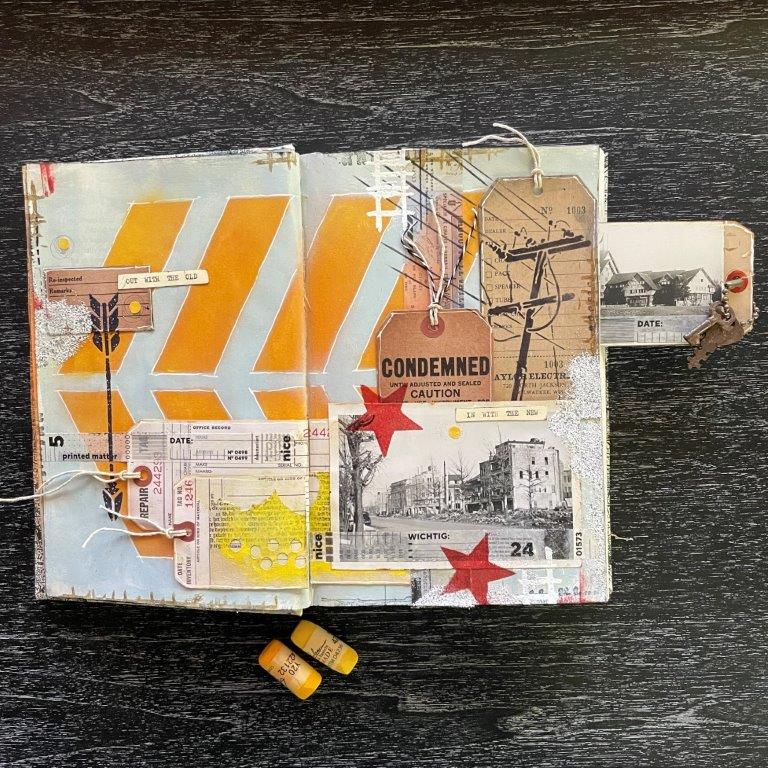
Step #1, Select Your Ephemera
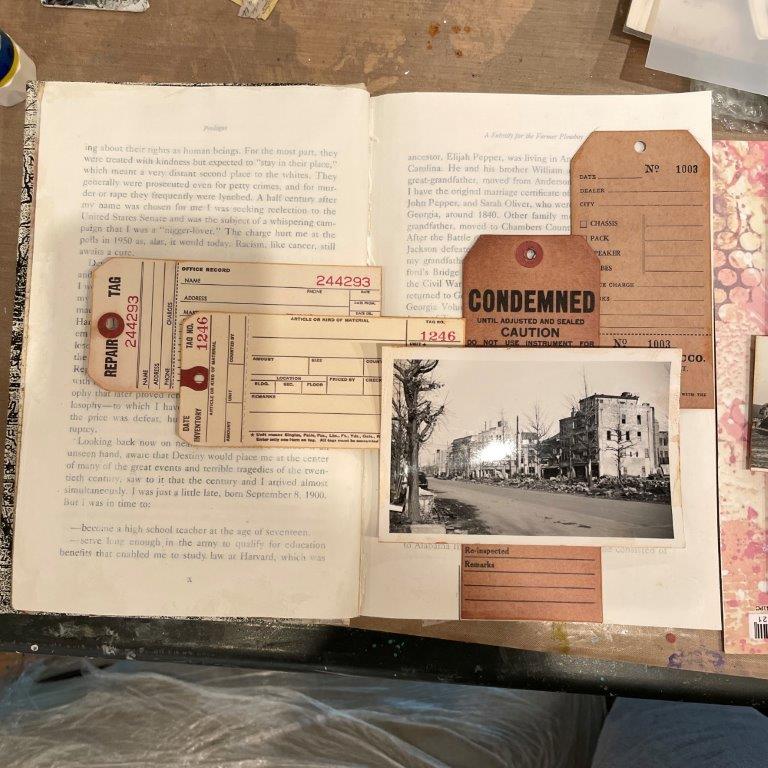
Gather some collage elements, I used tags from an ephemera pack and two vintage photos and came up with a pleasing layout. Set aside.
Step #2, Develop your Background
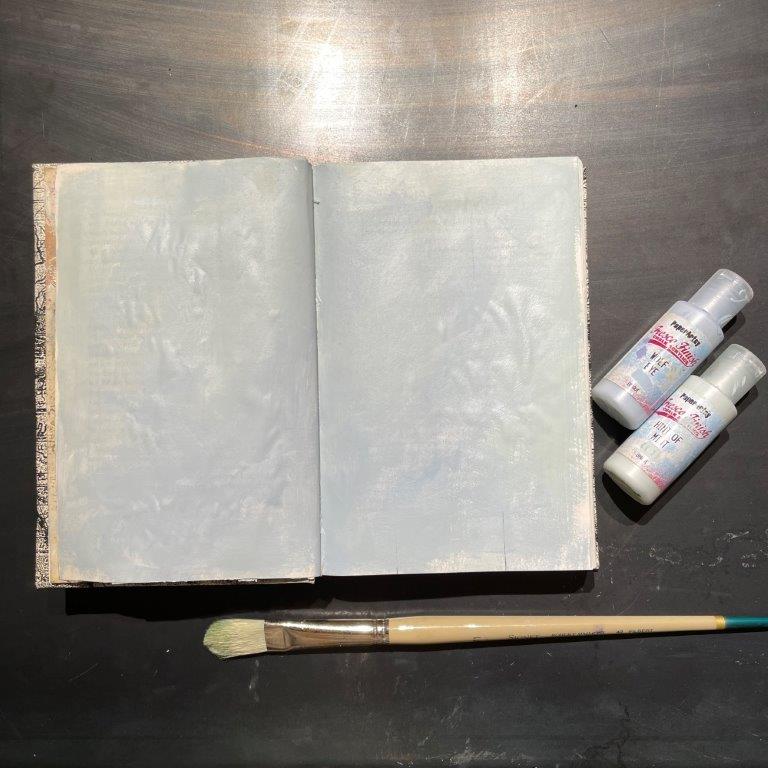
I blended 2 light blue/gray tones together in a messy way and let dry.
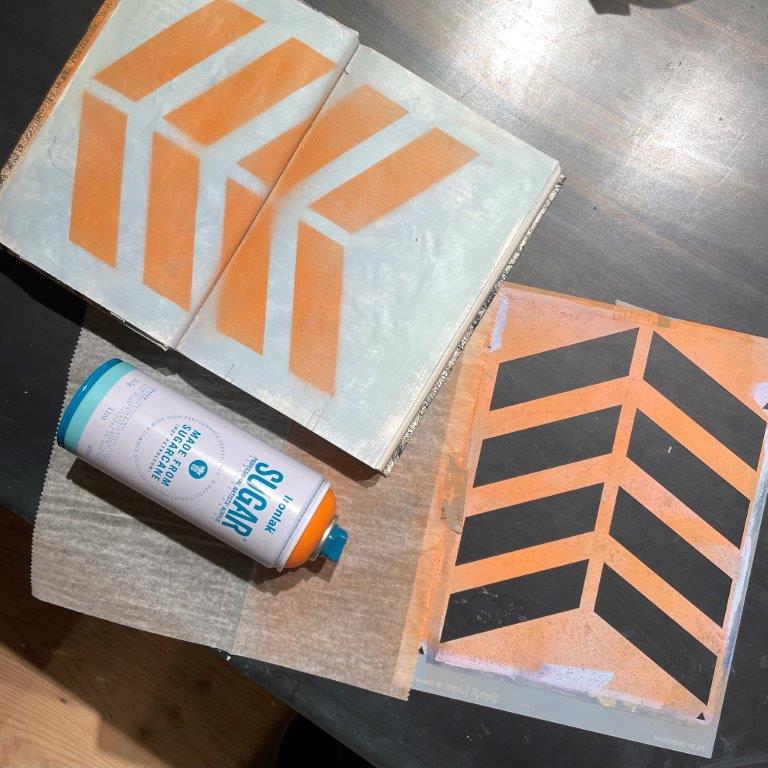
Place the Chevron Stencil across your pages and add some washi tape to keep in place. Using Orange Spray paint, spray through the stencil.
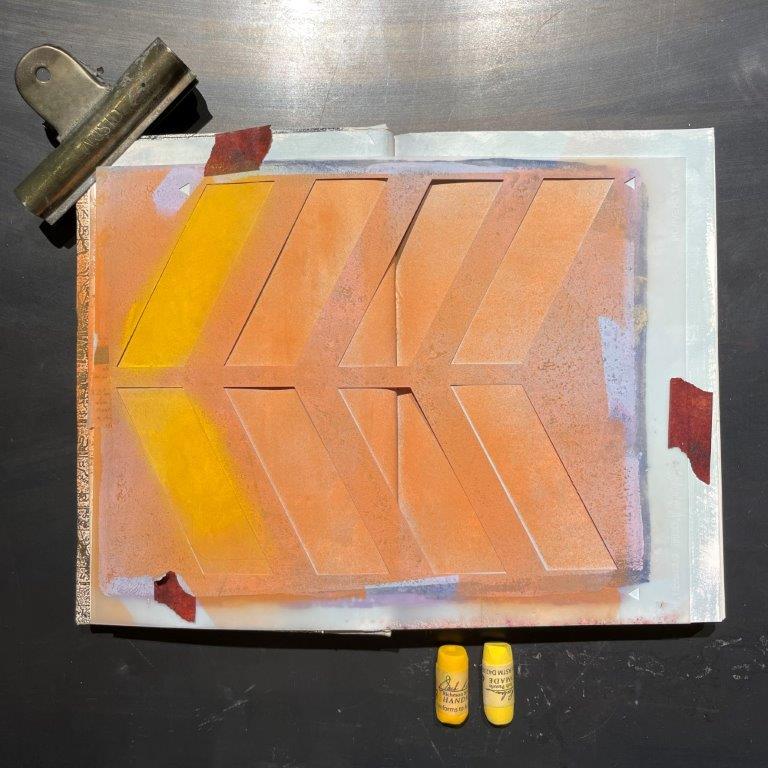
Replace the stencil over the spray painted Chevrons and scribble in two shades of yellow pastel, blend with fingers and spray fixative to set the pigments.
Step #3, Inking and Embossing
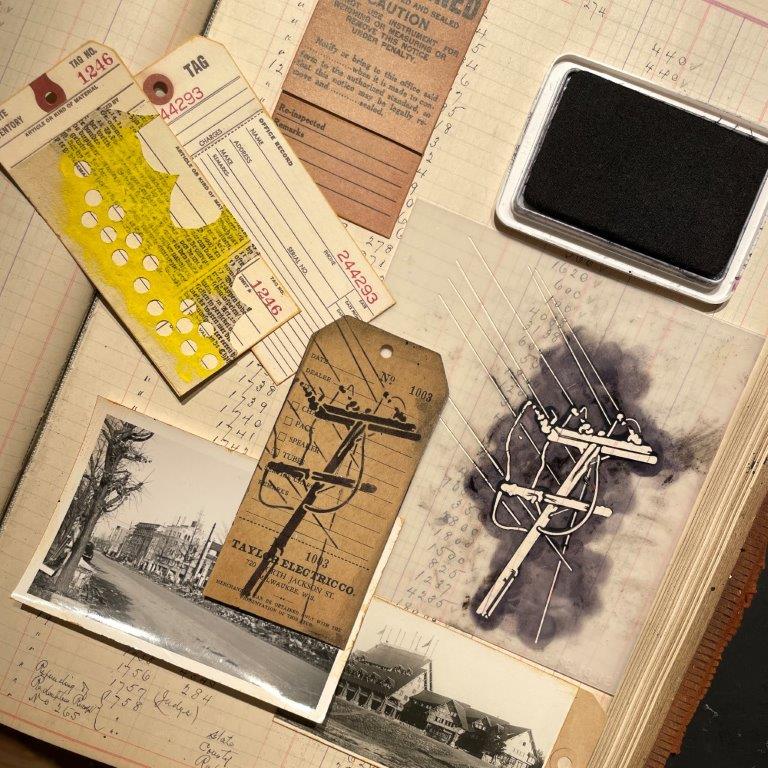
Place the Powerlines stencil over the tag and sponge black ink through the pattern. (Black acrylic paint or gesso would be a good substitute). Decorate any of the additional tags with collage papers and washi tape. I used a scrap of yellow paper that I had hole punched and some black text washi for an industrial look. I also added a few washi tapes under the collage elements to anchor vertically under the tags and horizontally over them once they were glued.
Place the Icons Stencil over the photo in a few spots and use a clear embossing ink pad to sponge through the star pattern in the stencil. Sprinkle red embossing pattern over and heat set.
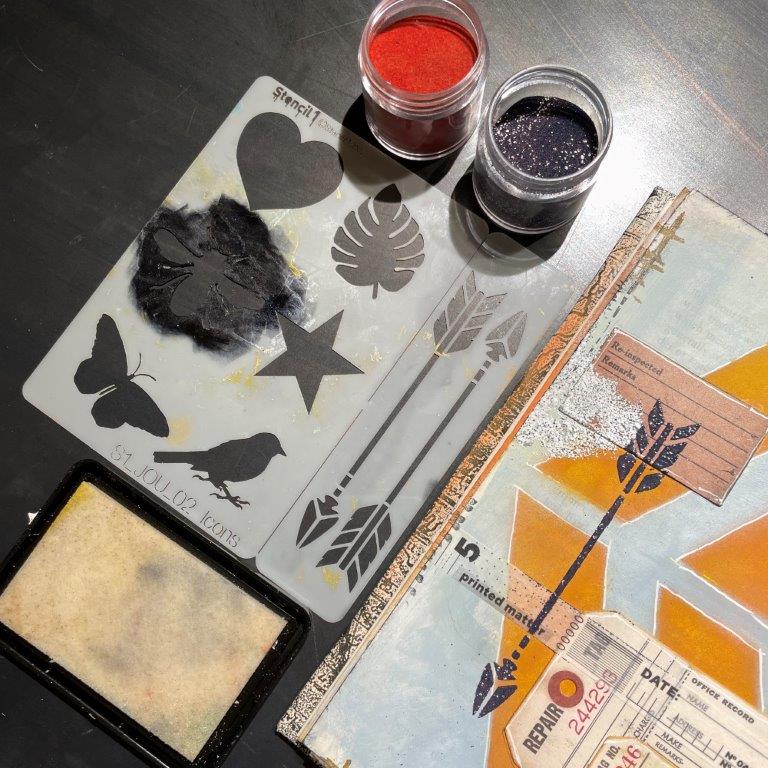
Using the same Icon Stencil, place the arrow pattern vertically on the left page and sponge through clear embossing powder. Sprinkle with black embossing powder and heat set.
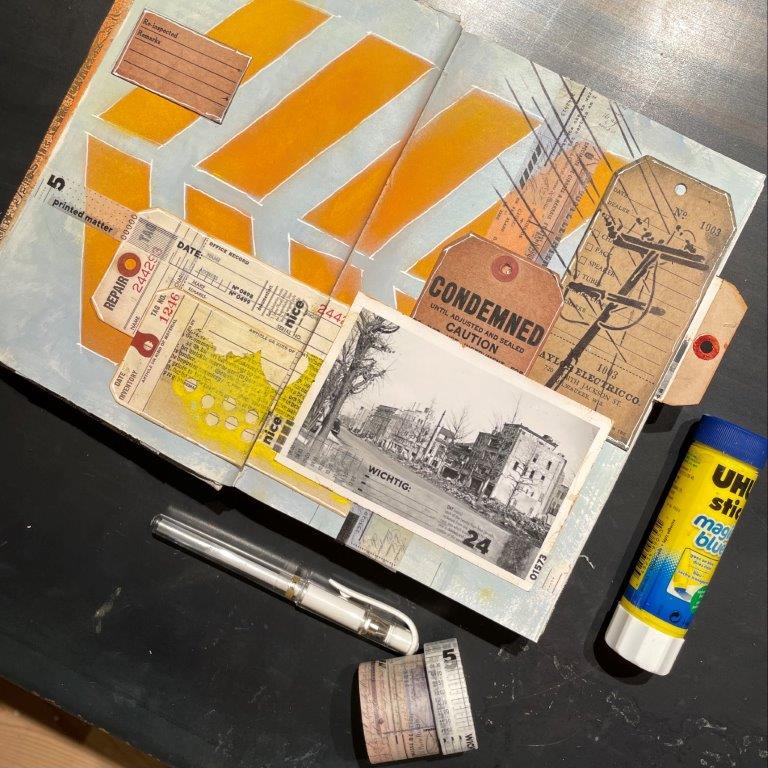
Step #4, Final Details and Pull Out
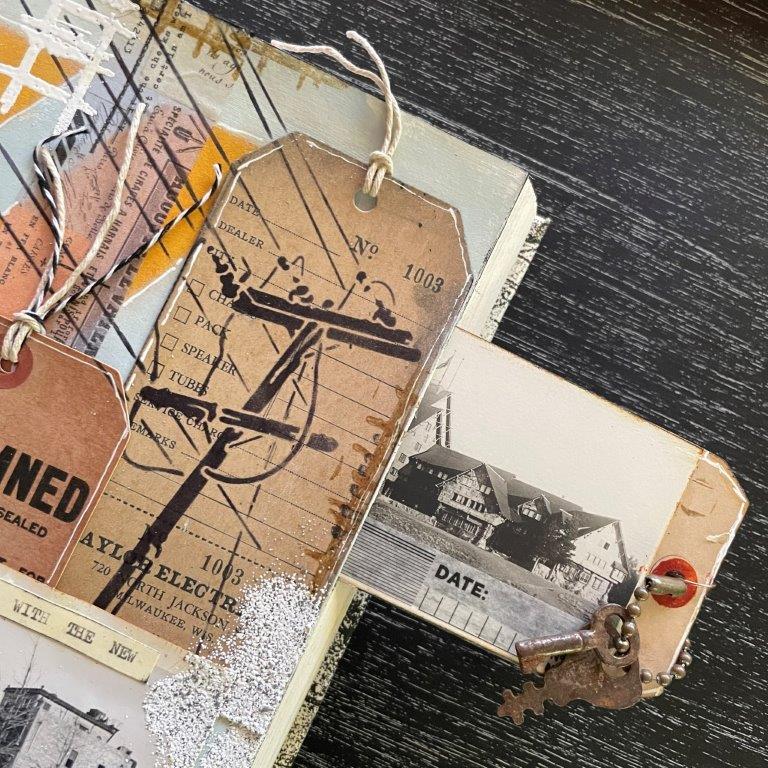
I ended up adding a pullout tag on the right side by gluing down the next page in the journal to the back right page of my spread. (Don’t use glue in the area where the tag would go, this creates the pocket…). Glue an old photo to the tag and embellished with a piece of washi tape. Add a few tiny rusty keys and a chain as an attachment through the tag hole. Voila, you have an interactive art page!
The last steps included some stamping around the edges with brown ink and smudgy embossing powder in Blizzard and White leading your eye to the focal images. I added my edged title and glued down 3 yellow pastel hole punched circles and called it a day.
Happy Journaling!
Tracy Hickman
@anonymous.palette