Στο νέο online παιχνίδι καζίνο του Nine Casino, εμπνευσμένο από τον κόσμο της κατασκευής στένσιλ, οι παίκτες μπορούν να δημιουργήσουν τα δικά τους μοναδικά μοτίβα για να ξεκλειδώσουν ειδικά επίπεδα παιχνιδιού. Immediate Byte Pro Neoprofit AI

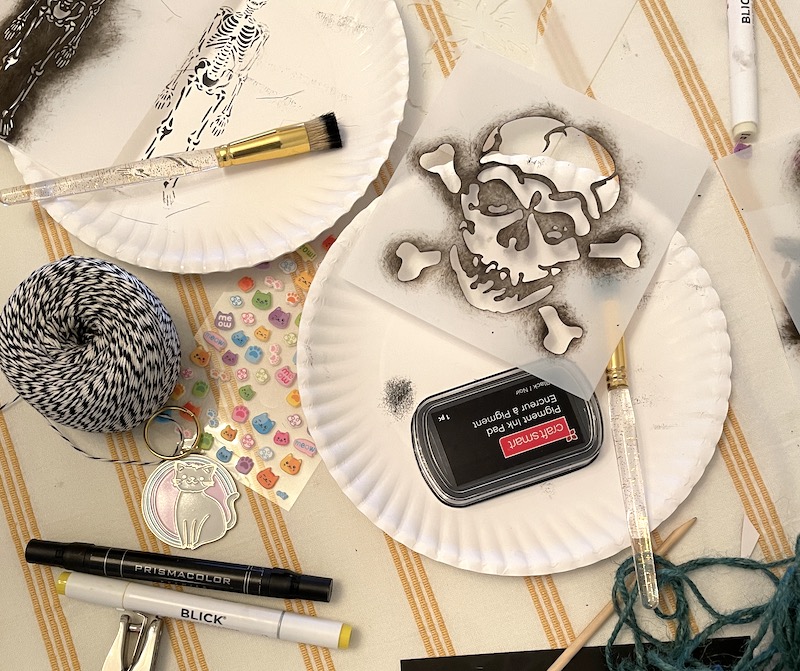
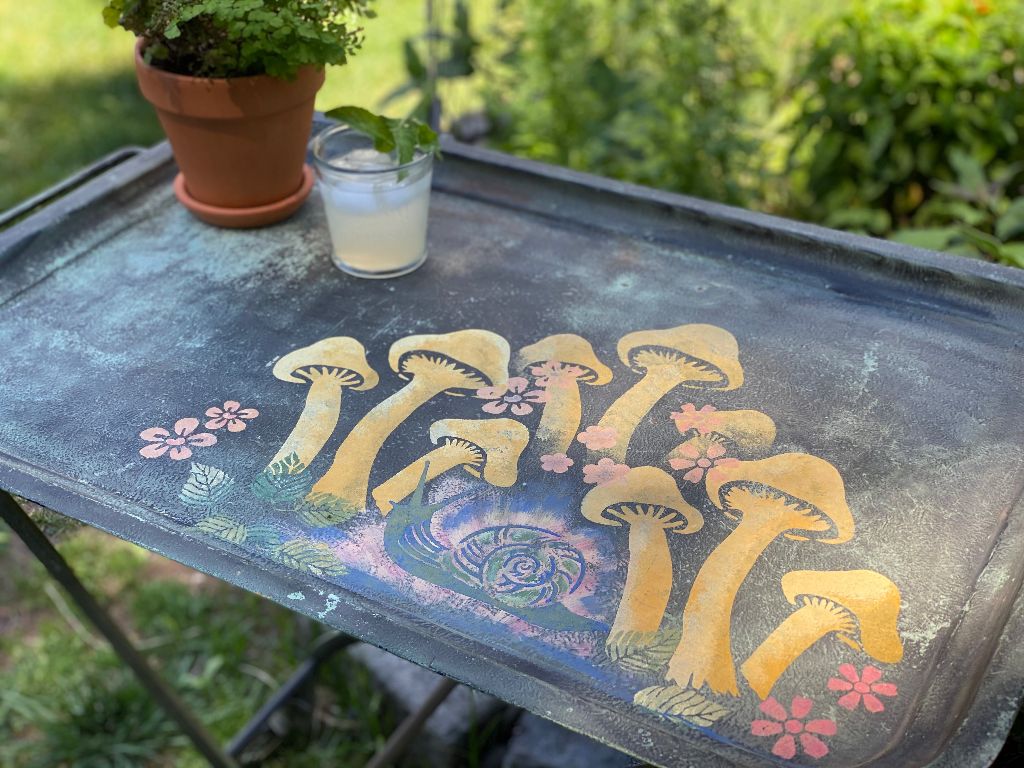
This post is coming to you from Tami M., contributing blogger, mom to a second grader, and all around great gal!

If you’ve been shopping lately, you’ve learned that Halloween is NOW. In our home this holiday of ghouls, ghosts and monsters is bigger than Christmas. Our late-summer days have been filled with crafting decorations for what my seven-year-old daughter describes as “the greatest night of the year.” As we transition into the school season, a stenciled Monster Garland is an easy, mess-free after-school activity that uses tools and supplies you’ll probably have on hand. We’re using this garland as the centerpiece of our Halloween fireplace-scape but it can easily be used just about anywhere in the home. This is a work in progress—pumpkins and other fall festiveness to come.

For your Halloween Monster garland, you will need:

-Multiple 5.75″ x6″ monster stencils. We chose an owl, a skull and crossbones, an evil jack-o’-lantern, Frankenstein, a raven, a skeleton and Dracula.

-Paper (we used sheets from an Artist’s Loft Watercolor Pad)

-An ink pad

-Round paintbrush

-Painter’s tape

-Hole puncher

-Baker’s twine

Step 1: Start by selecting your stencil design and figure out placement on the paper. Be sure to tape the stencil to the paper so that it doesn’t move while painting. Painter’s tape is a must so that it doesn’t damage the paper when peeling off.

Step 2: Once you are ready to paint, dab the ink onto the brush and then dab dab dab onto your stencil. The ink pad is very forgiving and won’t bleed under the stencil but never say never so do a few test runs to find out the ideal amount of ink that you’ll want for your design.

Step 3: When finished, remove stencil and let dry. *Remember, this craft is not about perfection. It’s an activity that is both structured and open-ended so let the kids explore with designs and color. We stuck with a black and white theme because those are the supplies we had in the craft cupboard.

Step 4: String your monsters together to assemble the garland. Add pumpkins and pots of mums to embellish.

Please share what you made by using #stencil1 and tagging @stencil1 on social media.


This post comes to us from our talented friend Tracy Hickman aka @anonymous.palette.

I’m excited to share this easy project and the process of how I created this Pop Up Journal Spread with 3 Stencil 1 Stencils!

Step 1:  Create Your Focal Image

On a sheet of Canson Mixed Media paper, I used the Stencil 1  #S1-01-80, Lotus Stencil, to sponge through Clear Embossing Powder. A granite mix Embossing Powder was sprinkled on and heat set.  I did this twice and cut out both Flowers (or in my case, Cactus 😉

I next used a few Sprays from Lindy’sGang to color the flowers.  You could use watercolors or acrylics here as well. Repeat on both Flowers/Cactus…

Step 2:  Create the Background

I next placed this amazing new Stencil1 #S1_PA _79,  Nature Damask Stencil,  across both pages of this Stillman & Birn Journal and sponged Clear Embossing Powder through the damask and butterfly portions of the stencil.  I used Black Embossing Powder for high contrast and heat set.  I replaced the stencil back over the pattern and then sponged Clear Embossing Powder through the two birds.   using a Metallic Chrome Embossing Powder to highlight these. (You could use acrylic paint here instead of embossing but I was looking for a slightly raised effect.)

Color your whole background first,  I used two different light pink sprays to give a mottled appearance and break the white paper.  I next used some Colored Magical Powders and Sprays to color the butterfly and birds. Watercolors would be a great substitute here as well…

Step 3:  Assemble your Pop Up!

On one of your Lotus Flowers, cut out carefully the center leaf.  I placed the new Stencil1  #S1_PA_86_S, Exotic Mum Stencil, over the top of the cut out leaf and sponged Clear Embossing Powder through, sprinkled White Embossing Powder  over the ink and heat set to indicate thorns, turning my Lotus into a Succulent Cactus 😉

Glue down the cut out flower across the center of the pages and bend under the two sides if your second full flower.  Place them making sure your book can still open and close and glue down those two under turned tabs. Then turn crease your individual petal down the center and glue just the crease portion on the pop up spine if your full Lotus.

I used two tea tags that I gessoes, colored and added my sentiments then stapled onto flower stickers that I placed in the birds beaks and voila, a spring inspired Pop Up!

Stay Creative!
Tracy

Please share your creations with us @stencil1.


Easy Art Journaling in 4 Easy Steps:

What You Will Need:

Chevron Stencil
Icons Stencil
Powerlines Small Stencil
Acrylic paint (Wolf Eye and Hint Of  Mint)
Paint Brush
Spray Paint (in Orange)
Soft Pastels (in Yellows)
Fixative
Black Ink Pad
Tags
Old Photo
White Gel Pen
Washi Tape
Glue Stick
Embossing Powders (Black and Red)
Clear Embossing Ink

Step #1,  Select Your Ephemera

Gather some collage elements, I used tags from an ephemera pack and two vintage photos and came up with a pleasing layout.  Set aside.

Step #2, Develop your Background

I blended 2 light blue/gray tones together in a messy way and let dry.

Place the Chevron Stencil across your pages and add some washi tape to keep in place.  Using Orange Spray paint, spray through the stencil.

Replace the stencil over the spray painted Chevrons and scribble in two shades of yellow pastel, blend with fingers and spray fixative to set the pigments.

Step #3, Inking and Embossing

Place the Powerlines stencil over the tag and sponge black ink through the pattern. (Black acrylic paint or gesso would be a good substitute).  Decorate any of the additional tags with collage papers and washi tape.  I used a scrap of yellow paper that I had hole punched and some black text washi for an industrial look.  I also added  a few washi tapes under the collage elements to anchor vertically under the tags and horizontally over them once they were glued.  

Place the Icons Stencil over the photo in a few spots and use a clear embossing ink pad to sponge through the star pattern in the stencil.  Sprinkle red embossing pattern over and heat set.

Using the same Icon Stencil,  place the arrow pattern vertically on the left page and sponge through clear embossing powder.  Sprinkle with black embossing powder and heat set.

Step #4, Final Details and Pull Out

I ended up adding a pullout tag on the right side by gluing down the next page in the journal to the back right page of my spread.  (Don’t use glue in the area where the tag would go, this creates the pocket…).  Glue an old photo to the tag and embellished with a piece of washi tape.  Add a few tiny rusty keys and a chain as an attachment through the tag hole. Voila, you have an interactive art page!

The last steps included some stamping around the edges with brown ink and smudgy embossing powder in Blizzard and White leading your eye to the focal images.  I added my edged title and glued down 3 yellow pastel hole punched circles and called it a day.

Happy Journaling!
Tracy Hickman
@anonymous.palette


Hello! I usually work in pairs when creating art on paper and this project was no exception. I like to purchase works in pairs but this also hedges your bet of one work hopefully being a success.

works_on_paper

What you will need:

Diamond Stencil from the Pattern 8 Pack
Thatched Texture Stencil
Small Damask Stencil

Matte Acrylic Paints in Neutrals
Stabilio Black Pencil
Graphite Pencil
Watercolor Pencil (Ochre)
Water Soluble  and Soft Pastels   
White Posca Pen
Spray Paint (Black)
Paint Brush
Glue Stick and Gel Medium
Collage Papers and Found Words

Step 1: Mark Making

I began by taping off 2 pieces of 12” x 12” Strathmore Mixed Media Paper to a board.

Insert photo of gray grungy Swirled marks on paper

I used a Stabilio black pencil to make some marks as well as a mechanical pencil. Wet a brush and and touch this to the Stabilio on the papers to start creating some energy and covering up the white of the paper. Charcoal or Graphite works well also.

Step 2: Continue Developing your Background

gray and pink diamond pattern with 2 black round marks

Add some water activated pastels, charcoal, or water soluble pencils or crayons. Reestablish Black Stabilio over marks that you like. I used the Diamond Stencil from the Pattern 8 Pack and rubbed pastel right through the stencil with pink pastel and ended up reestablishing this pattern in later layers.

I selected 5 matte acrylics in Chalk, Antarctic, Buff, Seaglass and Koala and blended with both a brush and a brayer. I made marks in the wet paint with a skewer and added some other colors of pastel and marks with an ochre watercolor pencil.

2 papers side by side on easel with unglued collage elements

Step 3: Auditioning your Collage Elements

Select some collage elements that are speaking to you. Painted Papers, vintage papers, book pages, fortune cookies etc…

Step 4: integrate the Collage
Elements with Stenciling

I reinforced the Diamond Stencil marks with Pink Pastel over the collage elements and sprayed Fixative to secure the pigment on both works.

Thatched Stencil and Hand

Using a darker contrast Blue Gray Paint, dry sponge matte paint through the Thatched Stencil on both papers.

Step 5: Final Stencil and Marks

I placed the Small Damask Stencil at the bottom of one of the papers and the top of the other paper so they would align if stacked and sprayed black matte paint through the stencil after protecting the other parts of the media with paper towel.

black spray paint and paper towel

A few additional marks and color notes along with adhering some found words as a title and you have 2 finished Mixed Media Works on Paper ready to hang!

Hope you enjoyed!

Tracy Hickman
@anonymous.palette


Here’s a DIY post that’s perfect for upcycling an old piece of furniture and giving it new life!This metal garden cart was actually someone’s trash and I decided to make it my treasure!Here’s how I stenciled the cart.

Materials you will need:

Metal cart
Assorted acrylic paints
Assorted stencil brushes
Mushroom stencil (8.5×11)
Spring stencil 4 pack
Snail and flowers stencil (8.5×11)
Matte clear coat spray

A group of garden themed stencils

Color mixing and process

The process was really fun and easy. I wanted to keep the colors somewhat consistent with what you might find in nature. I mixed a golden yellow for the mushrooms and a lighter, brighter yellow to highlight them.

Painting a mushroom stencil

I chose to use the stencil three times at varying heights to create depth.

Mushrooms stenciled on a garden cart

Then I mixed a bright blue for the snails first coat because the green I wanted to use would get lost against the green background without it. Then I went over that with the green, leaving some blue peeking through in spots to lift the snail off the background. I decided on a soft pink, with hints on orange and red for the flowers and used the green from the snail and a lighter yellow for highlights on the leaves.

Painting a snail stencil

I added metallic gold to everything I mixed up. After everything dried, I did two quick coats using a rust-proof, matte clear coat spray.

A garden cartwith stenciled designs

I loved doing this project, not only were the stencils adorable and fun but they also were easy to use on this surface. I love making something beautiful for my garden that I can use while spending time outside with friends.

Happy Crafting!
~ Teri @tjaneiro2 on Instagram


Do you create Home Decor Updates with Stencil1?
Please share with us on social @Stencil1 and #stencil1