Beginner Art Journaling in an altered book using Stencils two different ways.
Materials Needed:
Any hardback book or novel
Glue stick
Clear and White Gesso
Flourish Borders Stencil 8-pack
Thatched Texture Stencil
2 Quatrefoil Stencil Small
Blossoms Stencil
Color Infusions or Magicals
(You could substitute watercolors)
Painted Papers or Collage Paper
Acrylic Paint in San, Chalk, Periwinkle
Washi Tape
Molding Paste
Water in a Spray Bottle
Chalk Paste in Sand
Watercolors
White Cotton fabric
Embroidery Floss
Embossing Powder
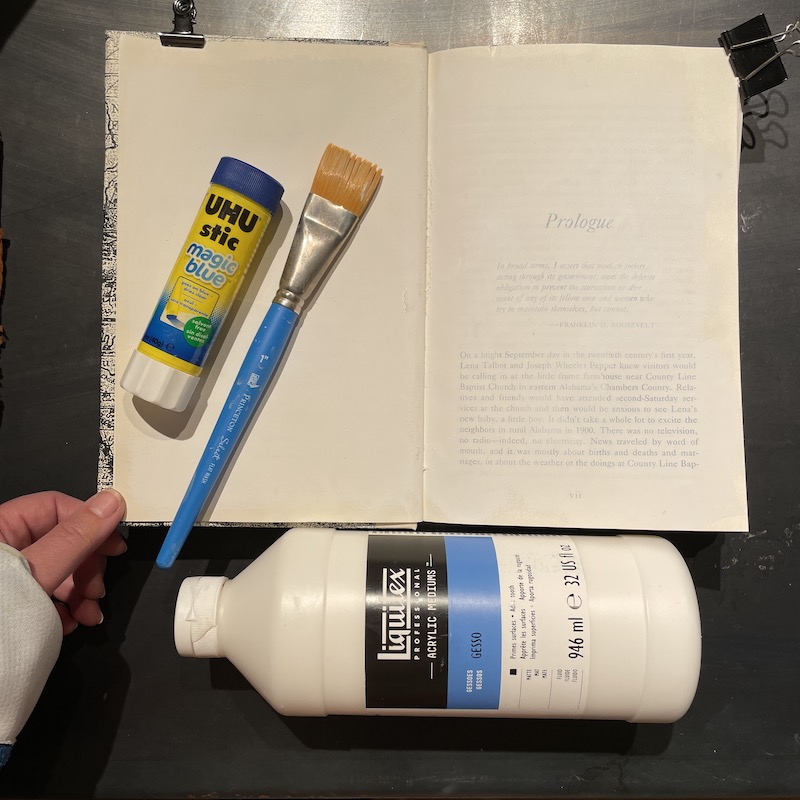
Step 1: Prepare your Book
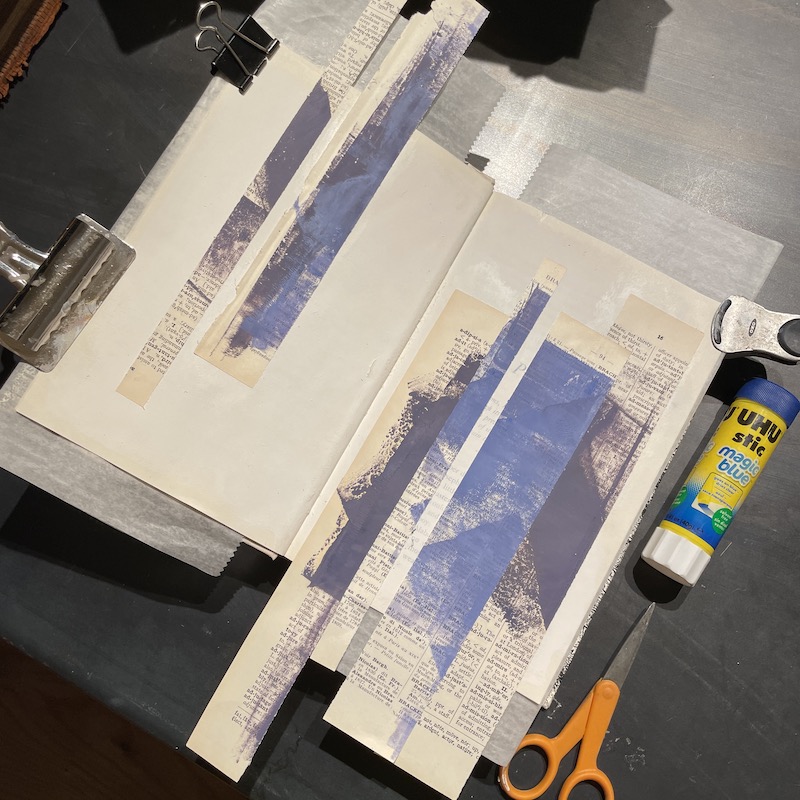
You can work in an art journal but recycling an old hardback book or novel laying around is a fun way to start journaling with little investment. I usually glue the left page to the page behind with a glue stick and do the same thing to the right page to reinforce the pages depending on the paper thickness. Next coat both pages in a layer of white gesso, A lighter coat see your text shows through, or do a couple of coats to cover completely. (It’s a good idea to tear out three or four pages between every journal entry to allow for thick layers that get built and then discarded pages can be used as collage elements
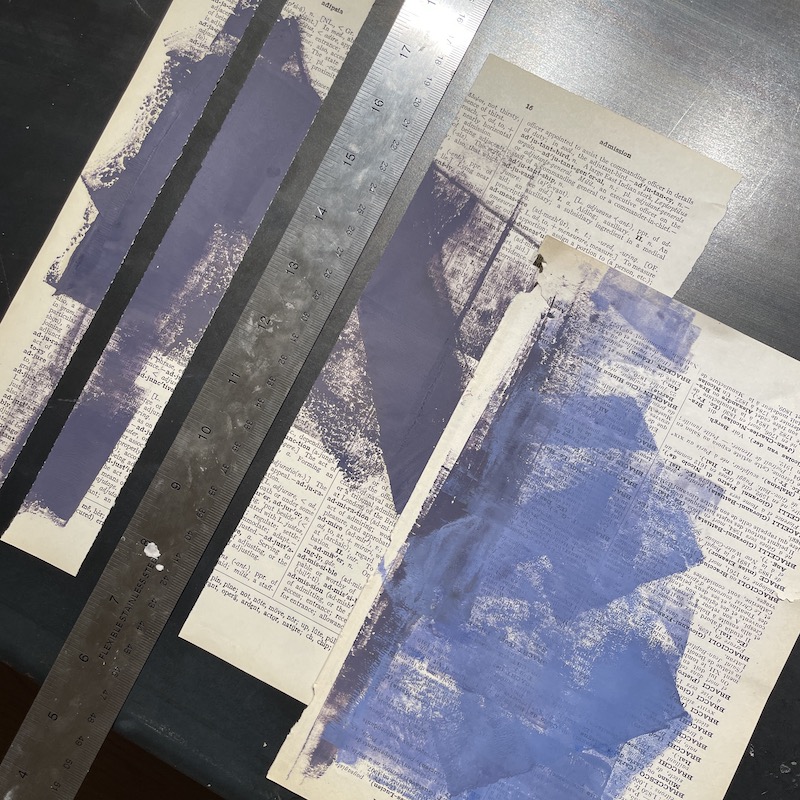
Use a couple painted papers, magazine pages or collage papers that you have laying around and tear into different width strips.
Step 2: Develop a Background
Using the glue stick, adhere your paper strips in a pleasing pattern onto your pages.
Choose one or two acrylic paints, (I chose a sand color lightened with white that blended in with the back of my dictionary page strips) Paint over the white gessoed blank background and blend in scrap paper strips.
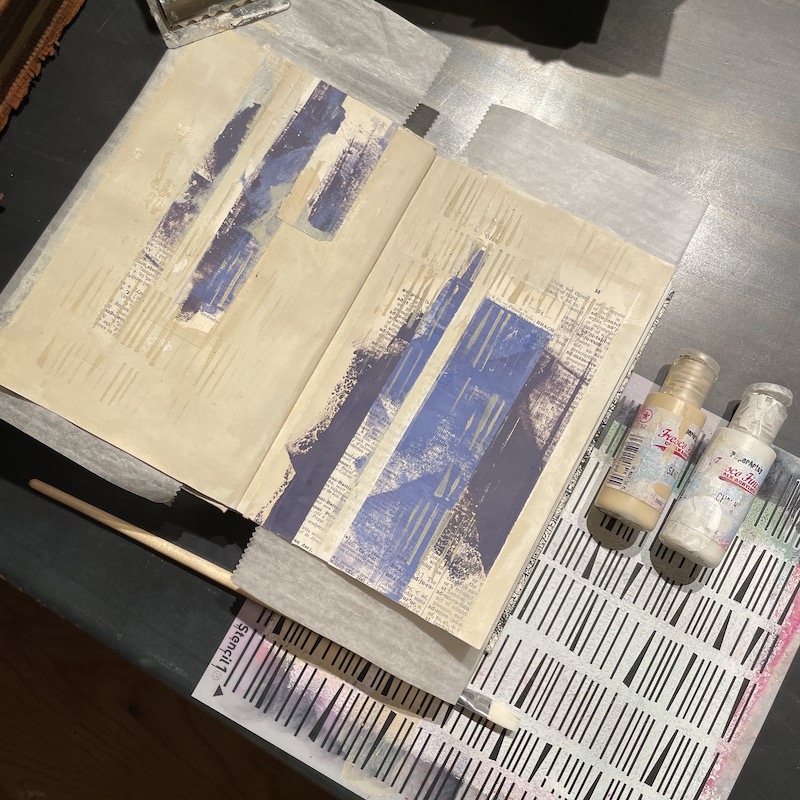
Place the Thatched Texture Stencil over your painted papers and sponge sand-colored acrylic paint pounced through the pattern. (I love this stencil as it can be used vertically, horizontally, or on an angle for completely different effects and also stacked over top of itself to make a hatched pattern ;). This technique helps harmonize your collage paper strips with the background.
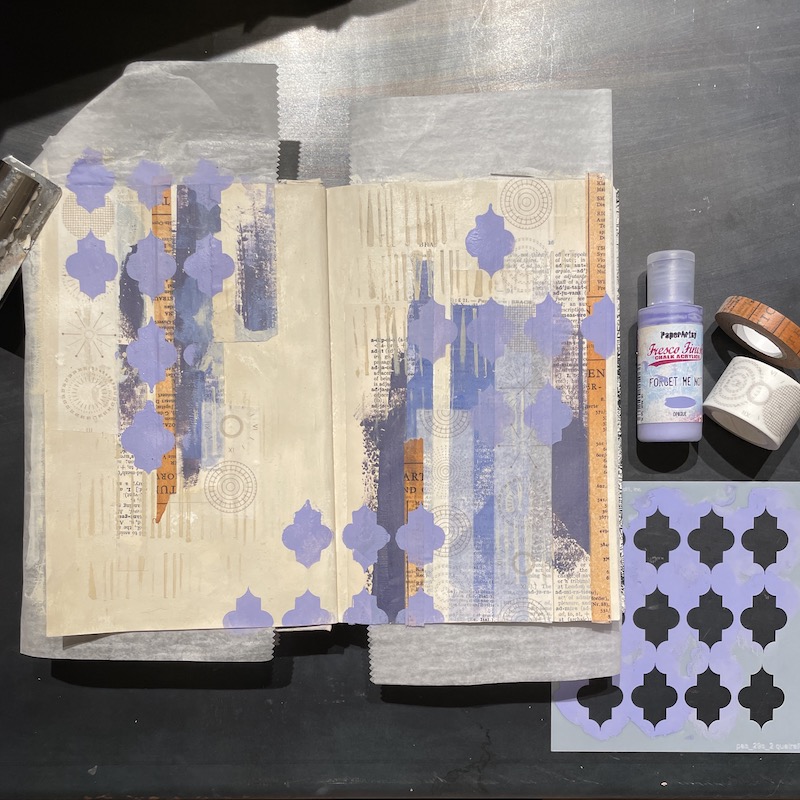
Step 3: Add Washi Tape and more Stenciling
Choose a few different Washi Tapes, masking tape can be substituted here. I always use a coat of clear gesso over the washi tape to let future mediums adhere better. Place the Quatrefoil 2 Stencil over the washi and pounce periwinkle paint through the stencil onto both pages.
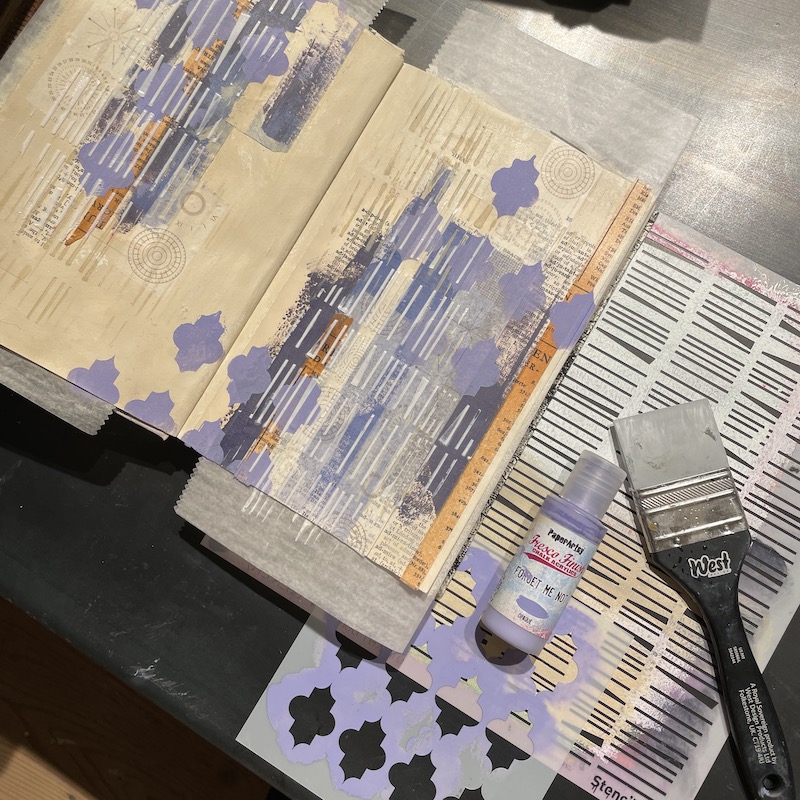
Using the Thatched Texture Stencil a second time, spread molding paste through the pattern with a silicone brush, gift card, or palette knife, and let dry.
Step 4: Final Layers with Stenciling Two Ways
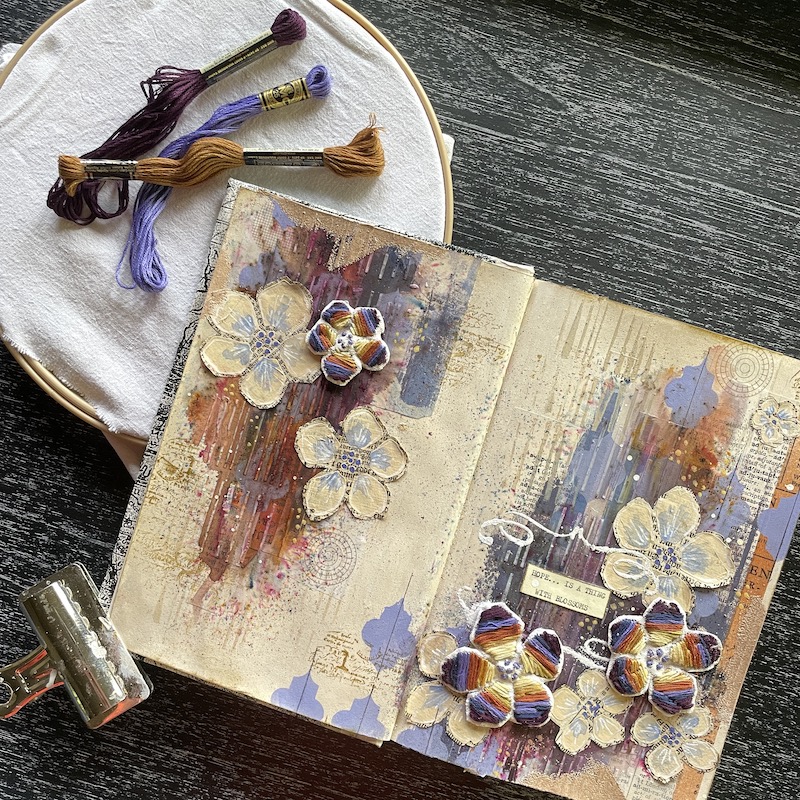
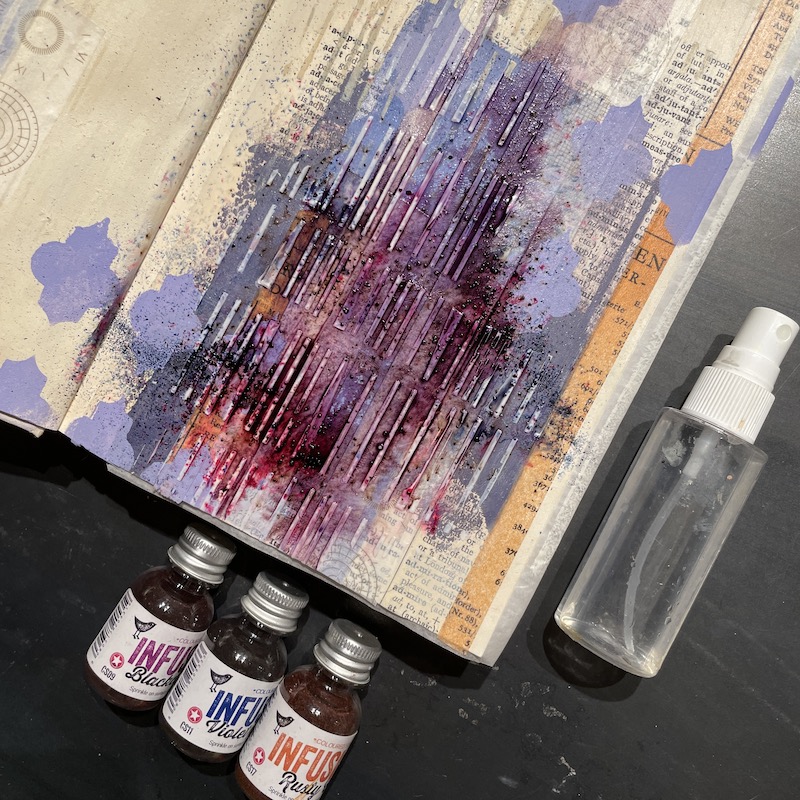
Infusions or Magicals are small jars of pigments that can be sprinkled onto the page then spritzed with water so the colors magically appear. This technique was used over the dried molding paste Thatched Pattern. (It can be fun to tilt the pages this way or that for the colors to move around and you can also blot back the color if you don’t want it so vibrant)
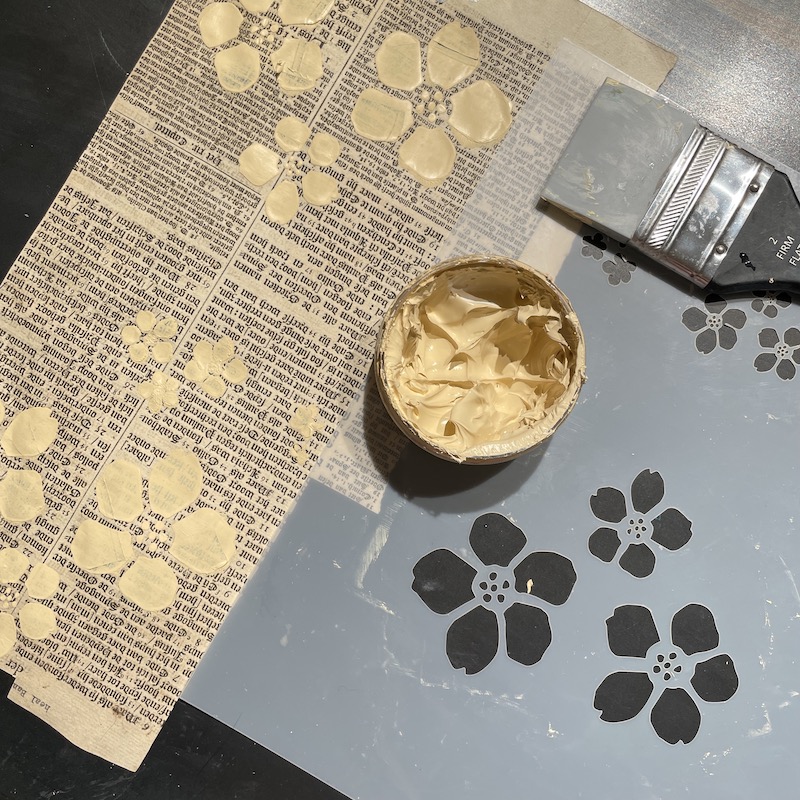
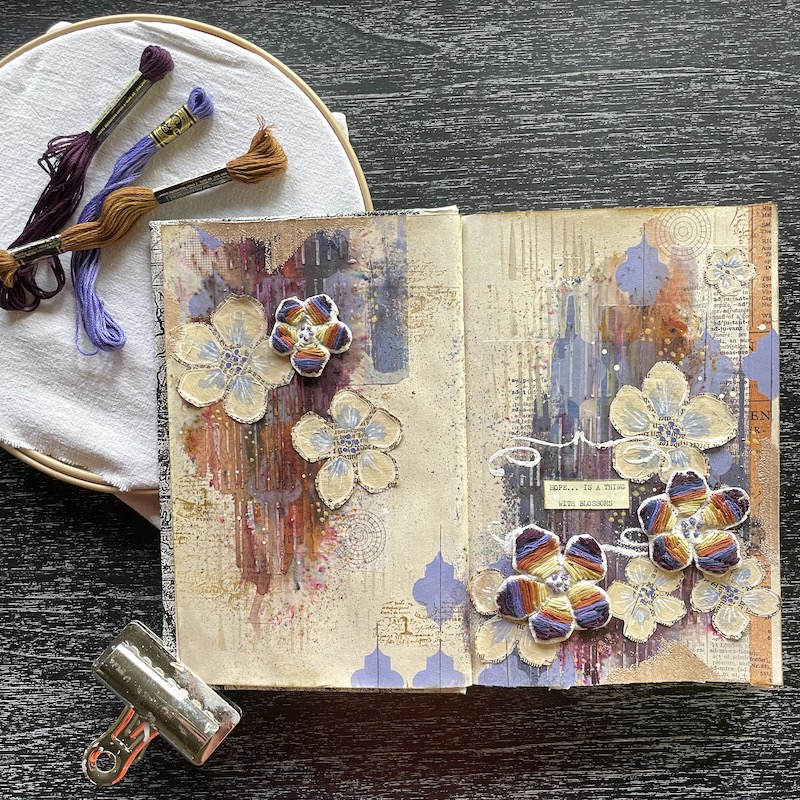
Next, spread Sand Chalk Paste (or Molding Paste tinted Sand) through the Blossoms Stencil onto the discarded book pages and cut out when dried.
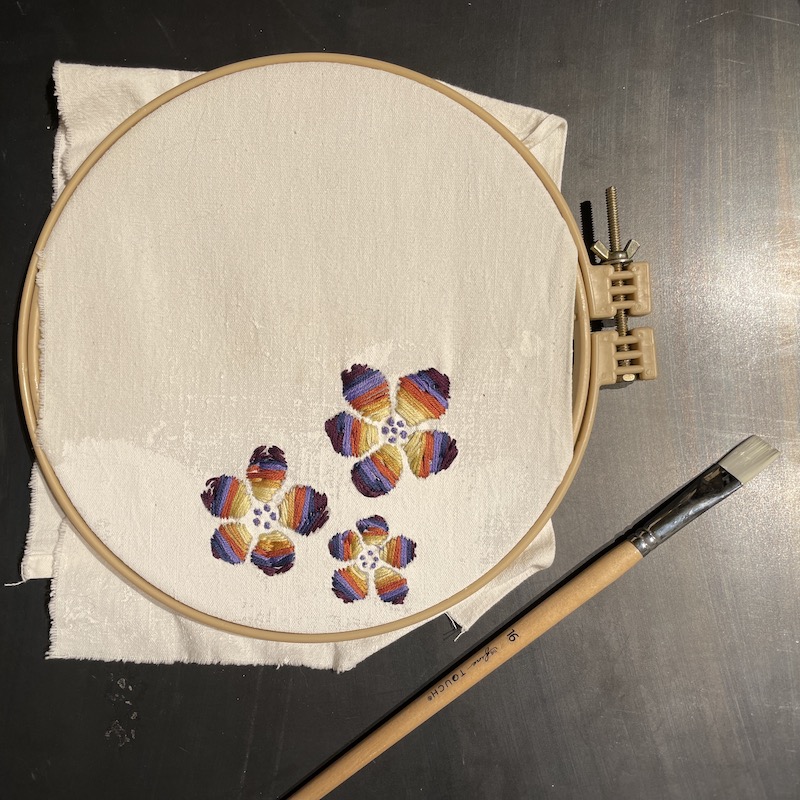
Using the same Blossoms Stencil, trace the pattern onto some plain fabric and use embroidery floss to stitch over the design. Glue the threads on the backside and when dry cut out your Blossoms. (This pattern embroidered on a pair of jeans would be fun!)
Step 5: Apply Blossoms and Final details
Glue your paper Blossoms down with a glue stick and glue your embroidered blossoms down with a thicker glue-like gel paste or fabric glue. Hand paint some details on your blossoms with watercolors and a white gel pen. I next cut out and adhered my quote, “Hope is a thing with Blossoms” and framed it with the Flourish Border Stencil by sponging clear embossing powder through the stencil and heat setting white embossing powder. Add some stamping with brown ink in a few spots and use the same brown ink around the edges of both journal pages. Finish by heat setting some Baked Texture Powder smudged onto a few areas over clear embossing ink and you’ve completed the first entry in your altered book!
Happy Journaling!
Tracy Hickman
@anonymous.palette
Do you create Mixed Media and papercrafts with Stencil1?
Please share with us on social @Stencil1 and #stencil1