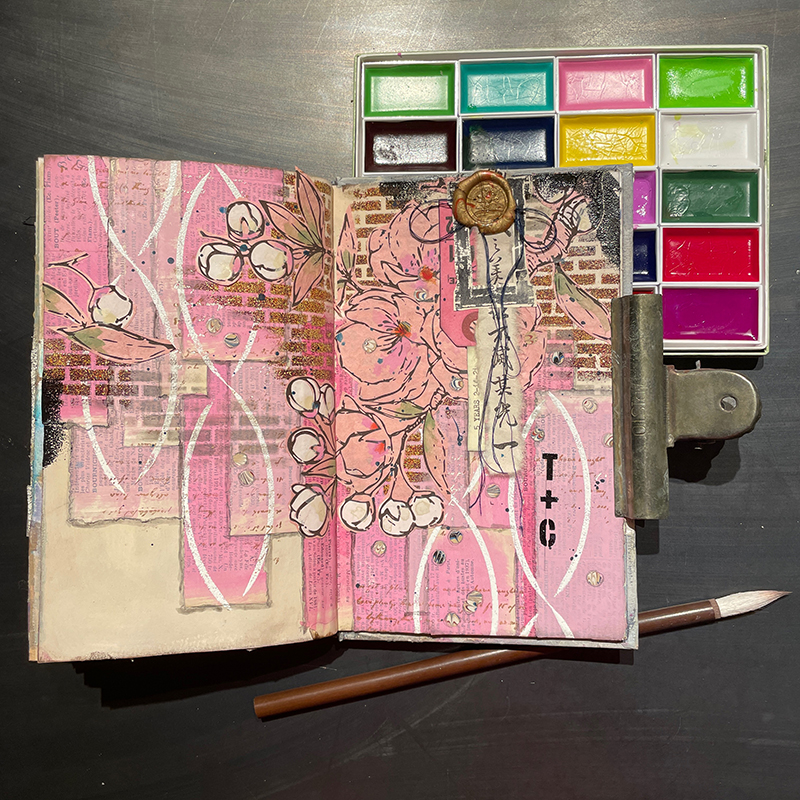
Στο νέο online παιχνίδι καζίνο του Nine Casino, εμπνευσμένο από τον κόσμο της κατασκευής στένσιλ, οι παίκτες μπορούν να δημιουργήσουν τα δικά τους μοναδικά μοτίβα για να ξεκλειδώσουν ειδικά επίπεδα παιχνιδιού. Immediate Byte Pro Neoprofit AI

This time around I wanted to stencil a galvanized bucket. There are endless uses and I love the idea of personalizing it. I’m thinking of using mine to put planted herbs or fruits in and it definitely would be great for storing crafting tools and brushes!

Materials and Supplies

Mixing colors

I used titanium white diluted with a little water for a whitewashed base coat. I wanted muted colors to suggest age so I started with a soft, warm gray for the honeycombs. I mixed up a light purple And then a bright yellow as an accent on the cherry blossoms. For the bees, I mixed a dark purple and a medium brown.

Process

First, clean your bucket so it is completely clean and free of grease or debris. To make the paint adhere properly, use a rag or paper towel to fully coat the surface you want to paint with white vinegar. You can choose to use an etching spray primer instead of vinegar for an even stronger bond. The spray primer needs at least 3 hours to dry, so I went with the vinegar instead and it adhered just fine. As long as it gets the job done, no need to overdo it, just have fun! 

Once you have primed your surface, you are ready to get stenciling!

I applied the whitewash base coat first. I used an old, ragged brush to accentuate the brush strokes adding texture while painting in vertical strokes. Once that dried, I applied my stencils, starting with the background. I used a gray color for the honeycombs and positioned them randomly toward the edges of the bucket.

For the cherry blossom, I used the lavender in the center and the brighter yellow on the edges, blending them as the colors met on the petals. It’s important to remember to use very little paint, just enough for coverage and not so much that it bleeds under the stencil.

Finally, I positioned the first bee and then staggered the next, slightly below. I used a muted purple and brown for the bees so they would stand out from the background, but still keep in line with the overall weathered look of the piece. I added some random vertical brushstrokes in pale purple and gray in the larger spaces between stencils to add to the antiqued look.

For durability, I used a clear coat spray to protect the base paint and painted stencil designs to finish the project. 

This project was made by our lovely friend, Teri @tjaneiro2 on Instagram
Please share your creations with us @stencil1.com


“Kings don’t Die” was inspired by those who lead others throughout times and refuse to give up ever.

Tools used for this project:

Place the skull stencil and trace the outline of the stencil with a pencil.

Then, outline the rose from the flower 4-Pack on the left and right side of the bottom portion of the piece of wood.

Take the 2 inch Old English Font stencil and begin tracing over the letters while leaving enough space between the characters. For this project, I decided to break up the word “don’t” into two lines. You can get creative with the placements of the stencils.

Draw the crown freehand on top of the skull to create a stylized look. You can draw it whichever way you desire.

After that, use the fine point tip and start burning along the outline you drew. Take your time while woodburning and take breaks if you need to. Remember to rest your woodburning tool on the metal stand included in your kit.

When finished burning the outline, erase the pencil marks and switched to the wide tip, and begin burning the inside of the outline.

Here is a video of the process.

Now you are done. Show off your woodburning skills and creativity to your friends and family.

This project was brought to you by Kenneth Medina (NYC-based artist and designer).

Please share your creations with us @Stencil1.


Stencils and Glass? Yes it’s a thing, a good thing!

BYOS – Bring Your Own Stencils, that’s what I did…to a glass making studio! Stencils can be used in so many mediums and my experimentation with glass produced some beautiful results if I do say so myself :). Here is how I used Stencil1 stencils with glass to make a hummingbird glass window ornament:

Materials You Will Need:

  • Detailed Birds Stencil 4 Pack
  • Tape
  • Glass Dust
  • Detail Brushes
  • Solvent
  • A Sturdy Flat Surface
  • A Small Spoon
  • Elmers glue
  • A Stove or Kiln or all this in a glass studio

I wanted to work on an optimistic, Spring themed image and the hummingbird was a perfect choice. It’s also great because it is a stencil design with a lot of bold open shapes, perfect for filling with glass powder!

I was provided a 7″ x 7″ white sheet of glass, that’s my surface for today! You have to wipe it clean with alcohol, no oil should be on the surface. I then planned the layout of the design and thought it might look best to turn my square glass shape to a diamond-like position and attach a chain to the top point for hanging.

I brushed in a little bit of watered down glue into the wing area and then sprinkled in glass powder.

I continued the process with a few colors of powdered glass. you can see here that I am creating ombre blended effects by the way I sprinkle the dust. I also always use my darker colors on face details, it helps to really see the detail of those features!

Here’s a shot of the different glass dust colors the studio offered. I love supporting small, local businesses like this. You don’t have to buy all the supplies, just visit, create, and everyone is happy! But yea, I also was like so how much is a kiln, haha! The art is addictive!

I also created a frame around the piece using these long sticks of glass, similar to hard pasta. It looked a little too structured for my taste so see what I did next…

I added these chunkier glass pieces around the edges to add some “atmosphere” to my little birds world. It adds some whimsy and texture. I then used a tweezer to adjust them to the composition I wanted.

Notice how I cut a small triangle shape up top and layered my hook in the layers of glass, a hook sandwiched between two pieces of white glass. The piece of white glass you see above the art piece is being used to simply prop up my hook so it doesn’t flop down while the glue is drying it inside the “sandwich”.

Once you remove the stencil, add your other elements of glass, you can use small tools to clean up your design. You can push some sand around, move shards around, and get it all to it’s final position before it get’s fired.

Your stencil has done it’s purpose and can be washed with warm soapy water. It’s ready for storage and to be used many more times!

The design was then spritzed with a very thin glue spray, almost like hairspray.

The piece was then placed on special paper that it sits on in the kiln. That’s me Eddie 🙂

Here’s a shot of the piece all finished, I am so happy with how the dust gets darker. Oh, forgot to mention I placed a small black glass bead for the eye. I think the eyes should pop in an image so this little bird got a nice dark eye.

Once completed, hang your piece proud! As shops reopen, please search for your local glass studios and bring Stencil1 stencils with you to try this technique. We would love to see what you make!

Please share your creations with us @stencil1.com


We hope you are all having a pleasant weekend. Whether it’s self-love, Valentine’s, or just a beautiful day we offer all of our love to you. Take some time to look at this beautiful anniversary mixed media journal entry.

What You Will Need:

  • Stencil1 Soft Chains Stencil
  • Stencil1 Industrial Font Stencil
  • Stencil1 PATTERNS #2 Stencil 8 Pack
  • Baked Texture Powder from Seth Apter, White Cloud, Eclipse, and Taos Sunset (or other embossing powders)
  • Paper Artsy Fresco Finish Paints, Sand, Blah Mange, Bubble Gum, Cerise, and Inky Pool. (Or like acrylics)
  • Golden Shading Gray Fluid Acrylic
  • Small Paint Brush
  • Dictionary Pages
  • UHU Glue Stick
  • Paper Artsy EM53 Stamp
  • Script Stamp from Dawn Houser
  • Archival Ink Pad in Black and Coffee
  • Clear Embossing Pad
  • Navy Blue Or Black Thread
  • Collage or Marbled Papers
  • A standard Hole Punch
  • A Waxed Seal Stamp
  • Watercolors or Gouache Paint
  • Vintage Collage Elements

“Hitched” is a journal entry inspired by a prompt “pink” in the #creative6daychallenge. I painted two adjoining pages in a Stillman and Birn journal with PaperArtsy Sand mixed with a little White Gesso. I next painted a few vintage dictionary pages in PaperArtsy Blah Mange, Bubble Gum, and Cerise. I ripped these into strips and glued them down with a UHU glue stick in a shingle-like format.

 I used some brown Archival Ink on a stamp with some French writing over the shingles in spots for some added interest.

I next used the Soft Chains Stencil and sponged on clear embossing ink from a pad through the design and removed the stencil. I sprinkled White Cloud Baked Texture Powder onto the clear wet ink and shook off the extra onto a piece of paper. Heat setting the powder with an embossing or heat tool reveals the magic of the embossing powder and makes such a crisp image from the stencil.

This brick pattern stencil from the Patterns #2 Stencil 8 Pack was next calling my name and used it by sponging Brown Archival ink through in random spots. I heat set and then replaced the stencil back over the pattern and sponged on clear embossing ink in spots and used Taos Sunset Baked Texture Powder to add that real brick texture.

I remembered a great wrapping paper with cherry blossoms from The Paper Source that I used and cut out the image, gluing down with a glue stick in the upper right over my “brick wall”. I then pulled out The Industrial Font Stencil to graffiti my wall with my and my husband’s initials also using clear embossing ink with Eclipse Baked Texture Powder (I created the plus sign with the lower case L.). I also added a bit of Eclipse Texture Powder at the right top and left pages to tie in the initials.

 I added some punched circles in marbled paper and glued down pencil lining after placement so they were a bit more dimensional.

I also outlined the individual pink shingles with Shading Gray Fluid acrylic ink from Golden to shadow. I next watered down some Inky Pool PaperArtsy paint and splattered over the bricks and cherry blossoms (covering the collage elements to protect). Using custom gold marbled wax, and the stamper, I took the Japanese calligraphy and stamped it with the string right below it. The string was tied into a neat little bow.

I colored the collage element with some Japanese watercolors and edged the outside of both pages with brown and black ink to the border and typed “5 Years 2-14-21” which is my 5 year anniversary and slipped it on the side of the calligraphy. Best Valentine’s Day Ever ;).

Happy Valentine’s Day! ❤️❤️❤️

This is another beautiful post from Tracy Hickman (@anonymous.palette on Instagram).

Please share your creations with us @Stencil1


Hand-crafted greeting cards create a subtle charm, that can be felt on both sides of a sincere exchange.

Out of Touch? Make It Special With Your Own Handmade Card

Spring brings with it renewal, warmth, and creativity. As we welcome the positive and healing change, maybe we should thaw some of our frozen relationships. Surviving so many historical events, gives us an excuse to forget that humanity is the only thing linking us together.

Sakura, the National Tree of Japan, symbolize Hope and Renewal When Bloomed

Handcrafting a greeting card gives you so much more control, over what the message says. Sometimes, it’s hard finding an appropriate card, and commercialism can make one’s sincerity feel less meaningful. Hand-crafted greeting cards create a subtle charm, that can be felt on both sides of a sincere exchange!

So Let’s Begin!

Materials Needed:

Once everything is gathered, get the masking/painter’s tape and create a small border around the card. We are going to create a vibrant cover and it will be oriented horizontally for the reader.

Make Sure To Practice!

I put a little extra tape towards the bottom right because I wanted it blank in order to put some words.

Try to tape it on a very flat service.

To recreate the desired effect, we need to use the paint very sparingly. This project doesn’t use too much of anything. Just your imagination, and patience. I want to create a gradient effect from deep indigo, violet, into warmer tones. Using the Scallop Stencil I’ll use these to symbolize the sun. The Asian stars will be used for the other side with the cooler colors.

Every Color I Made is a Tint

I only used acrylic paints in red, blue, yellow, and magenta. Magenta mixes beautifully with cool blue hues(Warm Blues tend to look slightly green/aquamarine.) We are not using black because it would desaturate the pure colors. Moving along to stencils! Once we’ve figured out the colors it’s time to begin using the stencils. Make sure to alternate the colors. Work from lightest to darkest as you move around your card. 

The Tapping Noise is Therapeutic

The background looks good enough to me, I played with scale and color to make it visually interesting. Clean up any smudgy stencils with white paint/gesso/white ink. I used all three. The branch is next, so we lay it out and make a highlight layer with pure white. It helps make the colors pop. 

Clean Up Your Lines!

Then create a warm brown with a combination of all three colors, I wanted my branch to appear reddish to match the Sakura petals. Went ahead and did the flowers, if you’re having trouble keeping the stencil still use more tape!

Hey! This Card was Created by Stencil1 Employee Yuli!

Do you create Mixed Media and paper crafts with Stencil1?
Please share with us on social @Stencil1 and #stencil1 


You’re painting, you’re done and you have excess paint in your palette. Don’t ever toss it, it can be used to make some wonderful assets for your next media or papercrafts projects.  Here’s how!

Using brushes, rags, and any other texture making tools you have, paint that excess paint into a paper journal!  We used some green and gold paint we had left over.

Let it dry before you then trace stencils such as the new Hexagon 8.5×11 pattern stencil or our lovely monstera leaf shown below (this stencil comes with the reverse stencil as well!).

Next, Cut out the shapes you traced.

Now you have these beautiful pieces to glue or decoupage into your next work of art!

Please share with us @stencil1 your stencil work, we would love to see!