Στο νέο online παιχνίδι καζίνο του Nine Casino, εμπνευσμένο από τον κόσμο της κατασκευής στένσιλ, οι παίκτες μπορούν να δημιουργήσουν τα δικά τους μοναδικά μοτίβα για να ξεκλειδώσουν ειδικά επίπεδα παιχνιδιού. Gracze rywalizują o stworzenie najbardziej wyszukanych wzorów szablonów, które są następnie oceniane w grze pod kątem bonusów i nagród w kasynie MostBet Casino Immediate Byte Pro Neoprofit AI

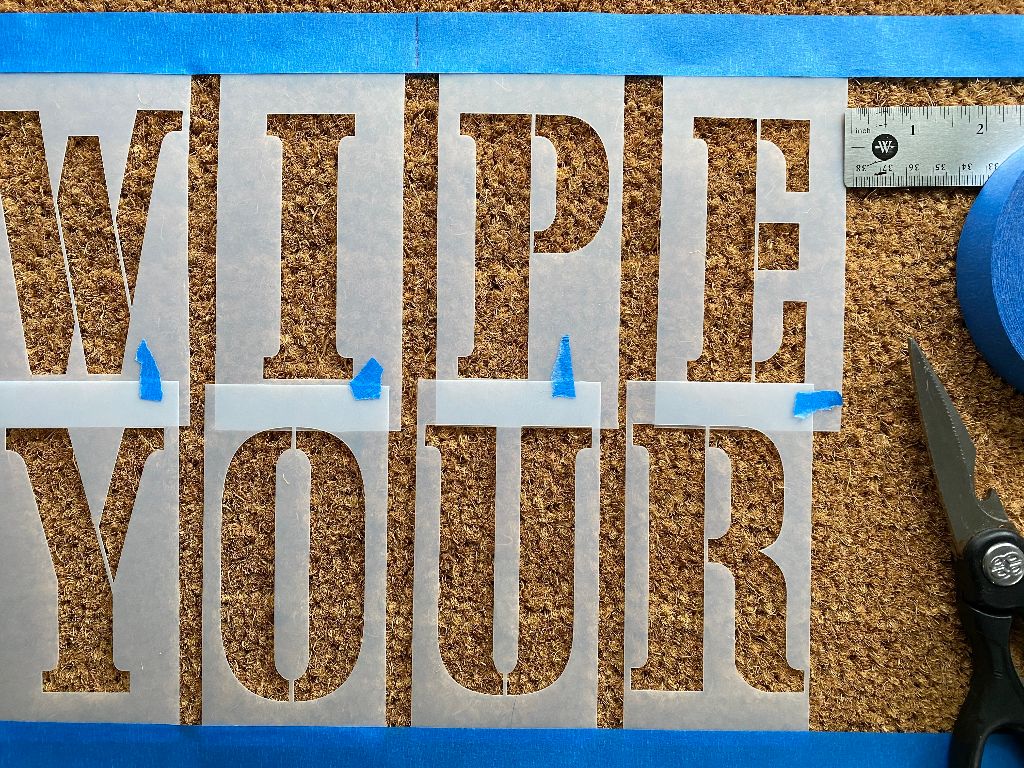
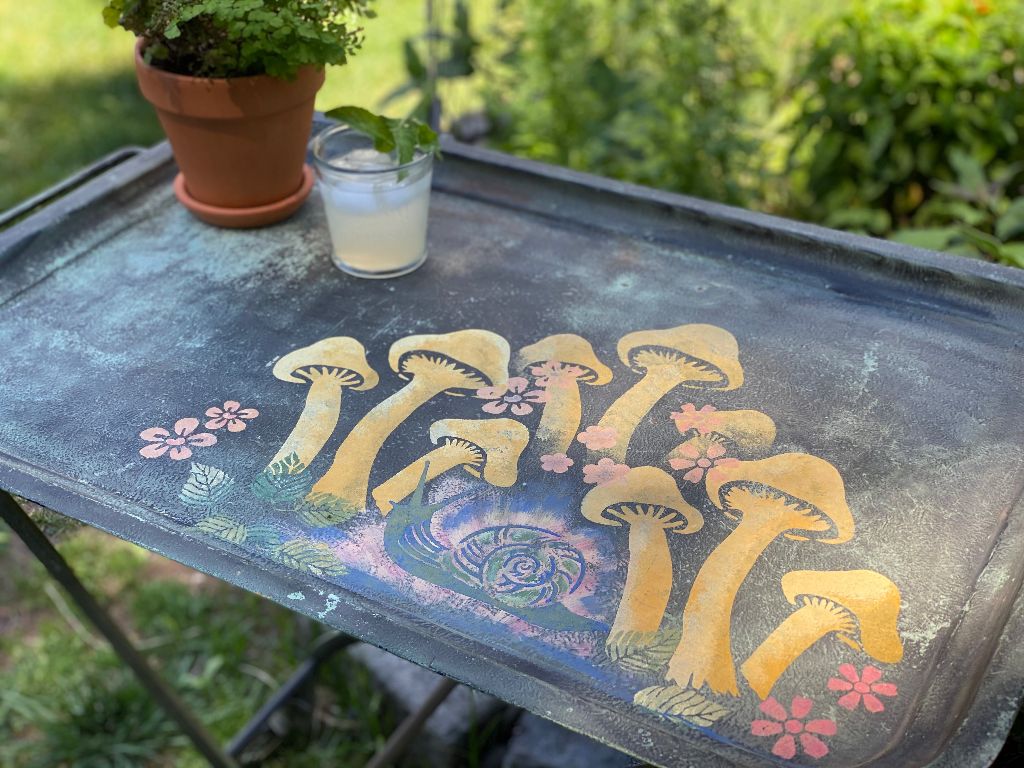
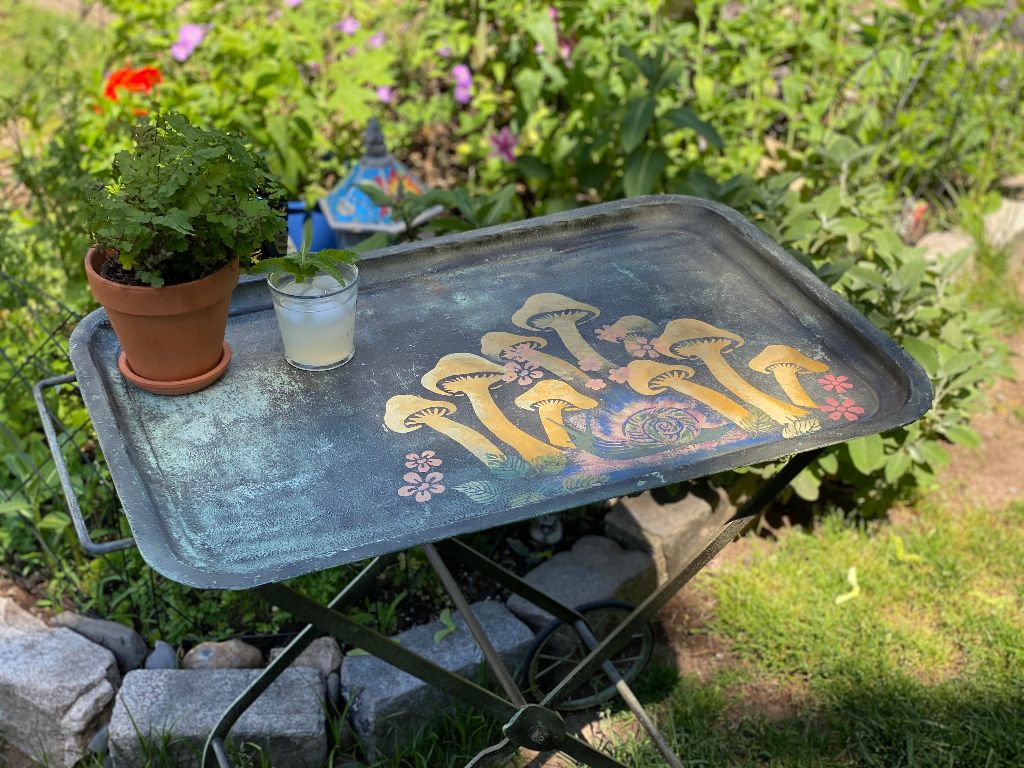
Here’s a DIY post that’s perfect for upcycling an old piece of furniture and giving it new life!This metal garden cart was actually someone’s trash and I decided to make it my treasure!Here’s how I stenciled the cart.

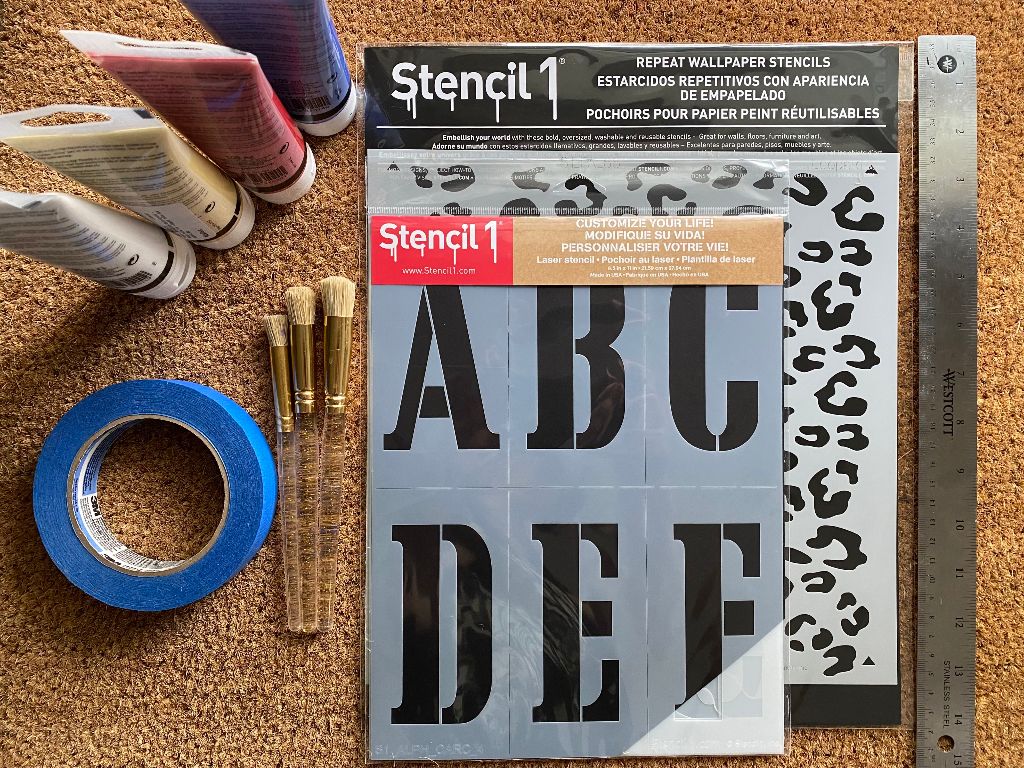
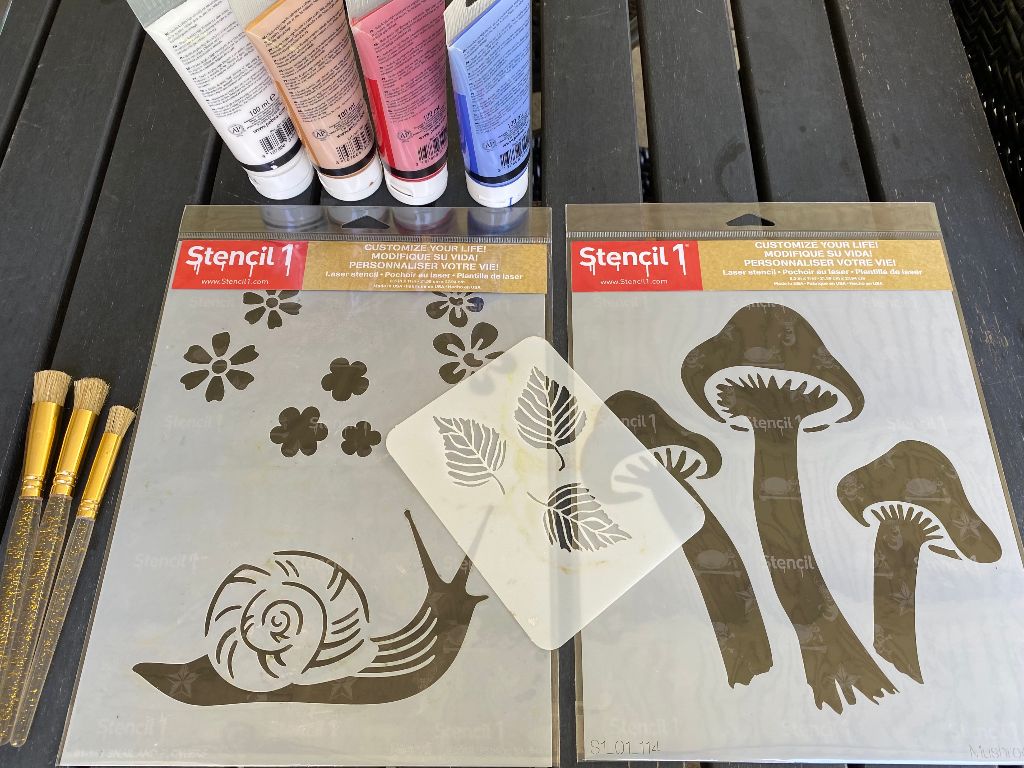
Materials you will need:

Metal cart
Assorted acrylic paints
Assorted stencil brushes
Mushroom stencil (8.5×11)
Spring stencil 4 pack
Snail and flowers stencil (8.5×11)
Matte clear coat spray

A group of garden themed stencils

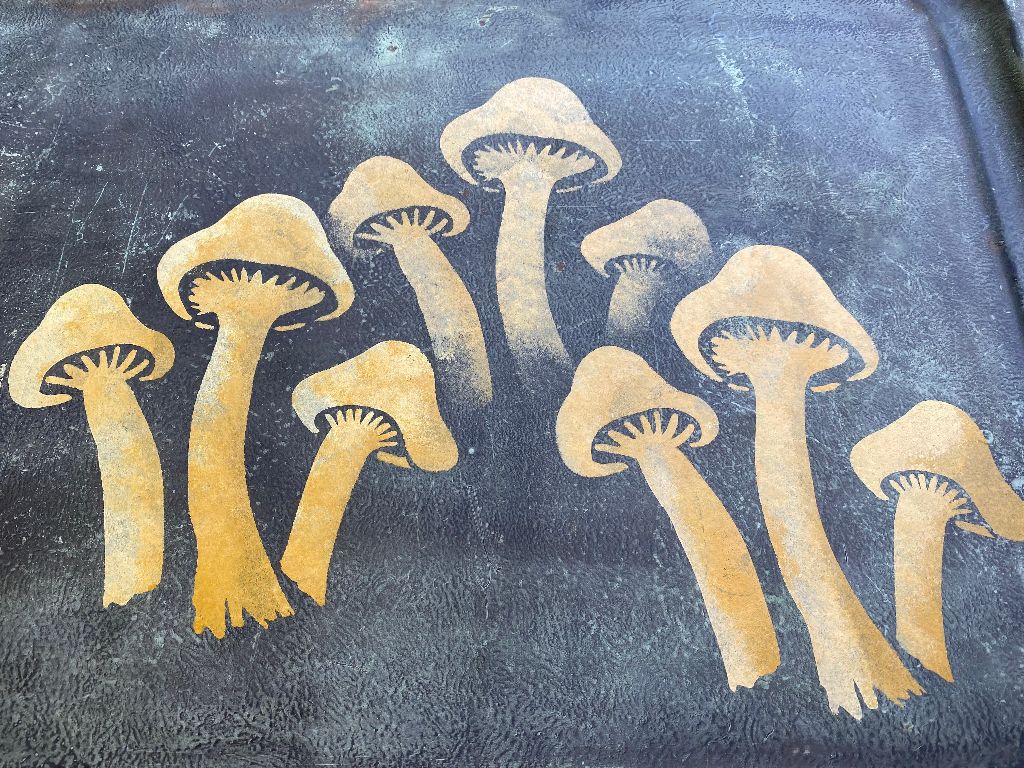
Color mixing and process

The process was really fun and easy. I wanted to keep the colors somewhat consistent with what you might find in nature. I mixed a golden yellow for the mushrooms and a lighter, brighter yellow to highlight them.

Painting a mushroom stencil

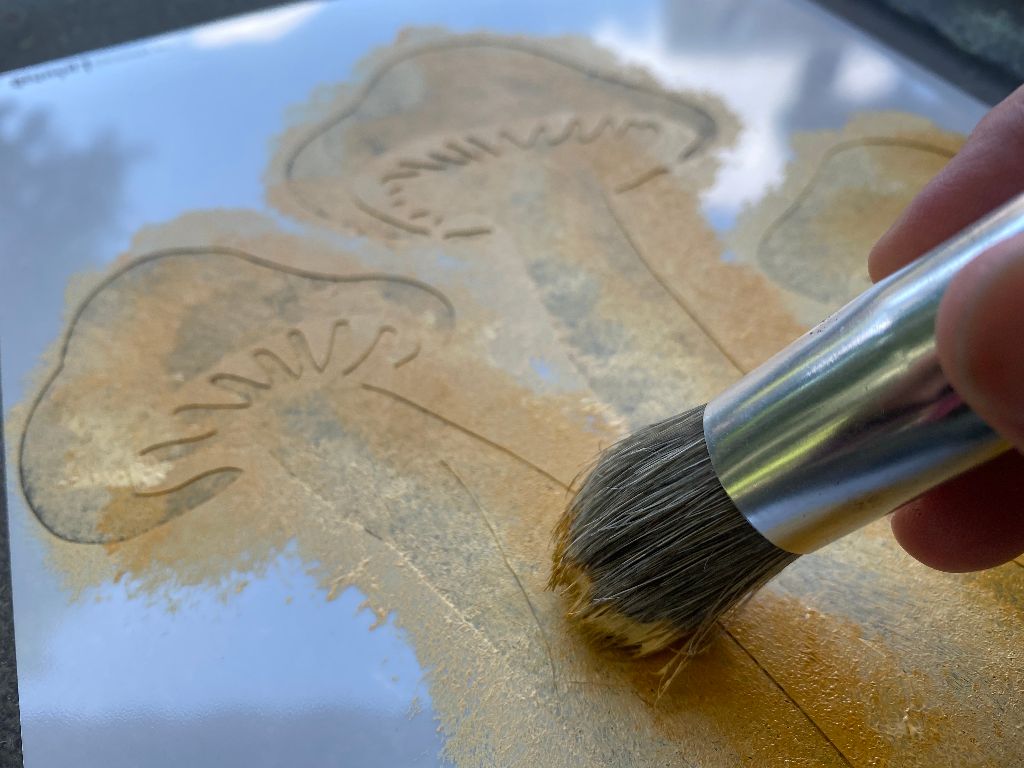
I chose to use the stencil three times at varying heights to create depth.

Mushrooms stenciled on a garden cart

Then I mixed a bright blue for the snails first coat because the green I wanted to use would get lost against the green background without it. Then I went over that with the green, leaving some blue peeking through in spots to lift the snail off the background. I decided on a soft pink, with hints on orange and red for the flowers and used the green from the snail and a lighter yellow for highlights on the leaves.

Painting a snail stencil

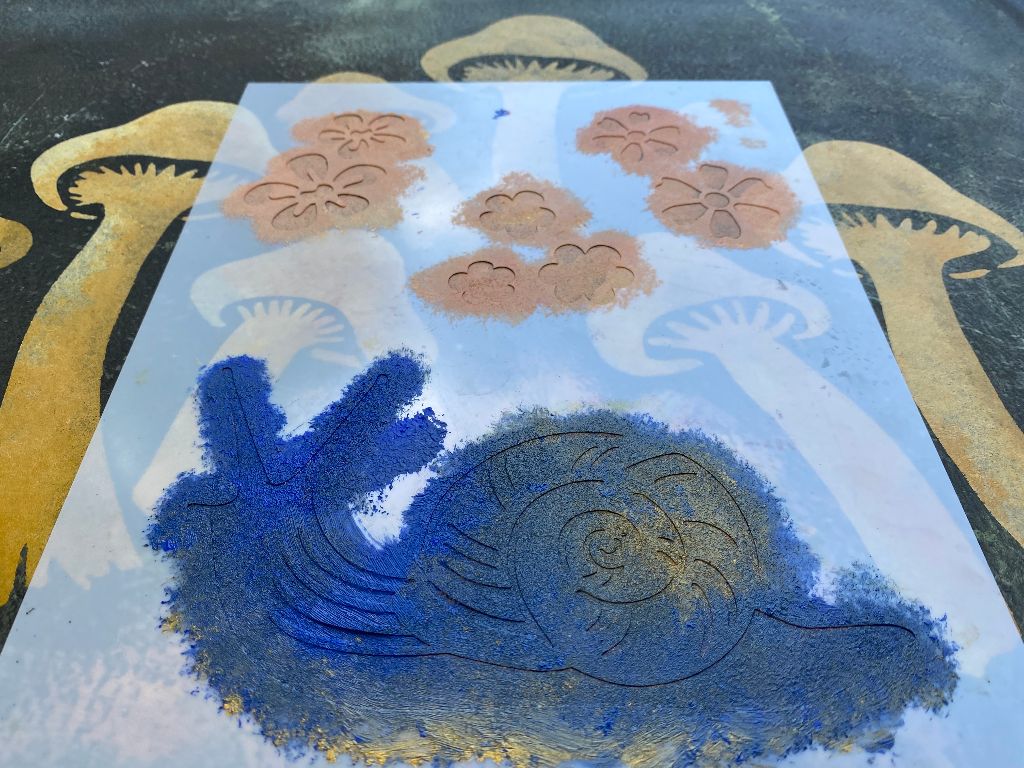
I added metallic gold to everything I mixed up. After everything dried, I did two quick coats using a rust-proof, matte clear coat spray.

A garden cartwith stenciled designs

I loved doing this project, not only were the stencils adorable and fun but they also were easy to use on this surface. I love making something beautiful for my garden that I can use while spending time outside with friends.

Happy Crafting!
~ Teri @tjaneiro2 on Instagram


Do you create Home Decor Updates with Stencil1?
Please share with us on social @Stencil1 and #stencil1 


Beginner Art Journaling in an altered book using Stencils two different ways.

Materials Needed:

Any hardback book or novel
Glue stick
Clear and White Gesso
Flourish Borders Stencil 8-pack
Thatched Texture Stencil
2 Quatrefoil Stencil Small
Blossoms Stencil
Color Infusions or Magicals 
 (You could substitute watercolors)
Painted Papers or Collage Paper
Acrylic Paint in San, Chalk, Periwinkle 
Washi Tape
Molding Paste
Water in a Spray Bottle
Chalk Paste in Sand
Watercolors
White Cotton fabric 
Embroidery Floss
Embossing Powder

Step 1: Prepare your Book
You can work in an art journal but recycling an old hardback book or novel laying around is a fun way to start journaling with little investment. I usually glue the left page to the page behind with a glue stick and do the same thing to the right page to reinforce the pages depending on the paper thickness. Next coat both pages in a layer of white gesso, A lighter coat see your text shows through, or do a couple of coats to cover completely. (It’s a good idea to tear out three or four pages between every journal entry to allow for thick layers that get built and then discarded pages can be used as collage elements

Use a couple painted papers, magazine pages or collage papers that you have laying around and tear into different width strips.

Step 2: Develop a Background
Using the glue stick, adhere your paper strips in a pleasing pattern onto your pages.
Choose one or two acrylic paints, (I chose a sand color lightened with white that blended in with the back of my dictionary page strips) Paint over the white gessoed blank background and blend in scrap paper strips.

Place the Thatched Texture Stencil over your painted papers and sponge sand-colored acrylic paint pounced through the pattern. (I love this stencil as it can be used vertically, horizontally, or on an angle for completely different effects and also stacked over top of itself to make a hatched pattern ;). This technique helps harmonize your collage paper strips with the background.

Step 3: Add Washi Tape and more Stenciling
Choose a few different Washi Tapes, masking tape can be substituted here. I always use a coat of clear gesso over the washi tape to let future mediums adhere better. Place the Quatrefoil 2 Stencil over the washi and pounce periwinkle paint through the stencil onto both pages.

Using the Thatched Texture Stencil a second time, spread molding paste through the pattern with a silicone brush, gift card, or palette knife, and let dry. 

Step 4: Final Layers with Stenciling Two Ways
Infusions or Magicals are small jars of pigments that can be sprinkled onto the page then spritzed with water so the colors magically appear. This technique was used over the dried molding paste Thatched Pattern. (It can be fun to tilt the pages this way or that for the colors to move around and you can also blot back the color if you don’t want it so vibrant)

Next, spread Sand Chalk Paste (or Molding Paste tinted Sand) through the Blossoms Stencil onto the discarded book pages and cut out when dried.

Using the same Blossoms Stencil, trace the pattern onto some plain fabric and use embroidery floss to stitch over the design. Glue the threads on the backside and when dry cut out your Blossoms. (This pattern embroidered on a pair of jeans would be fun!)

Step 5: Apply Blossoms and Final details

Glue your paper Blossoms down with a glue stick and glue your embroidered blossoms down with a thicker glue-like gel paste or fabric glue. Hand paint some details on your blossoms with watercolors and a white gel pen. I next cut out and adhered my quote, “Hope is a thing with Blossoms” and framed it with the Flourish Border Stencil by sponging clear embossing powder through the stencil and heat setting white embossing powder. Add some stamping with brown ink in a few spots and use the same brown ink around the edges of both journal pages. Finish by heat setting some Baked Texture Powder smudged onto a few areas over clear embossing ink and you’ve completed the first entry in your altered book! 

Happy Journaling!

Tracy Hickman
@anonymous.palette 

Do you create Mixed Media and papercrafts with Stencil1?
Please share with us on social @Stencil1 and #stencil1 


Materials Needed

Process
First I measured out the center of my mat and worked the placement of my lettering around that.

I kept it very straightforward, centering the words about 8 and 1/2 inches in from the edge of the mat. Then I taped down my letters going all the way off the mat and securing the tape to the table, as it would not really stick to the doormat.


Once I was satisfied with the placement of the letters, I then used a large 1-inch stencil brush to tap into the paint. The first application was with a very dry brush, then I went in a little heavier with the second and third coats.


For this project, you really have to give it a heavier hand in order to get into the mat fibers so you get a uniform look. For the border, I used the leopard print stencil.


I used more paint on the brush at the edges and a drier brush towards the center to give it a faded look as the pattern gets closer to the lettering. After it dries, you can spray it with a layer of clear shellac for extra durability.

Happy Crafting!
~ Teri @tjaneiro2 on Instagram


Do you create Mixed Media and Home Decor Updates with Stencil1?
Please share with us on social @Stencil1 and #stencil1 


This Was Such a Great Find! By luck, we came across an abandoned wooden octopus! We weren’t sure what to do with him since he was so large. Black paint with gold accents sounded perfect though.

Materials Needed:

This is very small and simple project. Here is the process.

Step 1: Washing The Octopus. We used a hard bristle brush and soap to wash the octopus. Some of the blue paint came off but no worries, we can cover this up later.

Step 2: Let it dry out, Use Black paint or black Gesso to cover up the octopus

Step 4: Using the Octopus Stencil and some tape, I placed it down in the head of the octopus. I went in with Gold acrylic paint and felt like it wasn’t enough. I wanted to give the golden octopus a little bit of depth so I started to mix the gold with Gel Matte Medium.

Step 5: Just go ahead and layer the paint and medium with the stencil. Allow it to try between each application.

Step 6: Now Add the Chevron pattern to most of the tentacles, leaving a lot of black space to balance the composition.


Step 7: Go back and clean any rough edges with a flat shader brush in the size extra small. And You’re Done!

Art is a Love Language
~ Yuli, Stencil1 Team Member

Do you create Mixed Media and papercrafts with Stencil1?
Please share with us on social @Stencil1 and #stencil1 


Something simple to inspire everyone for the much-needed sun and warmth. Just grab any white hat, or buy a hat with a pattern for fun!


Materials Needed:


Step 1: Pick Your Hat! This hat was found in a dollar store. The hat, although beautiful, felt like it was missing a symbol or emblem in the front. Using the Butterfly Stencil, and Pearlescent medium mixed with Titanium White, Silver fabric paint, and purple pearlescent fabric paint were used on three of the butterflies.


Step 2: Duct Tape Held the Stencil down on the dome part of the hat. This part is tricky but doable! Just be careful.


Step 3: Stipple Away! When using light colors in paint, make sure to use various brushes to save time. No color mixing, or waiting for the brush to dry between different hues.


Step 4: Now use the journal Icons Stencil for the smaller butterflies

And Done!

Happy Customizing!
Yuli Stencil1 Team Member

Do you create Mixed Media and papercrafts with Stencil1?
Please share with us on social @Stencil1 and #stencil1 


Beginner Art Journaling in 5 Easy Steps…

Materials Needed:

Step #1 Washi Layer: Place several washi tapes down in a pleasing pattern across your pages. Add glue stick under the tape for permanence and a layer of clear gesso over top.

Step #2 Collage and Stamping: Using an old ledger page (or any collage paper you may have on hand) trace the Triangles 2 Aligned Stencil with a pencil and cut out triangles.

Step #2 Continued: Place triangles down in a pattern of your choosing, I overlapped mine. Glue down with a glue stick and cover in clear gesso. Add some stamping in red ink through the small triangle stencil in the Patterns 8 Pack Stencil to marry all the elements. I also added brown ink to a chain-link rubber stamp in a few areas and teal ink with a numbers stamp.

Step #3 Stencils: Place the Antlers Small Stencil down over the collage elements and hold in place with washi tape. Using a palette knife or gift card, spread crackle paste through one antler at a time when dry. Let crackles appear without heat setting for the best effect. 😉

Step #4 Spray Inks: Color the Antlers with your favorite spray ink, I spritzed water over the crackle paste and used the applicator out of the bottle to touch around edges. (you could also substitute watercolors or water-soluble crayons or watered-down acrylic paint here if you don’t have spray inks. Build up with a few colors after heat setting.

Step #5 Focal Point and Edges: Select 1 or 2 photos to place as a focal point, ink edges so they stand out, and glue down. I typed the phrase “pulled in too many directions” and affixed it with small metal Brads through both pages. The final detail consisted of edging the outside of all the pages with brown ink and smudging some clear embossing ink in a few spots around the edges. Heat set red baked texture powder for some edging drama.

Here Are The Details!

Happy Journaling,
Tracy
@anonymous.palette

Do you create Mixed Media and papercrafts with Stencil1?
Please share with us on social @Stencil1 and #stencil1