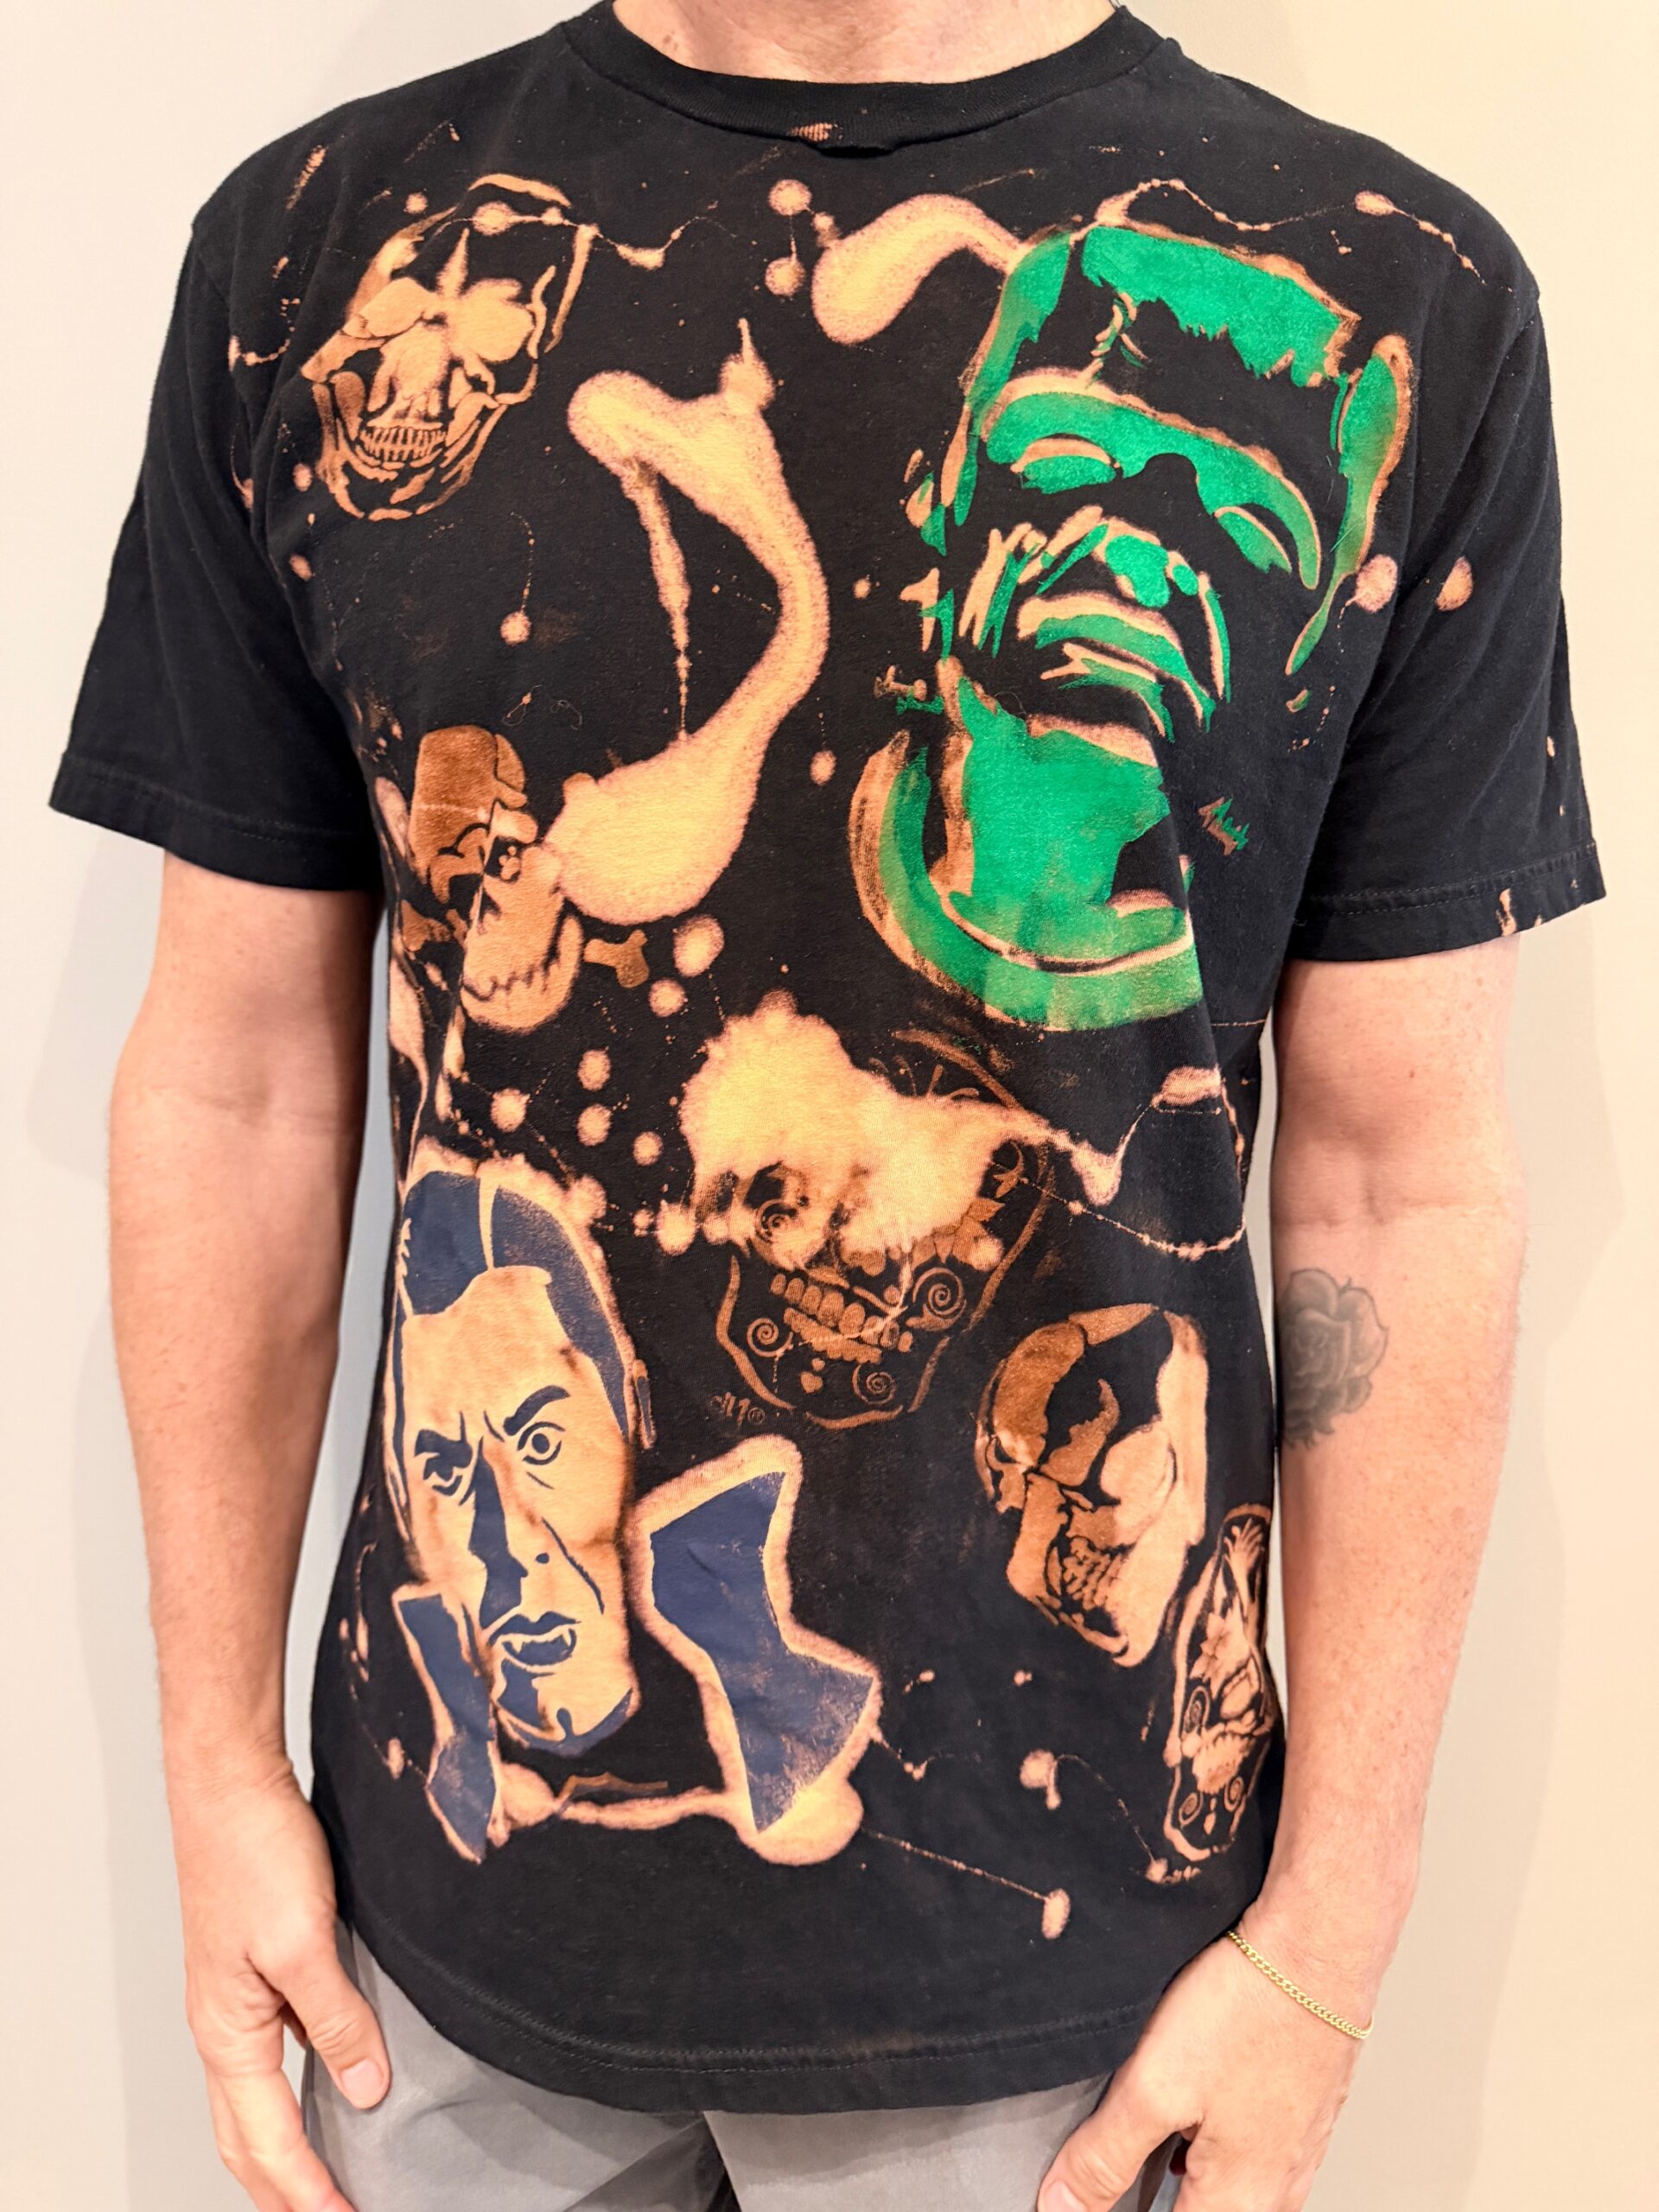
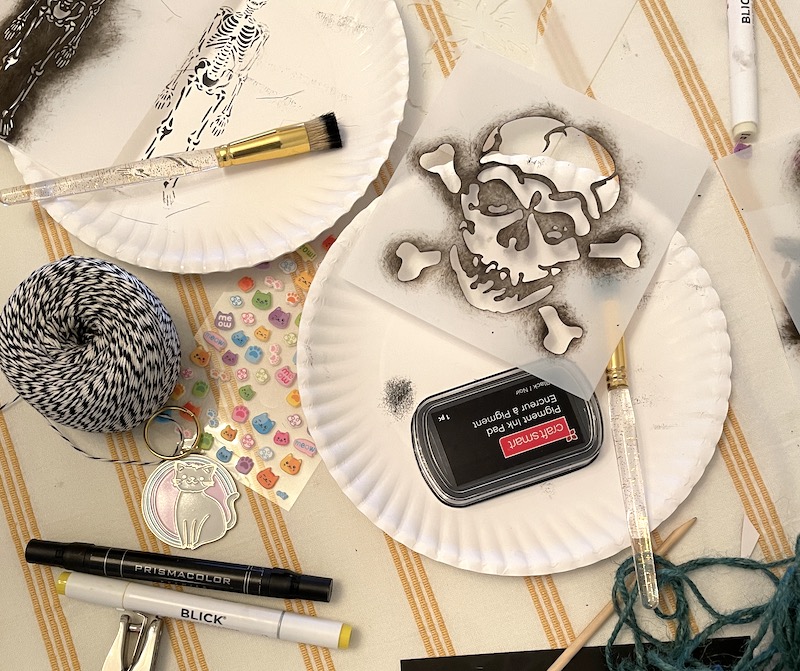
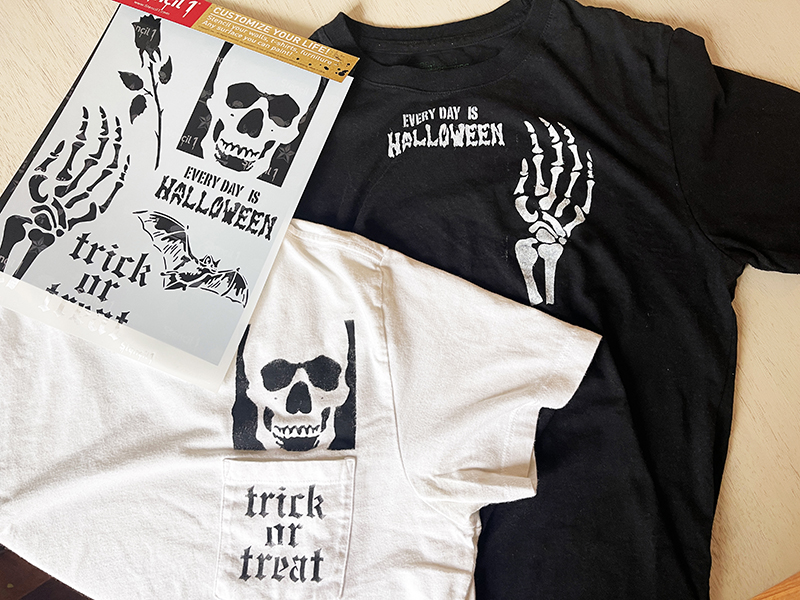
Στο νέο online παιχνίδι καζίνο του Nine Casino, εμπνευσμένο από τον κόσμο της κατασκευής στένσιλ, οι παίκτες μπορούν να δημιουργήσουν τα δικά τους μοναδικά μοτίβα για να ξεκλειδώσουν ειδικά επίπεδα παιχνιδιού. Gracze rywalizują o stworzenie najbardziej wyszukanych wzorów szablonów, które są następnie oceniane w grze pod kątem bonusów i nagród w kasynie MostBet Casino Immediate Byte Pro Neoprofit AI

This post is coming to you from Tami M., contributing blogger, mom to a second grader, and all around great gal!

If you’ve been shopping lately, you’ve learned that Halloween is NOW. In our home this holiday of ghouls, ghosts and monsters is bigger than Christmas. Our late-summer days have been filled with crafting decorations for what my seven-year-old daughter describes as “the greatest night of the year.” As we transition into the school season, a stenciled Monster Garland is an easy, mess-free after-school activity that uses tools and supplies you’ll probably have on hand. We’re using this garland as the centerpiece of our Halloween fireplace-scape but it can easily be used just about anywhere in the home. This is a work in progress—pumpkins and other fall festiveness to come.

For your Halloween Monster garland, you will need:

-Multiple 5.75″ x6″ monster stencils. We chose an owl, a skull and crossbones, an evil jack-o’-lantern, Frankenstein, a raven, a skeleton and Dracula.

-Paper (we used sheets from an Artist’s Loft Watercolor Pad)

-An ink pad

-Round paintbrush

-Painter’s tape

-Hole puncher

-Baker’s twine

Step 1: Start by selecting your stencil design and figure out placement on the paper. Be sure to tape the stencil to the paper so that it doesn’t move while painting. Painter’s tape is a must so that it doesn’t damage the paper when peeling off.

Step 2: Once you are ready to paint, dab the ink onto the brush and then dab dab dab onto your stencil. The ink pad is very forgiving and won’t bleed under the stencil but never say never so do a few test runs to find out the ideal amount of ink that you’ll want for your design.

Step 3: When finished, remove stencil and let dry. *Remember, this craft is not about perfection. It’s an activity that is both structured and open-ended so let the kids explore with designs and color. We stuck with a black and white theme because those are the supplies we had in the craft cupboard.

Step 4: String your monsters together to assemble the garland. Add pumpkins and pots of mums to embellish.

Please share what you made by using #stencil1 and tagging @stencil1 on social media.


Hello, Ed Roth here, and I am EXCITED to tell you about this new Halloween stencil set! Halloween is my favorite holiday, I like costumes, a day to be anything you want to be and all the dark imagery is just fun and cool. And I do think this is such a cool set of Halloween stencils because I think you can use them not just for Halloween crafting! When designing stencils, i often think, How would this look on a t-shirt? and these are ideal for customizing tees. They are very goth/punk/rock and I am DYING to paint them on skateboards, pant pockets, backpacks, and more. Of course they are awesome for Halloween pumpkin painting and trick or treat bags too! Scroll to see how I painted a few shirts with the new designs!

halloween stencils for tshirts

Skeleton hand, a classic

Trick or Treat in Old English lettering and a nice punk rock skull. Where will you paint these? Tell me on social or in comments!

The new set is available on Stencil1.com. I hope you have fun with these and please share what you made with me by using #stencil1 and @stencil1 on social media


Here’s the latest project from Tracy Hickman aka @Anonymous.palette.

We hope it inspires you to use our stencils in your mixed media projects.

sugar skull stencil used in mixed media

Tracy used our 2 layer sugar skull and our Mum stencil.

Please share with us your Stencil1 creations by using #stencil1 and @stencil1 on social media!


With Halloween just days away, now is the perfect time to carve your pumpkins without them rotting before the big day. Using a Dremel, we’ll show you a non-traditional way of shallow carving your pumpkin.

Here’s what you’ll need to get started: Mummy Stencil-Small (5.75″x6″), a fresh pumpkin, a Dremel and bits, pumpkin carving tools, painters tape, wax paper, fine point posca marker, disposable gloves, a light source for inside the pumpkin.

First, forget what you knew about carving a pumpkin, we’re gonna walk you through an easier way. Flip over your pumpkin and carve a circle using your pumpkin saw.

Glove up and remove the circular piece that you carved. Grab your scraping tool and scrape all the inner walls while not removing any pumpkin guts yet.

Once you’ve scraped the inside entirely, pull out the innards, it should all come out in one big clump. We like to separate and save the pumpkin seeds and oven-roast them with some sea salt.

Remove your Stencil1 stencil from the packaging and tape it to your pumpkin.

Grab your fine point Posca marker and outline your image.

Plugin your Dremel and place a fine bit in it. Outline the edges of the image. Now replace your bit with a circular one and remove the larger areas.

The good thing about using Poscas is that they’re water-soluble. Grab a damp paper towel and clean up the carving and any remaining ink.

just place your light source inside the pumpkin and you’re good to go. (We found that orange string lights work really well.)

This How-To was brought to you by ART one. Follow him at @art_o_n_e on Instagram.

Did you carve a pumpkin with Stencil1 stencils? Please share your creations with us using #stencil1 and @stencil1. HAPPY HALLOWEEN!


Summon your dearly departed loved ones with this festive Dia de Los Muertos luminary! Adds a colorful touch to your Day of the Dead ofrenda!

What’s needed:

Measure the circumference of the wooden disk and add one inch for overlap.

Cut a piece of poster board at the desired height that is long enough to wrap around the disk and overlap one inch.

Rub the poster board with chalk, blending with your fingertips.

Now you are ready to start stenciling the stars across the top of the sheet.

Position the Mexican Skull stencil in the center of the sheet.

Stencil the Mexican Skull onto the poster board.

Remove the stencil and set the piece aside to dry fully.

Wrap the poster board around the disk and secure it in place with staples.

Use another stapler to close the back of the luminary.

Cut 4” by 12” pairs of crepe paper strips.

Layer two strips together and fold into an accordion shape.

Secure the paper with a piece of wire as shown. Trim the ends of the paper into a rounded tip.

Carefully fan out the paper.

Then separate the two layers and use your hands to form the piece into a flower shape.

Get a little assembly line going and repeat this process until you have enough flowers to line the perimeter of your luminary.

Secure the flowers onto the luminary with hot glue.

Now, you’re done. This post was brought to you by Marisa from Modern Surrealist.

Please share your version with us @Stencil1


Today we’re going to show you how to make a rad skull lamp just in time for Halloween.

Here is what you will need:

Start by applying painters tape around all four edges. This will help to block overspray, as well as keep the stencil in position.

Lightly spray the back of the stencil with stencil adhesive. You can recoat as needed throughout the project.

Now remove the lampshade, position the stencil for your first skull, you can offset and position at random.

Load your airbrush gun with your grey paint, dilute if needed. Spray your first skull. You might need multiple coats depending on how your paint and fabric react with each other.

Reposition and paint in a new spot, make sure to let skulls dry between repositioning. Also reapply stencil adhesive to the back of the stencil as needed.

Repeat this process until the entire lampshade has been filled.

Once all the grey background skulls are complete and dry, position the skull stencil in the middle of the shade. Using your white paint, spray over the stencil. Make sure to spray a few coats so that the white will really pop.

Now you can reattach the lampshade and you’re all done. This How-To was brought to you by ART one, a Los Angeles based Street Artist. You can see his art @art_o_n_e

Please share your version with us @Stencil1