With the weather getting colder and allergy season seeming to hang around, tissue box use is in full effect. With this tutorial, we’ll show you how to blend those cardboard boxes into your seasonal decor.
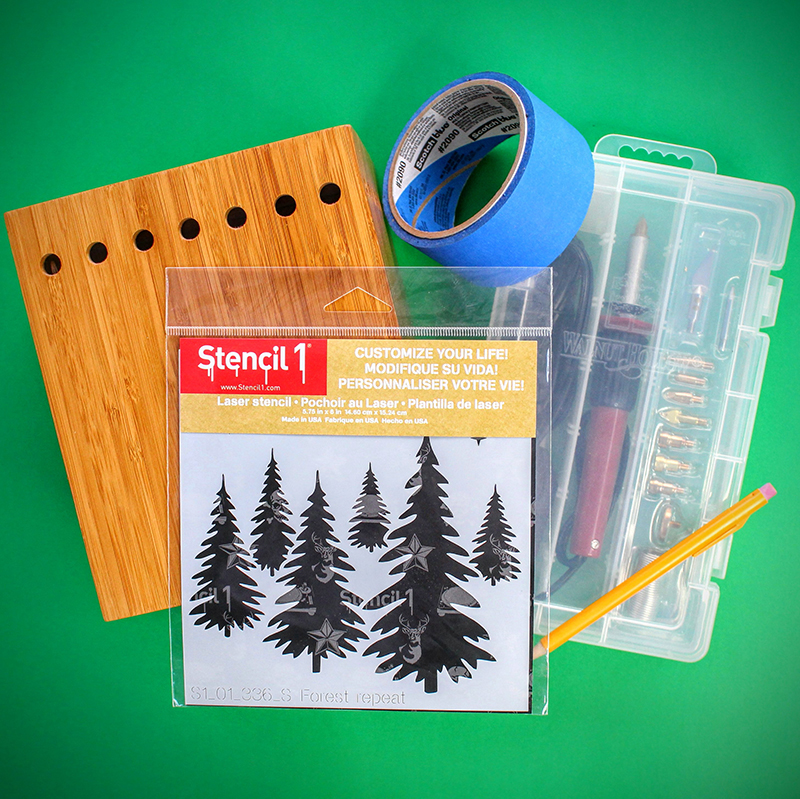
Here is what you will need:
- Solid/real wood tissue box cover
- Stencil1 “Evergreen Forest Stencil – Small”
- Woodburning tool kit
- Mechanical Pencil
- Painters Tape
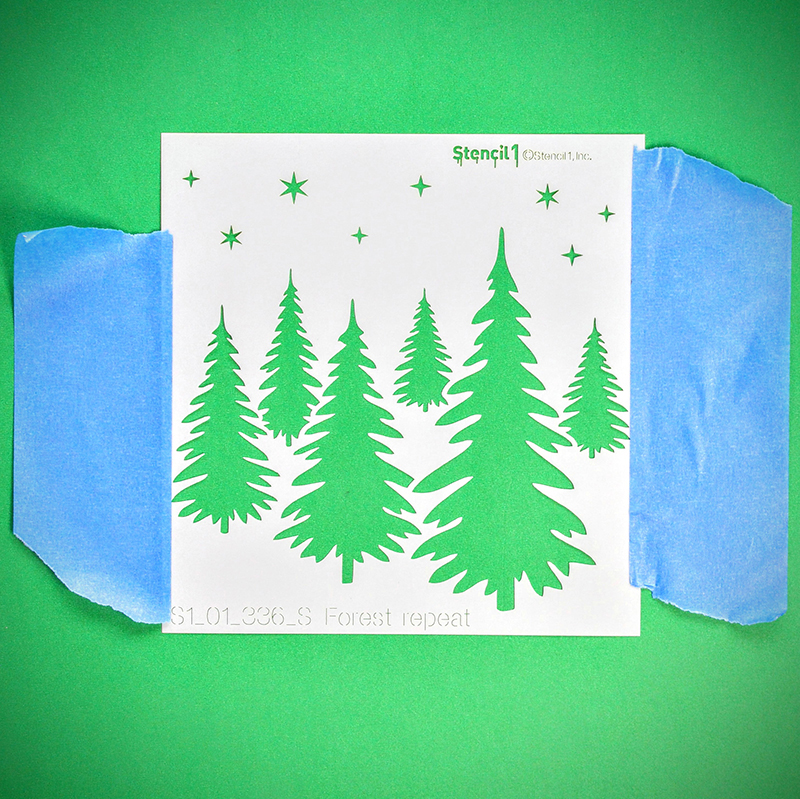
Begin by removing your Stencil1 stencil from the packaging and applying a piece of painter’s tape to the left and right sides.
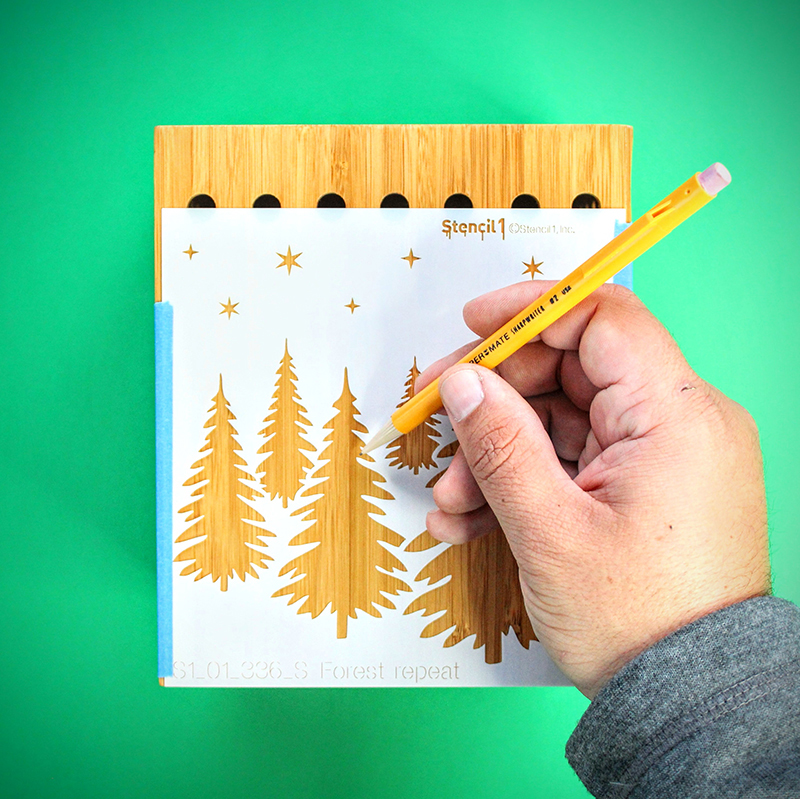
Position and attach the stencil and outline the trees and stars.
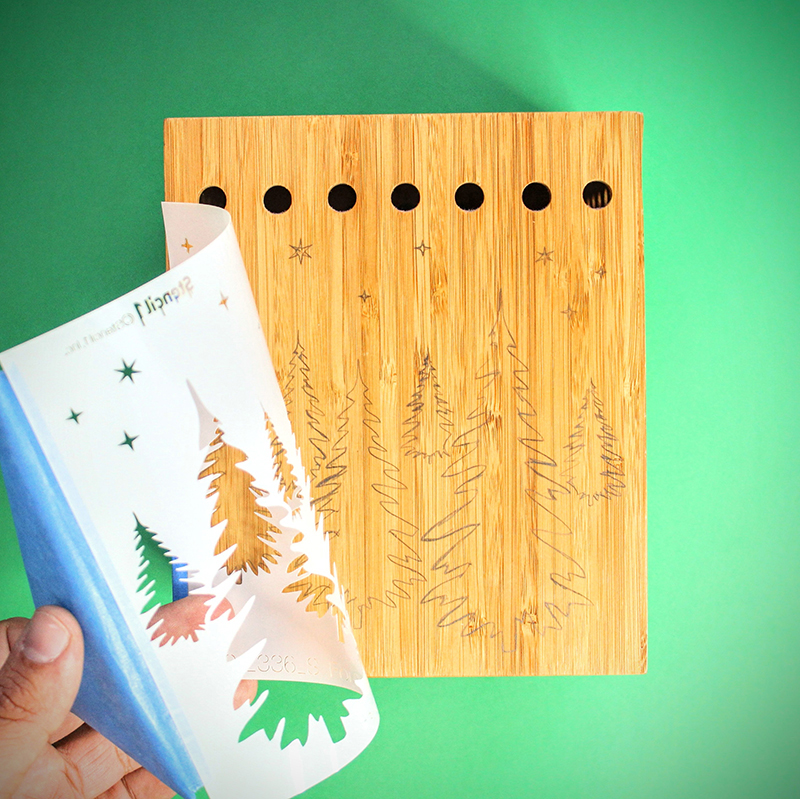
Once you’ve outlined the entire stencil, remove it from the box.
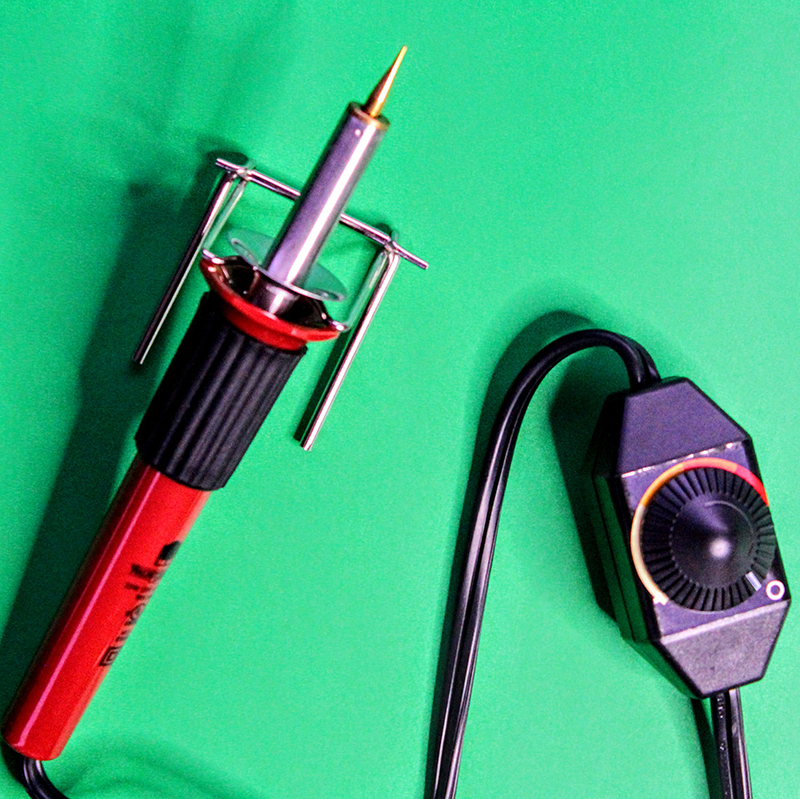
Attach the fine point bit and then plug in your woodburning tool and set it to the appropriate setting for the wood you are using. Make sure to place the tool on the stand if your kit came with one so you don’t risk it rolling and burning something.
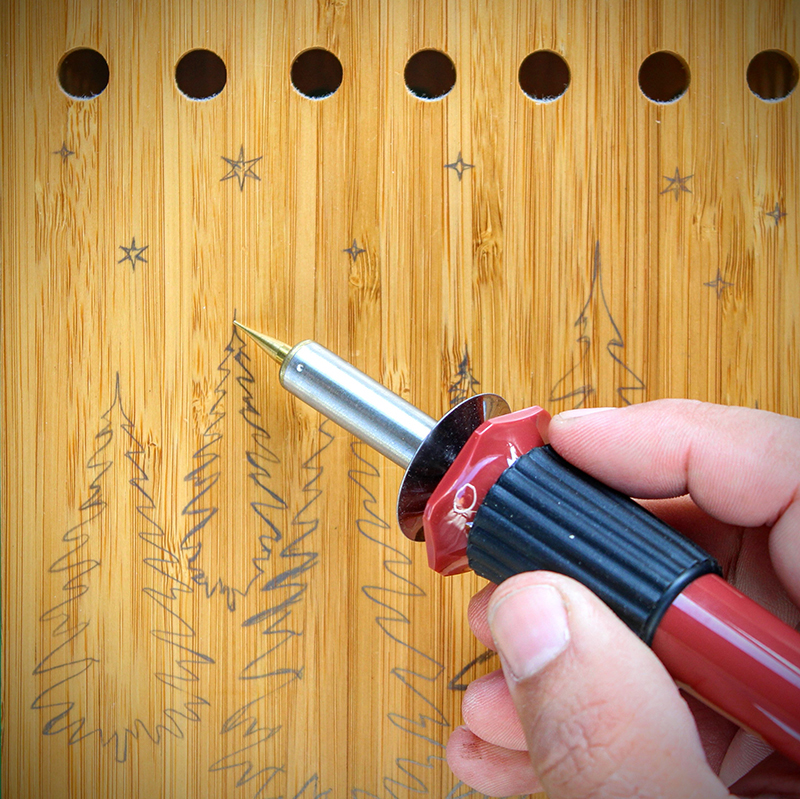
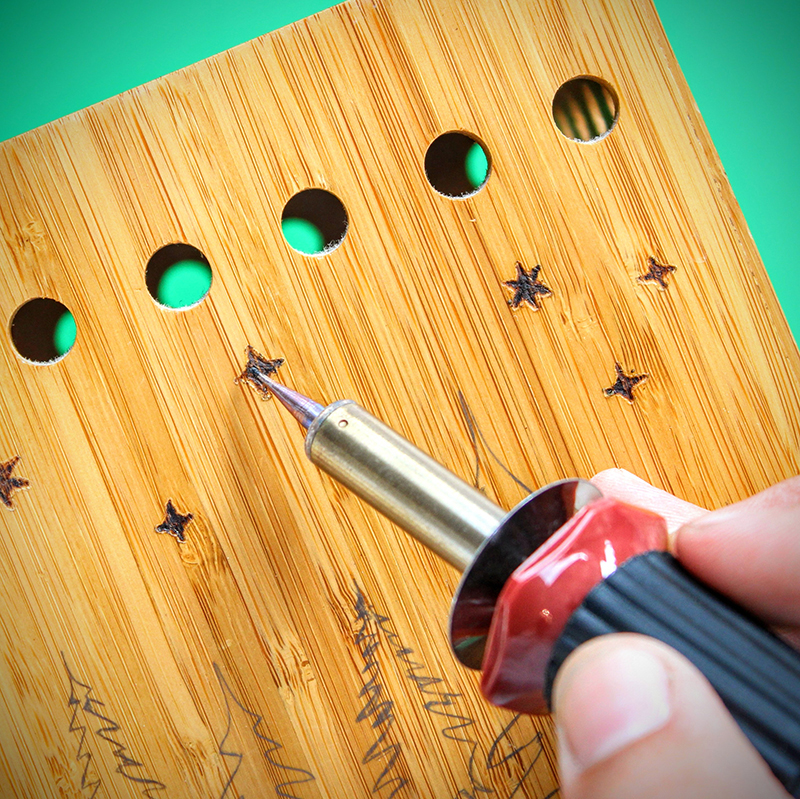
Once the tool is fully heated, begin tracing the pencil marks you laid down. You can also fill in the stars with the fine tip.
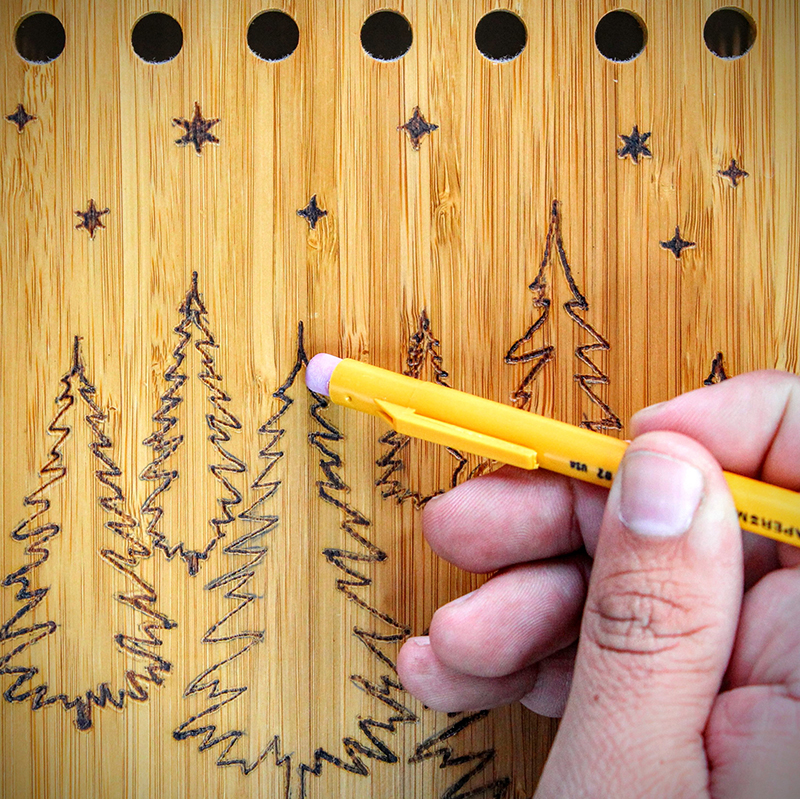
When you’re done outlining and the wood has cooled, you can grab your pencil and erase any remaining pencil marks that are visible.
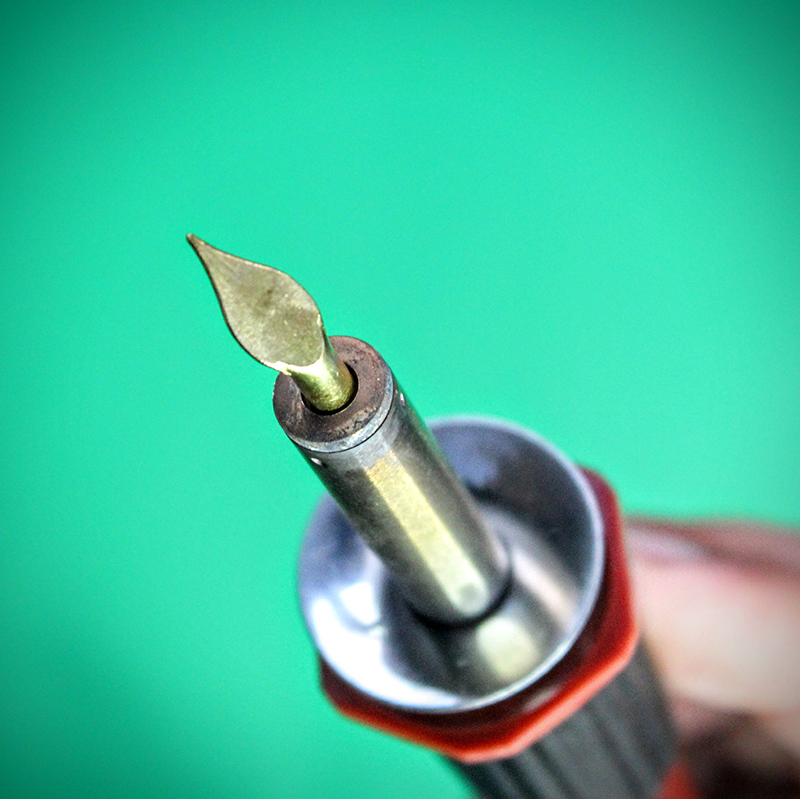
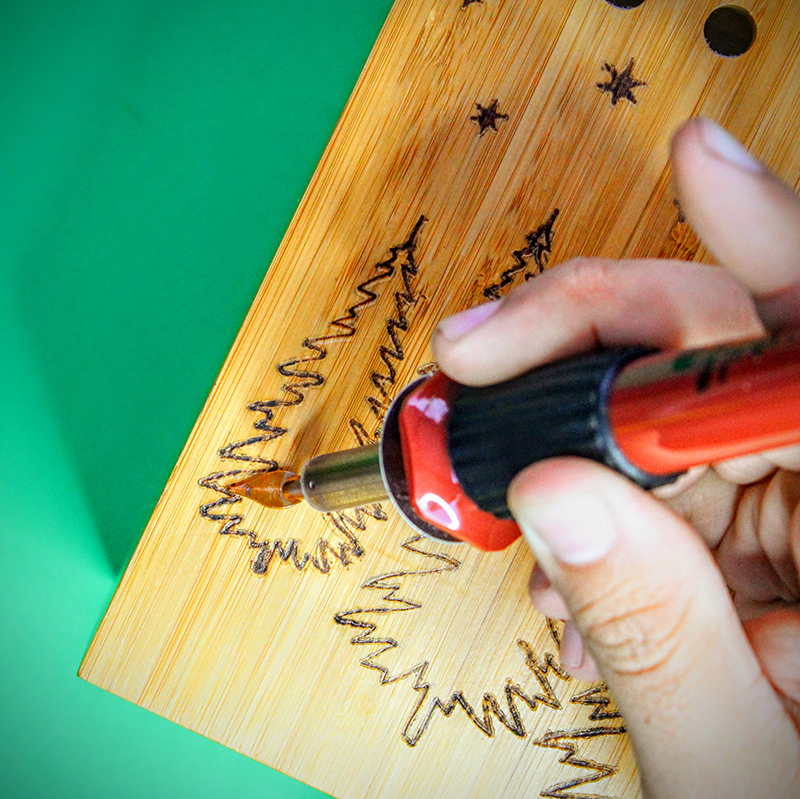
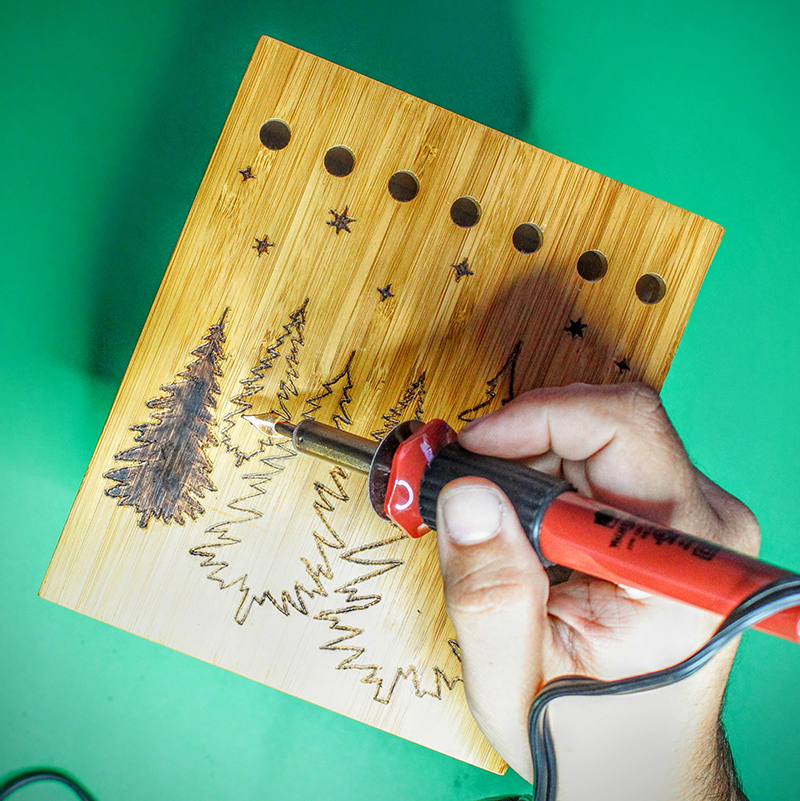
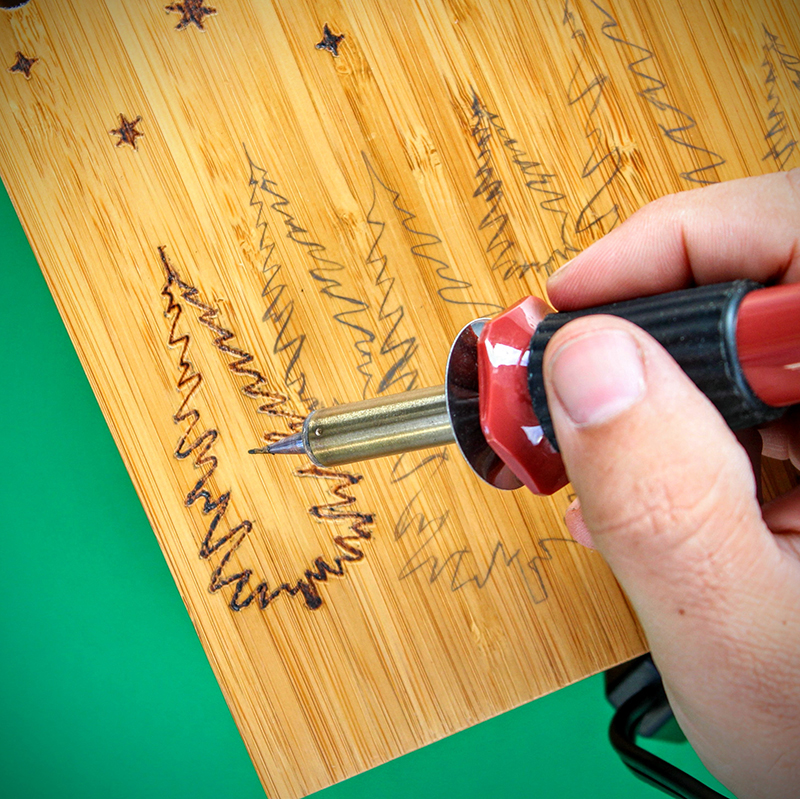
Change over to the leaf-shaped tip. (You might need to turn off the heat and let it cool.) when the new tip is on, you can fill in the trees.
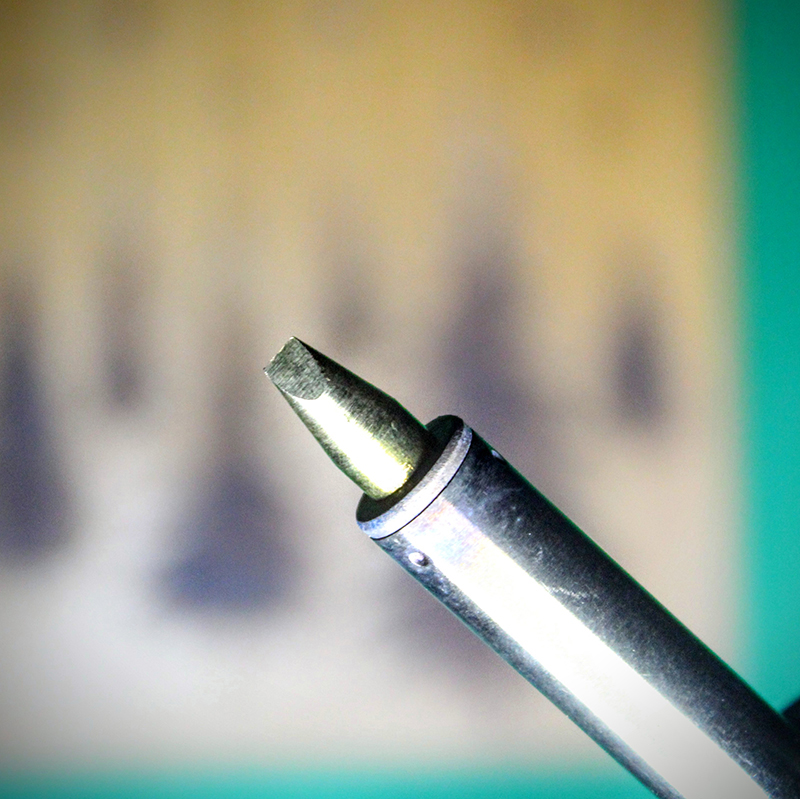
Last you will need to switch over to the flathead tip to fill in any detail that you were unable to with the last tip.
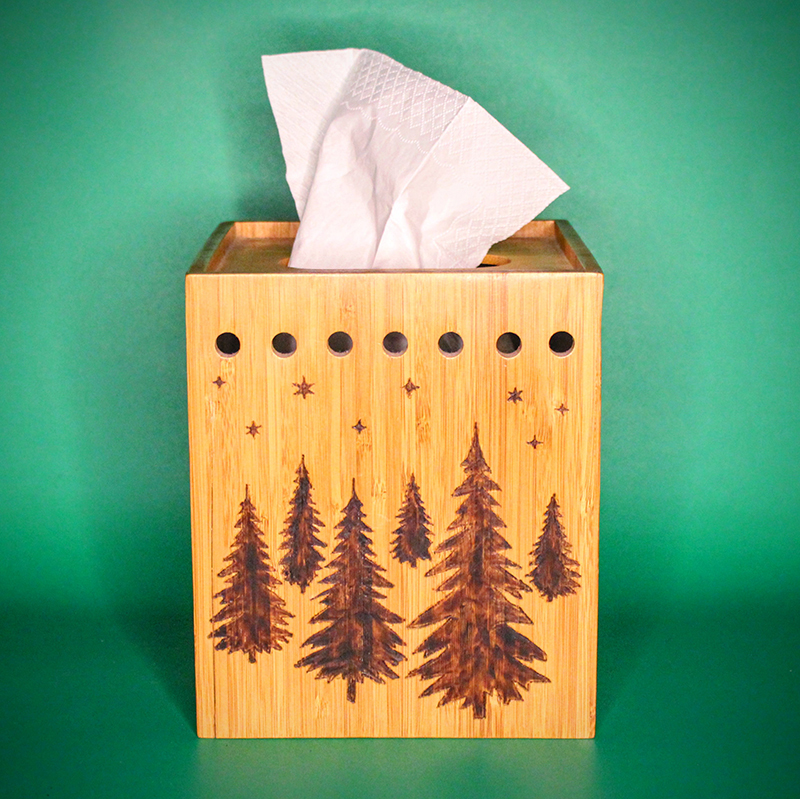
Now you’re all done and can slip your cover over a tissue box, and find a great place for this guy to live during the winter months.
This How-To was brought to you by ART one (@art_o_n_e)
Please share your version with us @Stencil1